
I had many problems to understand shaders, but after getting a grasp - it is so easy, convenient and powerful! I present to you my twisted version of understanding shaders, hoping it will help other aspiring devs 

This is my slow path from a total noob to a less-noob-ish shader programmer  It is meant for someone totally new, so don’t mind a plain style and many simplifications or depictions (not exactly totally true, because saying them totally true demands more explanations and those explanations demands more exaplanations and so on, and so on ) Later things will be clear for you and you will get to know easily how it is really working.
The post is full of useful links and you should check them all - additionally I am encouraging you to check out the whole awesome Defold documentation after reading this post. 
 Drawing a picture.
You use sprites to see a visual in your games. Defold uses (Nerd’s babble alert!  ) OpenGL (a framework to draw graphics) to draw your sprite to a screen. There is a special way of telling the graphics card how it should be drawn. There are two programs that runs for every pixel every frame before the final color of that particular pixel is displayed on the screen.
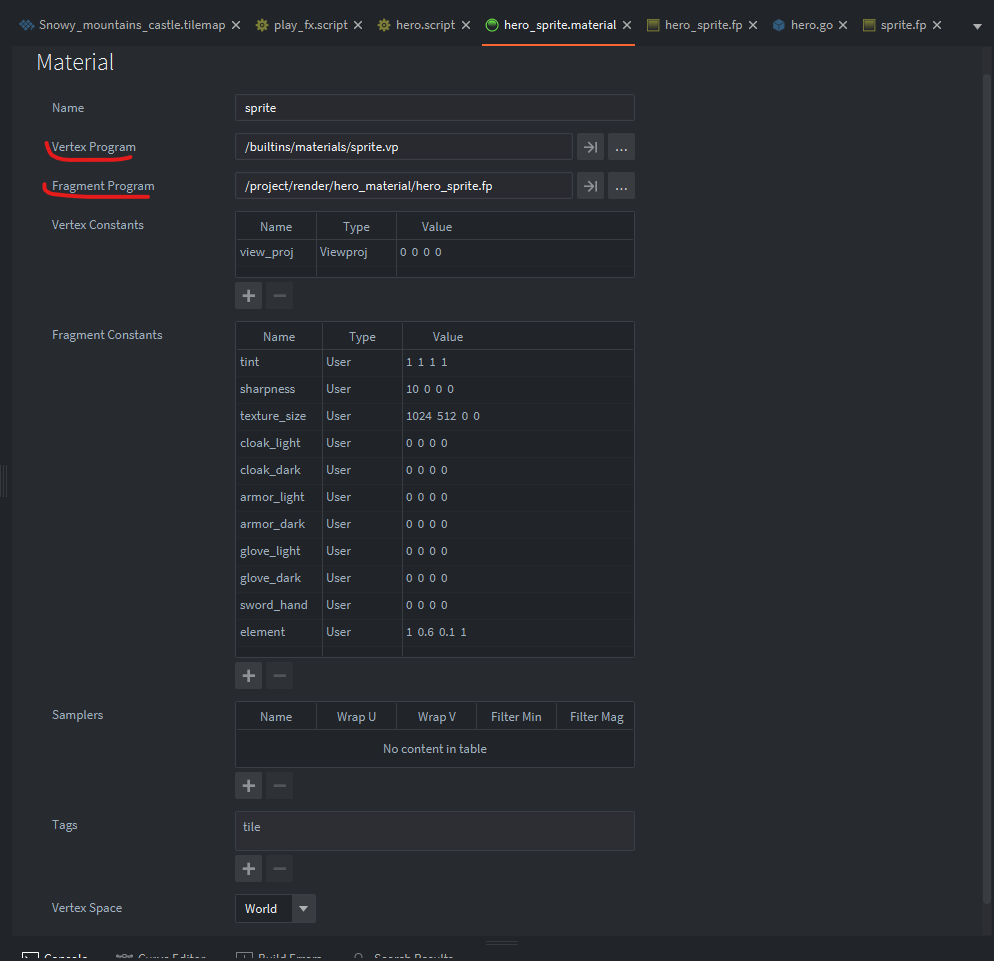
Those are (OMG more babble! ) vertex program and fragment program. There are joined together in something called a material.

 Materials to study
In Poland we say “How a horse looks like? Everybody see!” (a not-so-scientific explanation of Mr. Chmielowski in his New Athens (encyclopedia) )
Material is like it looks like - in our real world we have materials like silk  , wool
  or cotton
  . They have, let’s think, a texture and a colour! (pun intended, you will get it soon ). In computer’s world it specifies how a sprite/particle/mesh and other visual assets are rendered (displayed on a screen) to resemble something
  .
.
 Recipe for an image
This is a recipe (from here):
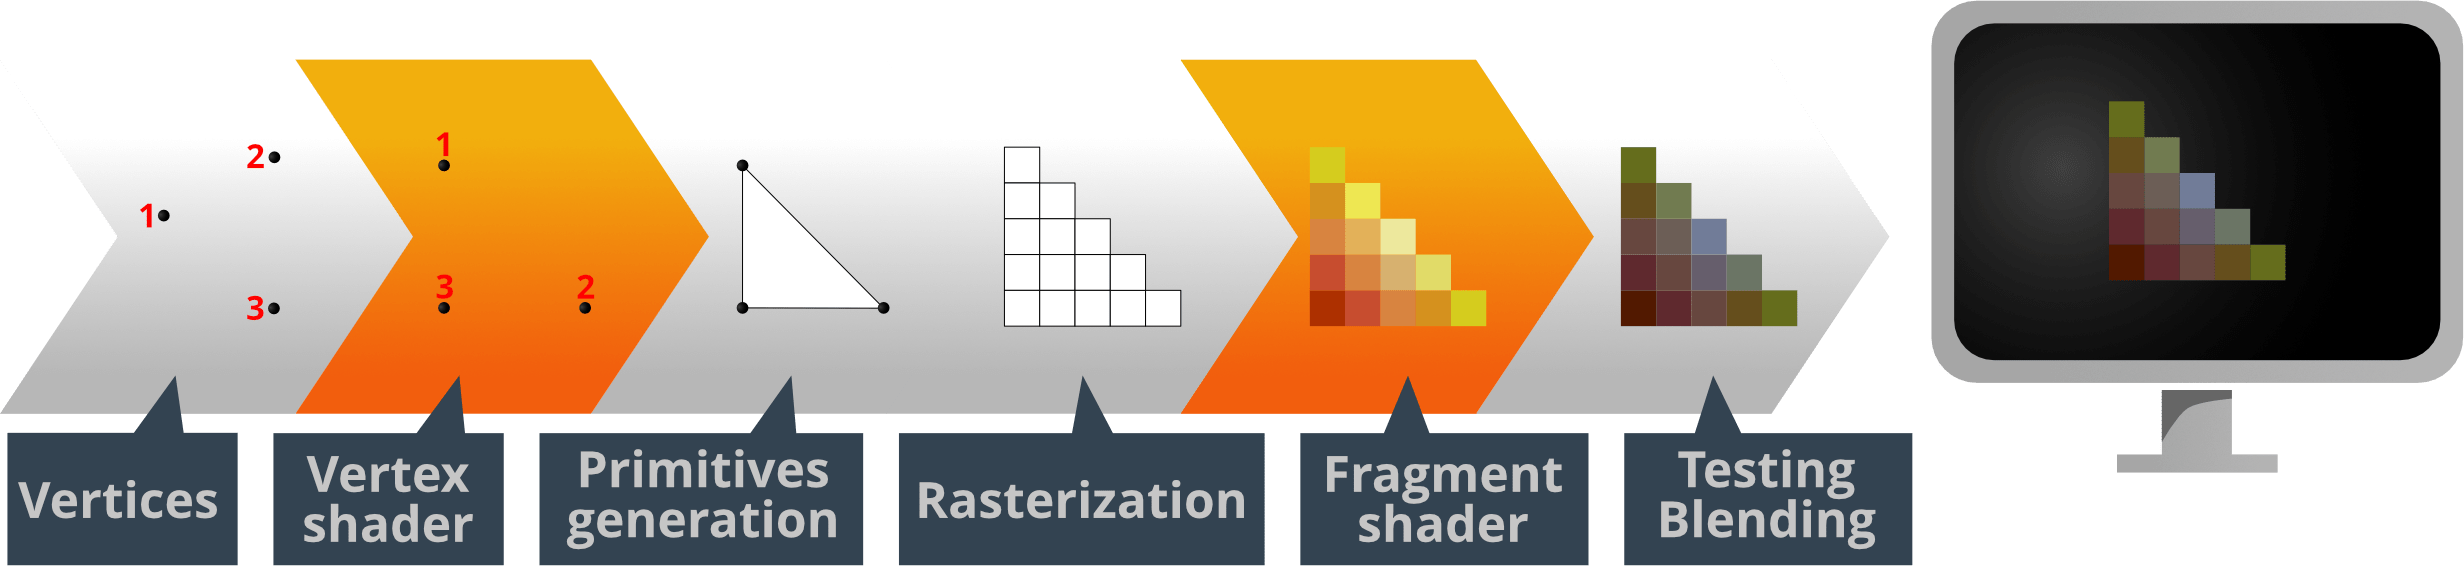
I will refer to it many times below:
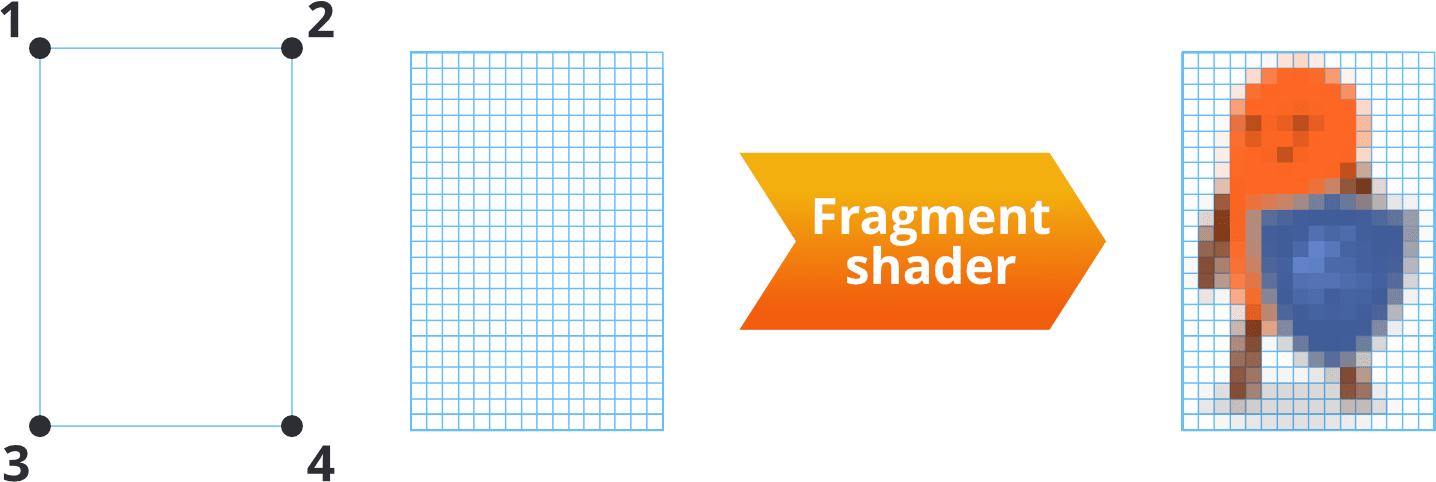
In a 3D engine (like Defold is) everything visual is a bunch of points (vertices). They are transformed from 3D space to a 2D screen space like a camera captures a 2D image of a real 3D world. From those points we can specify some basic geometrical shapes (primitives), imagine retro style 3D:
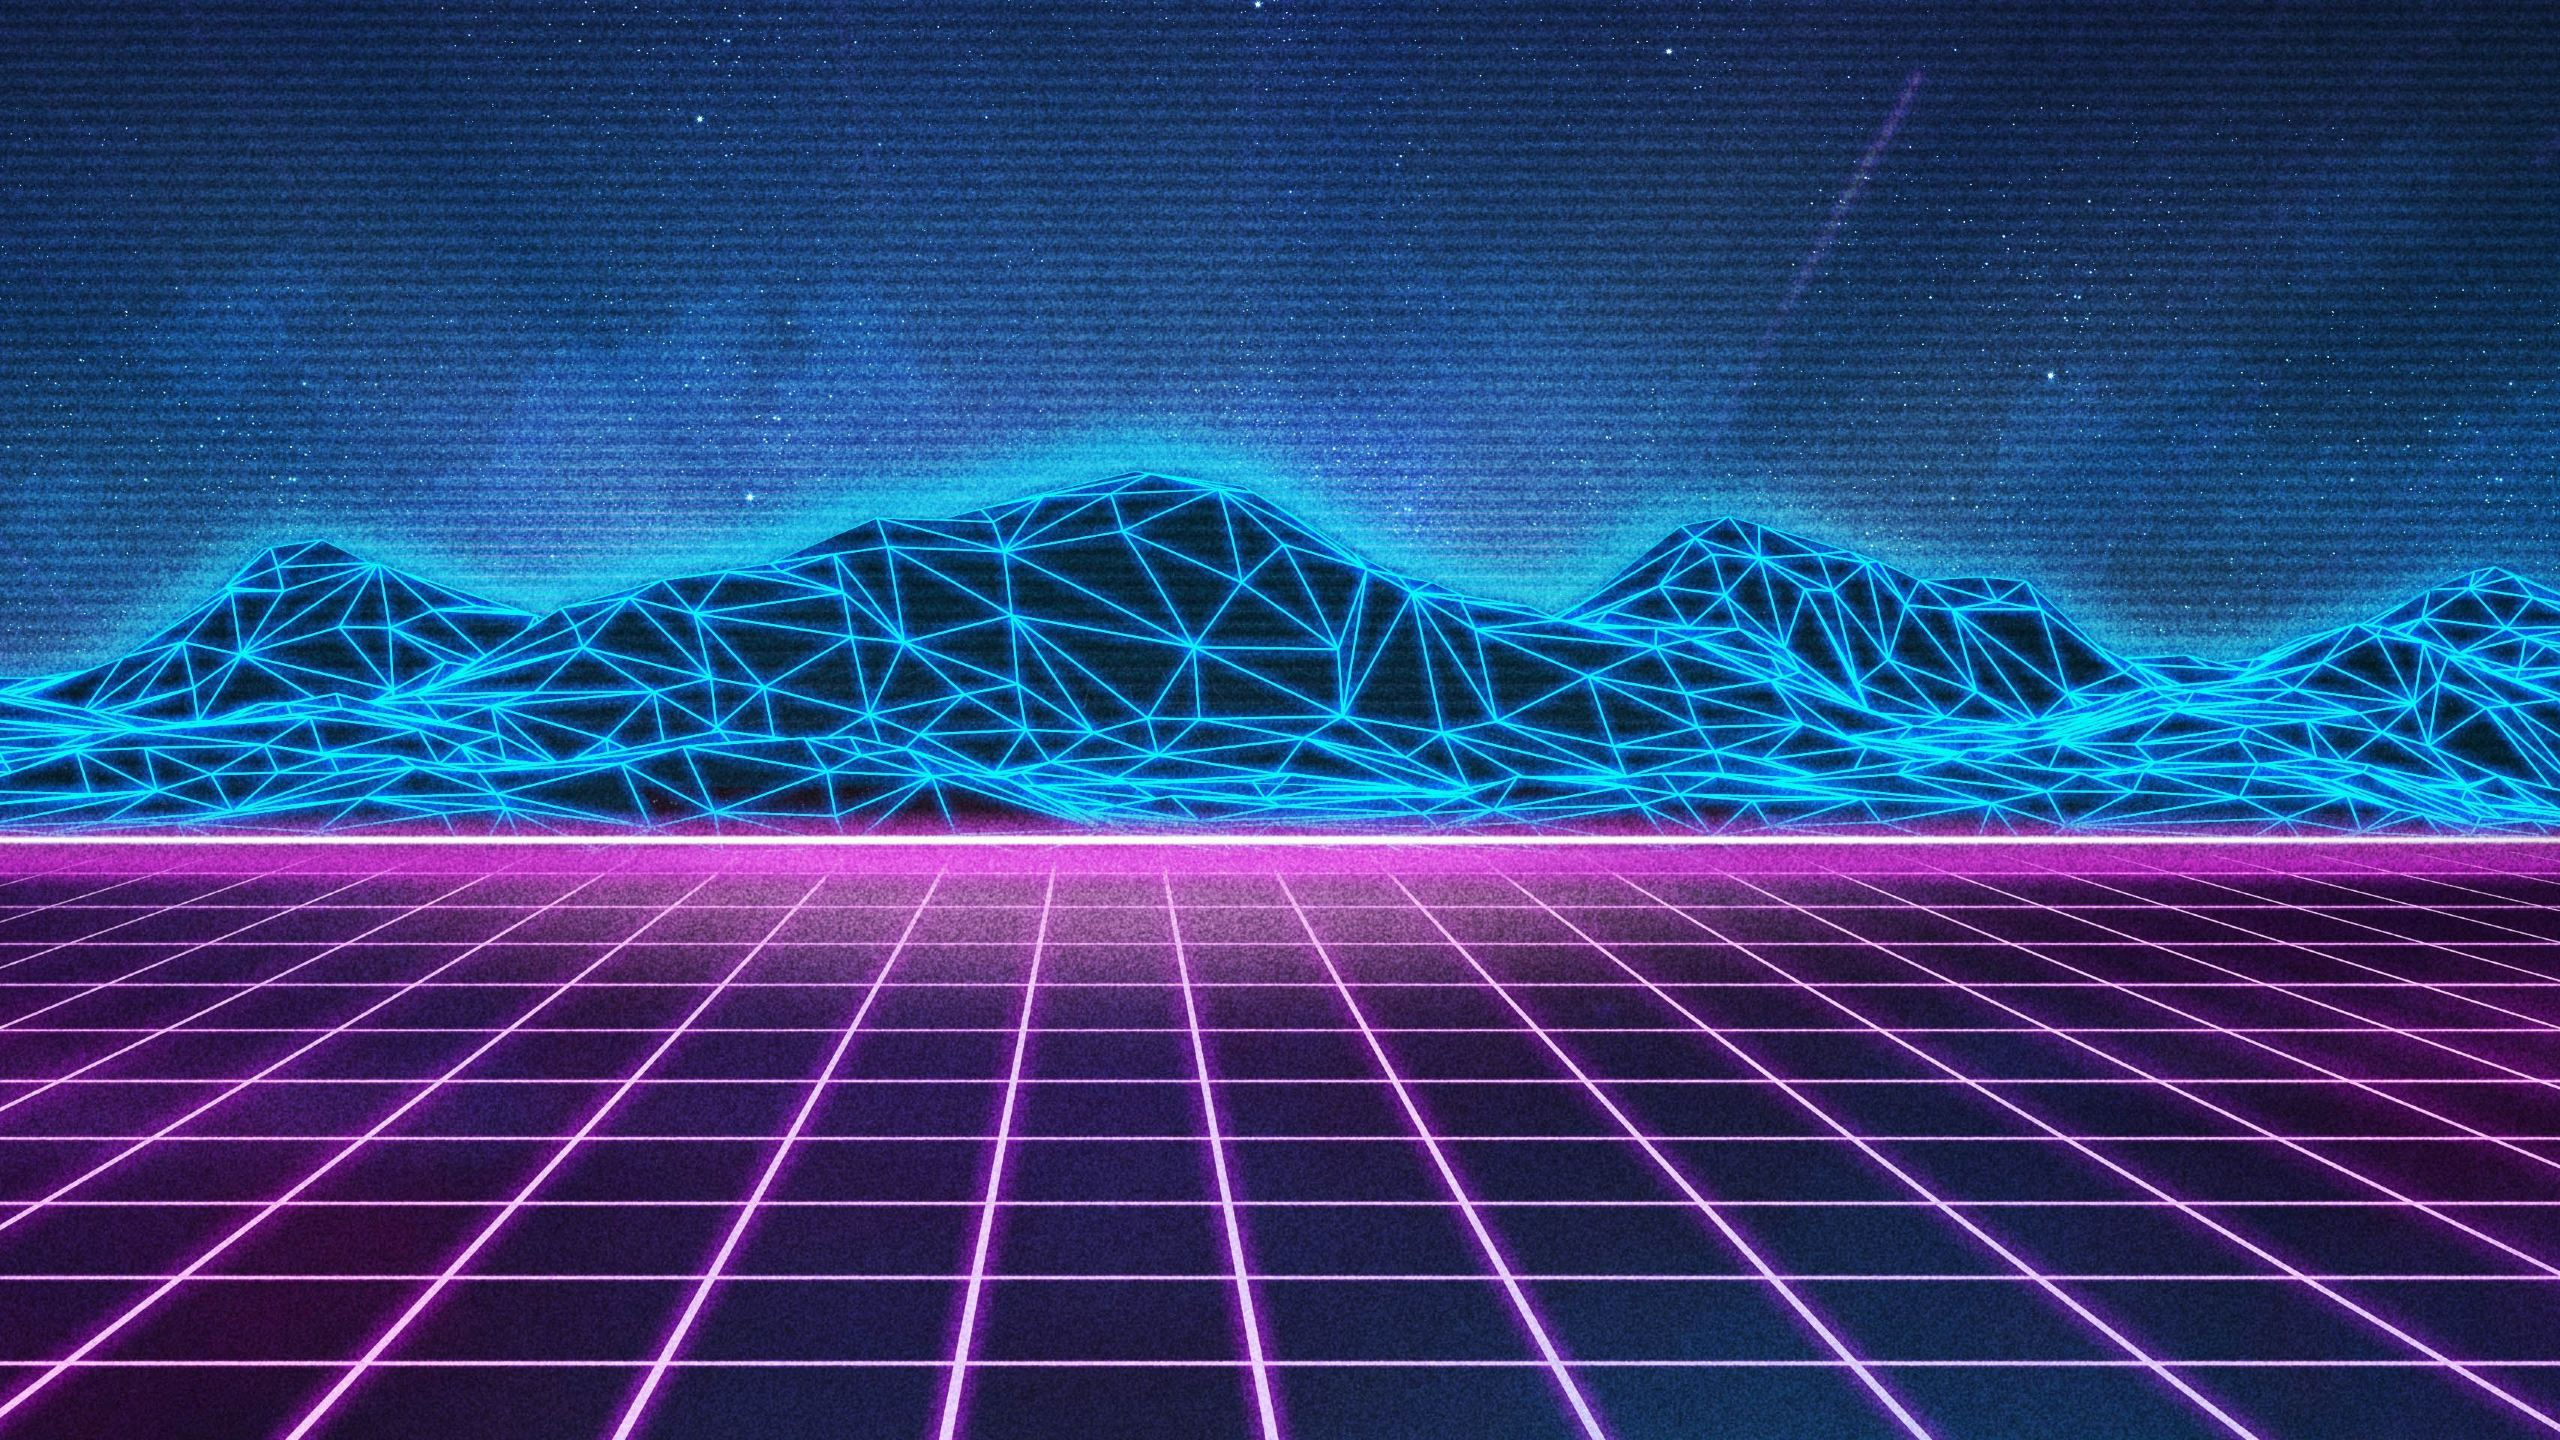
(source: https://wallpapersden.com/retro-wave-wallpaper/2560x1440/)
But a screen is consisting only of pixels, and each of them can glow in one of different colors for us, so we can see a picture in whole. So we are taking picture of primitives we have (continuous geometry) and chop it into a handful of small pieces  (aka rasterize it into fragments). Then, we have an interpolated colour of a fragment (and we can modify it), so we can finally light that one diode in our newest OLED monitor. And another diode. And another…
 Vertex program
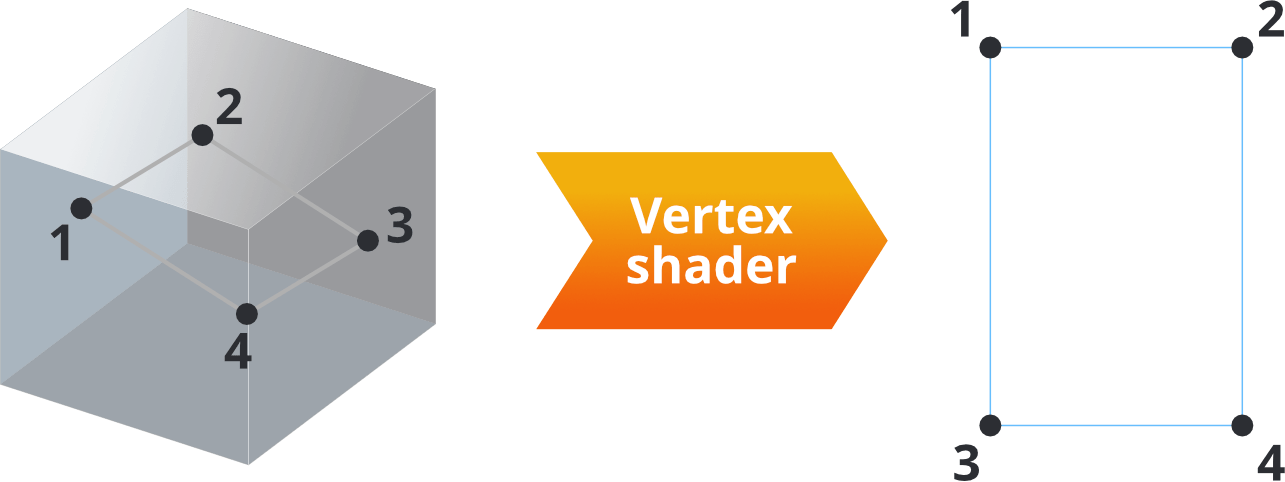
It takes care of the first part of that process - calculating position of vertices (aka points in a 3D space that specify the geometry) from 3D space to a 2D screen space - so it somehow answers a question - where to draw. But let’s leave it for now - it demands some further explanations about cameras, projections and so on and you will need it mainly for 3D games. For now we are taking into account sprites in 2D games and sprite’s geometry is simple as it is - a rectangle (you will see it too). We’ll use a default vertex program.
 Fragment program
It simply defines what color should have each fragment (pixel). It’s used in the last stage of the process of preparation of your image to be displayed on the screen. So it somehow answers a question what to draw. That’s it, can’t say here anything more useful or wiser  , but I want that definition to be a little bit longer so it looks professional
After reading above and getting a grasp of what it is, you should read about those programs in manuals for a deeper understanding.
 Excersises
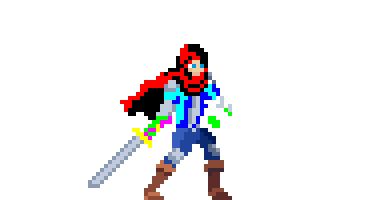
You must try something in order to stop being afraid of that thing. You must face that monster before it hits you. But when it hits you, you will probably blink in white (games are teaching!)
(https://sventhole.itch.io/blademaster)
We will make that effect in shaders, but normally it will be more efficient to just tell your graphic designer (or yourself) to merely draw that one frame in white, ok? Although such exercise will teach you:
- getting data from a texture
- changing color of pixels
- sending data to a shader
 Let’s start!
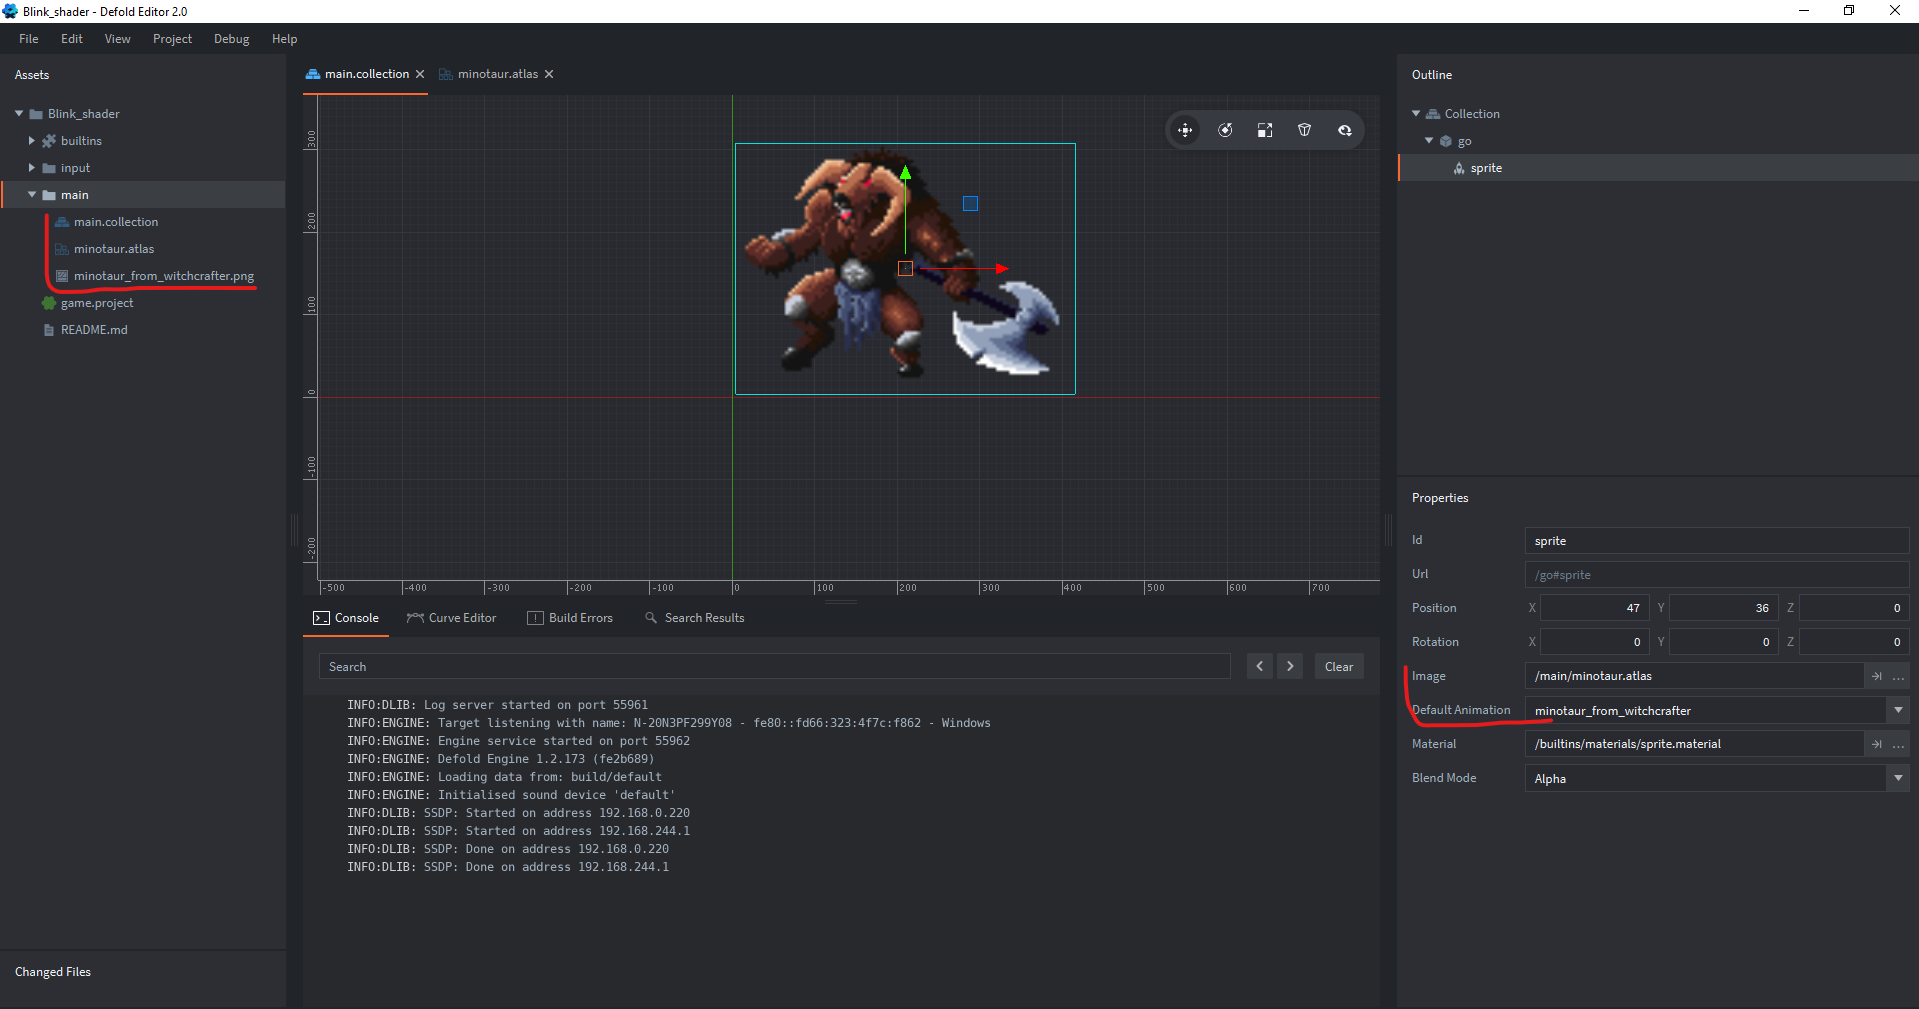
Create an empty project in Defold with a sprite.
Add an image - make an atlas and add that image into it. Add game object with sprite to your collection and set sprite image and a default animation to your new image. Do I need to describe it? ? It is probably a thing you did a dozen times in Defold
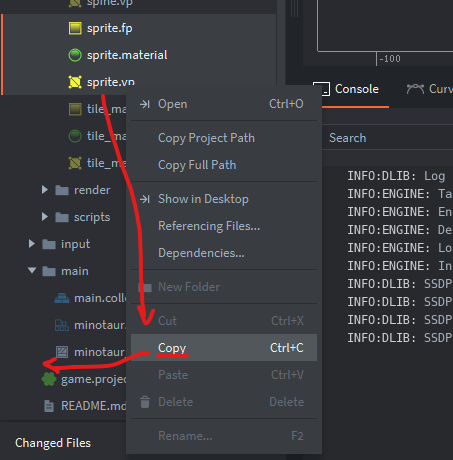
Copy a default sprite material, fragment and vertex program to your working folder. I don’t care about tidiness so much for this exercise. (But that alter ago speaking in brackets will be watching you!  Remember for future that a good structure is crucial!
  ):
):
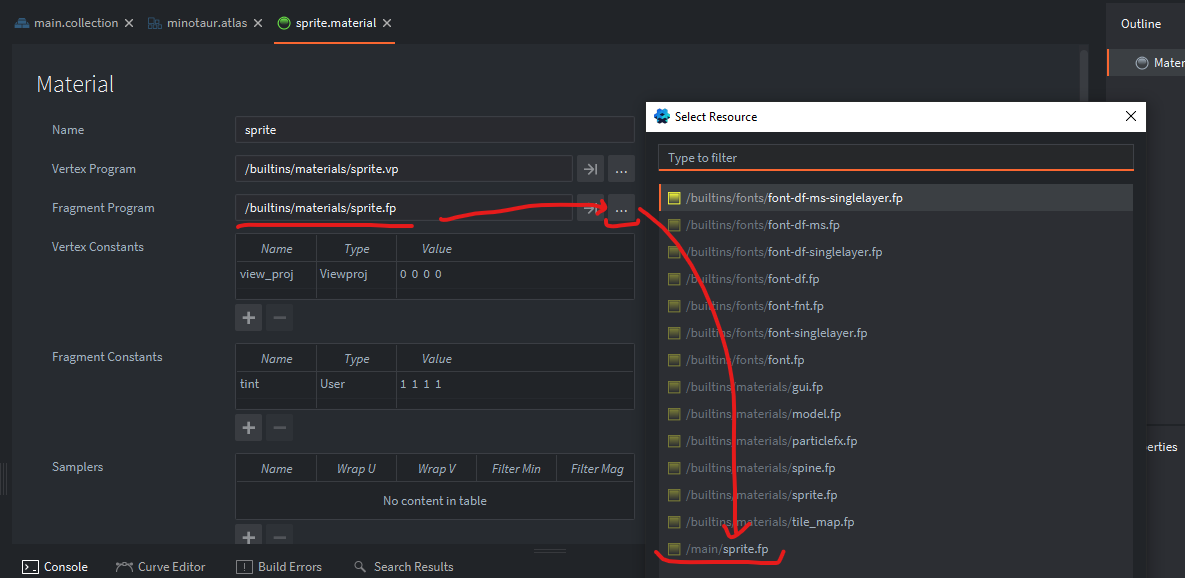
You can (should! ) rename them. Open your new material and change the fragment program to your new fp (fragment program), however you named it (however?! ):
Save it (save frequently! ) and open your new fragment program. (and do backups! )
Magic explained line by line, just like here, but, you know, without Nerd’s babble (it’s a professional documentation! )
It’s a code written in GLSL (OpenGL Shading Language), something similar to C++. You will notice I commented out some lines that are useless here. (if there is a useless code remove it! don’t leave comments! ) For now just focus on the essence which is for each fragment to:
-
Get a position from vertex program
-
Get your image data
-
Get a color of that particular pixel by sampling your texture at an interpolated position
-
and write it to the output (gl_FragColor)
 /*1*/ varying mediump vec2 var_texcoord0; // position of your fragment = output from vertex shader = input for fragment shader

 /*2*/ uniform lowp sampler2D texture_sampler;  // your image = texture data used like a reference here to create an image = this is automatically assigned by Defold engine, because you specified an image for a sprite
 //uniform lowp vec4 tint;  //vector representing a color in RGBA (red, green, blue, alpha)
 // above are uniform variables - passed to the fragment program (first by engine, second by user)

 void main() //this is hmm, a main function of your program, it looks like it has no output (void), but you'll know it's not particularly true
 {
     //lowp vec4 tint_pm = vec4(tint.xyz * tint.w, tint.w);

     /*3+4*/ gl_FragColor = texture2D(texture_sampler, var_texcoord0.xy); // * tint_pm;  I commented out multiplying the color by tint, texture2D() is a function that takes sampler data and interpolated position and gives you a color of the fragment as a vector in RGBA (red, green blue, alpha)
 }
Save it. Open you collection with a game object with a sprite and change its Material property to your new material.

If everything is ok, you should see a sprite as it was. Nothing changed. It’s because we got the texture data and put it to a graphic card just like we received it. So now, let’s have a fun:
Get back to your fragment program and add in the last line of main:
gl_FragColor = texture2D(texture_sampler, var_texcoord0.xy) * vec4(1.0, 0.0, 0.0, 1.0);
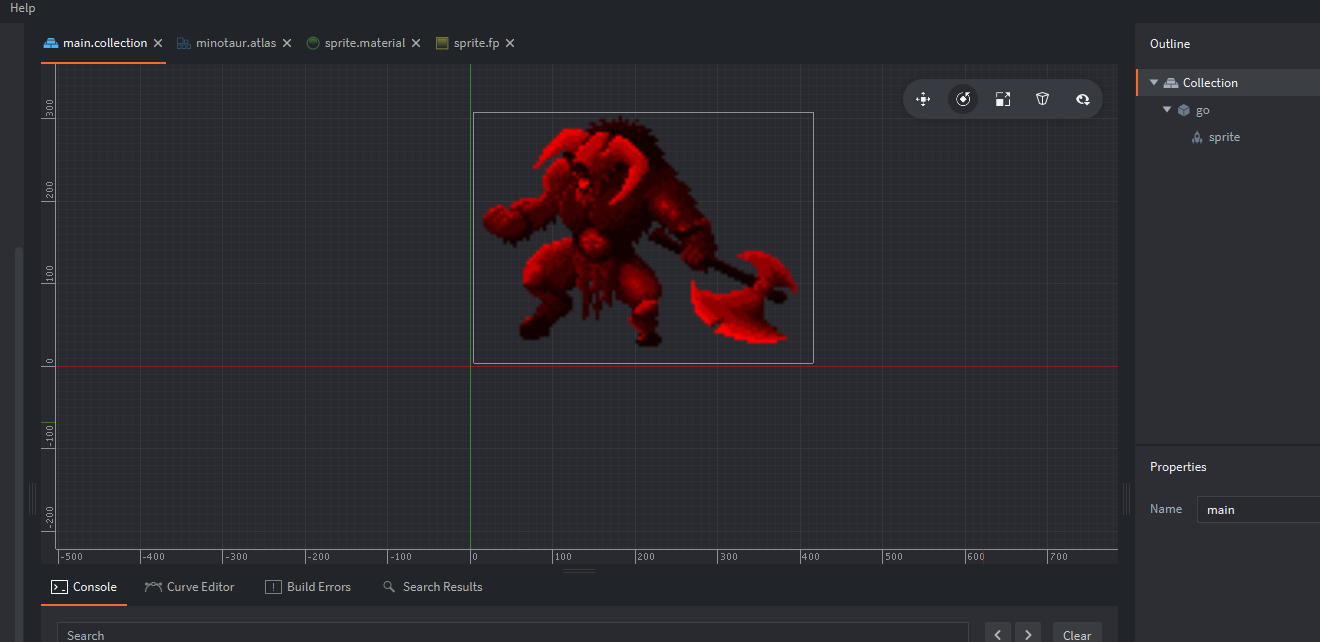
So I just added * vec4(1.0, 0.0, 0.0, 1.0) - multiplied the color by another color (red, because vector represents the color in RGBA with normalized values, so full red, no green, no blue and non-transparent) so whatever the color of the pixel was it will have 0 * blue color and 0 * green color. Save it. Then check in your collection whether the sprite has changed (ooh I love Defold  , you don’t need to build your project to check, if such simple shader is working, changes are visible in Editor immediately!). Your image should be more aggressive now:
That’s it, you wrote your first post-process effect! But we wanted to blink in white, so let’s change the values in the vector to: (1.0, 1.0, 1.0, 1.0) - and you will see that this will not affect you sprite much - because any value multiplied by 1.0 will be still the same value. You can tinker a little bit with the vector, probably you will get to the solution that you could multiply it by e.g. 10.0 (value in the end will be normalized anyway) to get a very bright image, but it’s still not pure white everywhere.
So, just try to leave a vector part here:
gl_FragColor = vec4(1., 1., 1., 1.)
You will get:
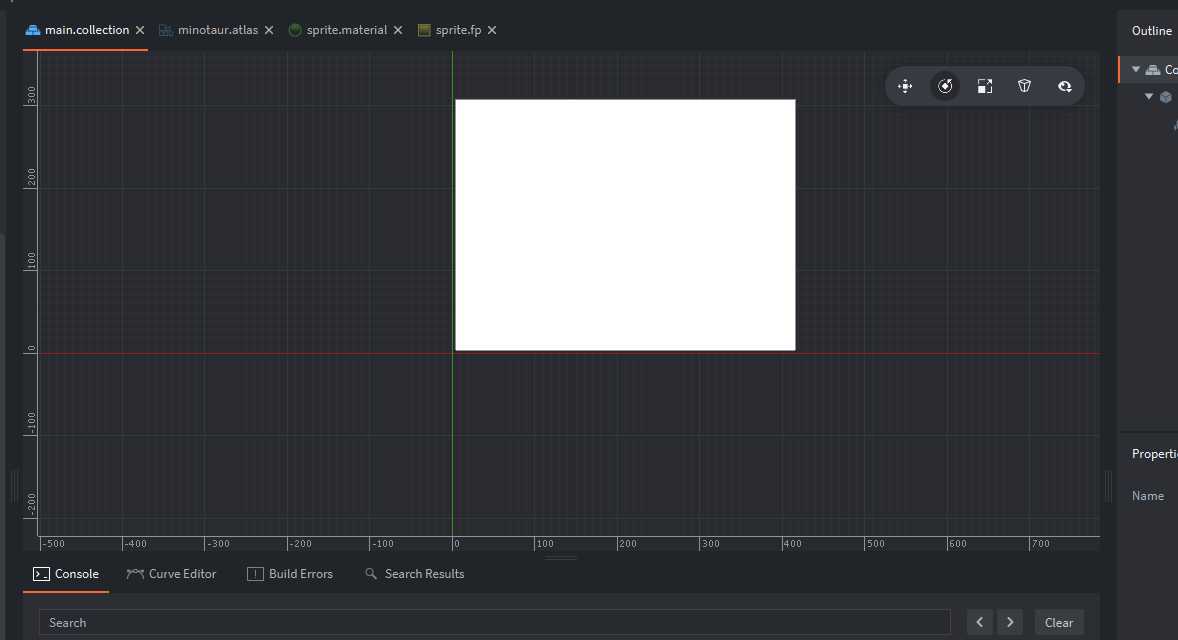
It’s because you set the colour of every pixel of that texture to white. And you see that the texture is rectangular, even if you have a character on a transparent background. Let’s assume for now you have some transparent part, ok? Hmm. Use that tip to distinguish background and sprite!
Check, if colour of the pixel has alpha = 0 and if so, use the old way for setting a colour, if not, it’s a part of your character, so set the colour to white. I will tidy up the code a little bit (finally! )
varying mediump vec2 var_texcoord0; // as it was
uniform lowp sampler2D texture_sampler; // as it was

void main()
{
    //write a color of the current fragment to a variable (lowp = low precision (it's enough))
    lowp vec4 color_of_pixel = texture2D(texture_sampler, var_texcoord0.xy);

    if(color_of_pixel.a != 0.0) // when alpha value of the color is not 0 (not transparent) (you can get components of this vector like .r, .b, .g and .a)
    {
        color_of_pixel = vec4(1.,1.,1.,1.);  // then it's your character - turn the color to white
    }
    gl_FragColor = color_of_pixel;  // write the color_of_pixel to the output gl_FragColor
}
(Save it! ) Result:

We finally hit that Minotaur! Audience is clapping! Critical hit!
The only thing left is that we should switch blink on and off.
🗪 Talking to the shady guy
We will tell the shader to turn on the blink effect and after some time to - turn it off.
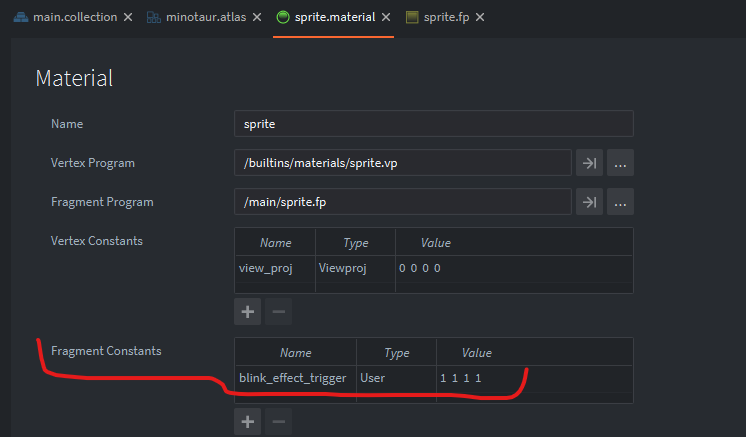
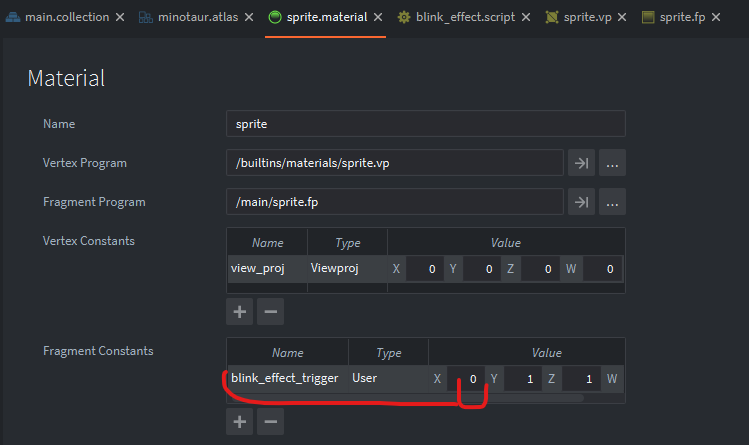
We will do it by setting a constant* of a fragment program. If you didn’t removed it, you should already have on in your material - tint. We will use it. You can rename it however you like it (for example blink_effect_trigger )
*in runtime! - it should be confusing now, but if you will treat each run of the fragment program as a separate operation you will understand that it is indeed a constant specified before the “runtime” of the fragment program
Open your fragment program and add that constant as a uniform variable at the top (I hope you really renamed it! ):
uniform lowp vec4 blink_effect_trigger;
Wrap your current if(){} statement with another if or just add another condition to your if() (let’s choose the second solution ):
    if((blink_effect_trigger.r == 1.0) && (color_of_pixel.a != 0.0))
    {
        color_of_pixel = vec4(1.,1.,1.,1.);
    }
This will mean that only, when the X component of the vector blink_effect_trigger is set to 1.0, our post-process blink will be working.
Yes, you can test it without building and running your code, just in Defold Editor! Save everything and your sprite should be now white, but change the X of vector blink_effect_trigger to 0:
Click somewhere outside (to confirm your change) and save. Check out your sprite - it should be like on a color TV!

So we can now manually turn on and off our post-process!

Now you will need to create a Lua script:
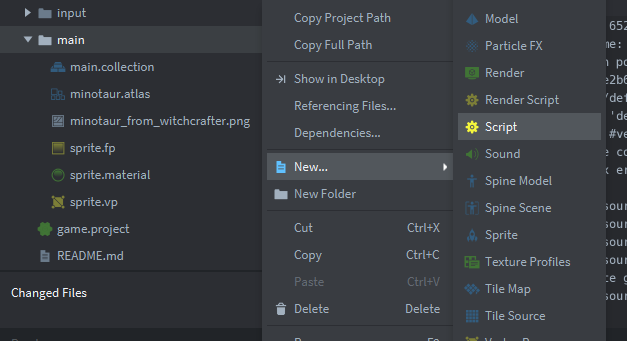
And attach it to your game object with the sprite:
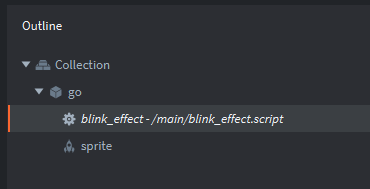
(Save everything )
Open your script and leave only init function. Write here only:
function init(self)
	go.set("#sprite", "blink_effect_trigger", vmath.vector4(1)) -- set property of "#sprite" component called "blink_effect_trigger" to vector of four components all equal to 1) = aka turn on your post-process
end
You told your sprite to set its constant blink_effect_trigger to vector with 1, meaning the post-process will be turned on!
Now, finally, after so much time without building our game - save it and build it!
You should see:
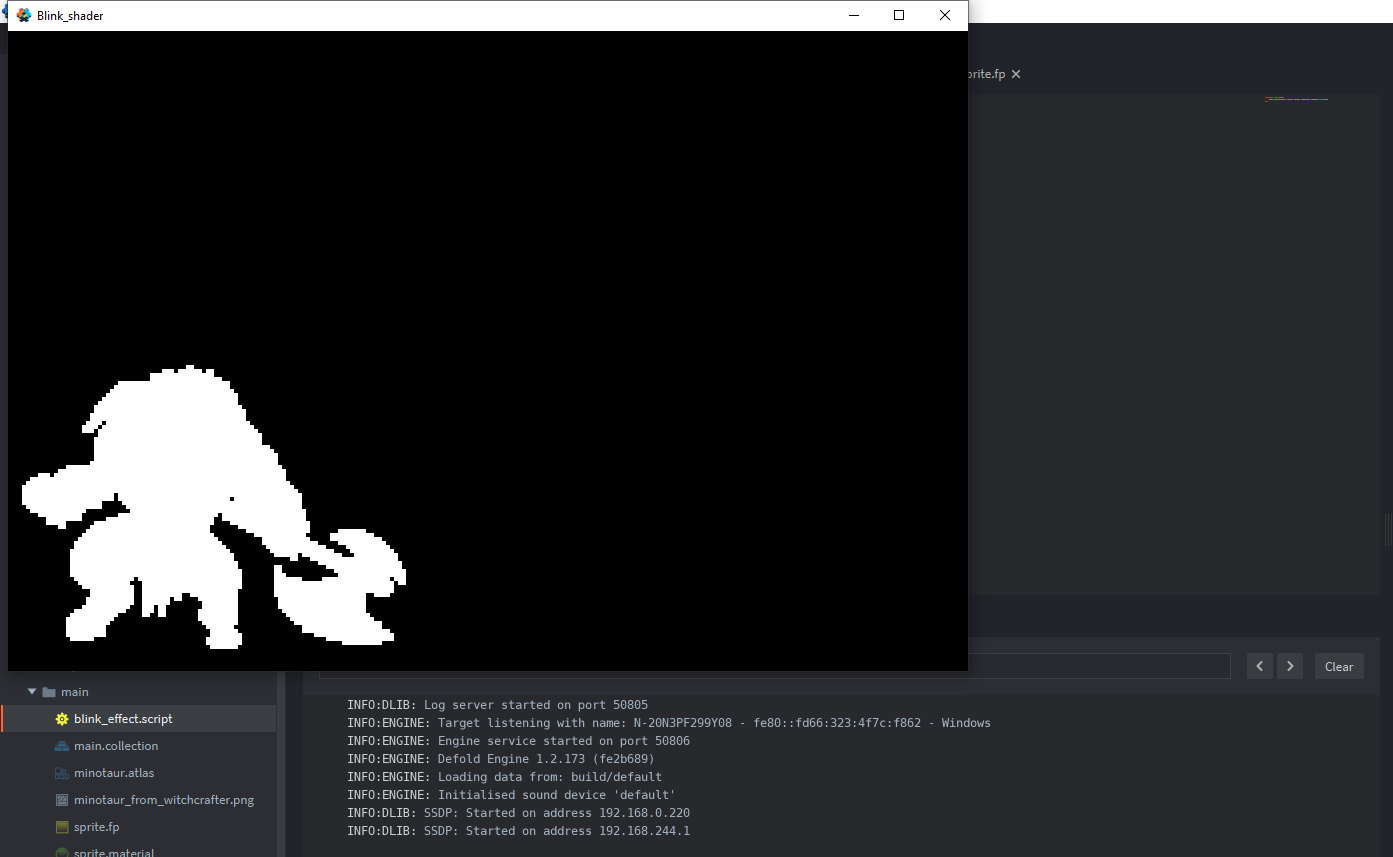
We just told that shady guy to turn on the post-process in runtime, at the very beginning of the program (aka in init)!
*Champagne pops! * 
But hey! Where’s turning off the effect??
*Champagne floods the floor * 
Ok, ok, here’s a fancy script:
function init(self)
	go.set("#sprite", "blink_effect_trigger", vmath.vector4(0)) -- at first turn off the post-process

	timer.delay(1, true, function() -- every second

		go.set("#sprite", "blink_effect_trigger", vmath.vector4(1)) --blink

		timer.delay(0.1, false, function()  --and after 0.1 sec
			go.set("#sprite", "blink_effect_trigger", vmath.vector4(0))  -- turn of the post-process
		end)

	end)
end
Save it, build it, make a gif and post it to social media announcing that you are working on Dark Souls in 2D and finally managed to hit your first boss:
Aaaa, and open another champagne!
 Summary
It’s not perfect (you should listen to me instead, it would be! ) and as I said, you should utilize shaders for much better effects - but hey, in few minutes you learned basics of computer graphics, OpenGL and how to write fragment programs, set up everything in Defold, test it, use shader constants and communicate with your shaders from a Lua script! I’m proud of you!
I was using such shader for enemies hit indication in a current demo of my Witchcrafter and I’m using fragment program on a hero sprite to modify his equipment even! And I wrote everything about it in details (with code) here!
Changing this:
to this:
Shaders are very powerful, just experiment!
And thank you so much for reading this!
Paweł


 There is a video about Defold that I started like two months ago and still didn’t finished!
  I must organise some time for it