Rounded corners drive me mad (solved)

Hi all,

as I said, rounded corners drive me grrrrrrrrrrr.

I have tried high-resolution jpgs, pngs, with blur and without, built masks out of pie nodes - I am never content with the lack of crispness.
Sure, it is a limitation of raster images and the smaller the image is, the less pixels there are for the arches. Especially since I want a quite subtle curvature, 2% or 3% radius or so.
But I am currently working on an app that involves paintings and want them to really shine.

Here is one of them in a test project, the images are textures in a gui box node (360 x 450 px):

Here is a close-up:

So, even if this might be a futile question:

Dear pros: have you got any tips and tricks up your sleeves to reduce the effect and make the corners more pleasing to the eye - please?

I would be so grateful for any hint.

Cheers and thanks in advance

Brigitte

This might be a job for a 9-slice node!

3 Likes

Hello @totebo,

will try it out first thing tomorrow.

Thanks a lot!

Brigitte

1 Like

You are correct the smaller the resolution of any image the trickier it can be to get some nice looking round corners with less space to work with. There is always alternatives like 9-slice and switching up texture min/mag filter might be able to get the look your after. Making the experience more pleasant for your users is a worthy goal imo.

I did a test to see if I could help a little.

Left: is a 3d rounded corners plane - Middle pre-edited corners in raster editing software - Right non-edited dog image with a rounded corner border image applied to separate node as child.

*First tried a 3d rounded plane and is to sharp and leaves pixel perfect edges not so pleasant on he eyes.

  • Second pre-edited the image in raster editing software to remove the corners best I could, of course could have applied aliasing to get it a bit smoother looking, this would require processing all the photos you have before bringing them into defold , not to much of a good idea.

  • Third I think might fit your purpose well this is simple and imo looks very decent without much work and optimal. Without any editing to your images as long as they are the same size throughout your project can be applied to them all and applied to gui layer without adding more draw calls. One node for your paintings and one child node for your rounded border image and that’s it. The rounded border image overlays/conceal the edges and is slightly bigger in size, can be colored to match the background if you wanted etc.

rounded_dogs_close

  • Close Up of corners -

  • node setup -

Round_Border_for_360x450

  • Round border image you can use if you’d like. Fits 360x450 px

*** Dog image found on google for testing purposes only***

3 Likes

Wow, @MasterMind,

what a lovely reply! I can’t thank you enough for this and the effort you put into this.
Your approach looks really great, I will put Louis in a frame tomorrow and post the result, if you like.
So, thanks you so much again!

Have a lovely evening

Brigitte

2 Likes

If the main image has details in the corners, and the background is solid, this is a great approach. It’s a trick I have used a lot over the years - it’s simple, works on all devices (unlike some shaders) and does the job well.

3 Likes

Yes, you are absolutely right @totebo, I have noticed this as well - more detail in the corner region, solid background - the corners look better. What if the textures have a solid colour? I have fiddled around a lot with such things (like buttons) and haven’t found a solution yet to make the corners look good.
But @MasterMind’s approach might work for this case as well. Will try it out as soon as possible.

A big thanks again to both of you, @totebo and @MasterMind!

I must be off now (election night in Germany, a thriller!) and we can discuss a little more tomorrow, if you like.

Till tomorrow

Brigitte

3 Likes

Good morning @MasterMind,

before I grab the frame you so kindly made for me and set off to work just one thing wanted to tell you yesterday. Better do it now, before I forget again.

I really started to do exactly that (and I had tons of photos in my last project), in Gimp and in Inkscape, before boredom overwhelmed me. Went on a hunt and found a little python image batch processor called “Phatch” on github. It can do rounded corners as well. And what is really nifty: it wants percentages as input for the size of the rounded corners, not pixels, so the dimensions of the images you throw at it does not matter.

Brigitte

1 Like

I would never spoil a nice image batch party, but one option might be to keep the images as they are, and let the rounded corner graphics cover the entire corner of the image. If that’s an option, no editing of the image would be needed.

3 Likes

Good morning @totebo ,
No worries, you are warmly invited to the party.
But of course, you are right, masking is the much better solution. I just wanted to present my find should someone be able to make use of it.
I am working with @MasterMind’s mask right now and try to find out why it is considerably smoother than the ones I have produced in Inkscape before. Your is as well much nicer than mine. May I ask you two what svg program you use?

Greetings to you both

Brigitte

2 Likes

I use Sketch (regrettably only available for Mac): https://www.sketch.com/

1 Like

Thank you @totebo. Sooner or later I’ll need a Mac anyway to spread my apps into this universe as well!

2 Likes

Hi again, @MasterMind, @totebo,

having experimented a bit following your advice, just a short update:

On the left is @MasterMind’s frame and it works really well, I find. In the middle my attempt with Inkscape, best quality settings for export I could find. And on the right a (rubbish) texture that proves @totebo’s point: the busier the corner areas are, the better rounded corners look, even with a very small and thus quite pixelated curvature.

With your help I am able to finally win my battle with rounded corners.
So: again a big thank you for your advice and the effort you put into it for me.

Cheers

Brigitte

4 Likes

That seems like a great tool for the job with images that have different dimensions and getting the same results you are after, thanks for sharing. I have used several vector software and I prefer Inkscape even over adobe illustrator. I use Inkscape for most of my vector art needs 99% of the time. Let me share the .svg below so you can take a look and make edits if needed!

So I gave it second thought and you could easily create a small graphic with the corners the exact same as I posted and use slice-9 settings and size the rounded frame to any image dimensions you need. So I did just that here.

The frame is 42x42 px in size - Slice-9 settings to 14 and thats it :slight_smile:

2screen

Rframe_slice

In Defold and looks exactly the same as the 370x460 set frame. This is ideal if you have several images with different dimensions.

Here are the ( .svg ) both the slice-9 and other on googledrive.

https://drive.google.com/drive/folders/14HMG2HAr35Th5CrcEZrG8gED8c5UVgGM?usp=sharing

Quick tip: I have found that the defold renderer likes the power of two with images so if you sometimes see some strange blurring on an edge I usually fix that by adding or removing a pixel from the size, with gui node using Manual size mode then adjusting

you are very much welcome,
Cheers~

2 Likes

You can also solve this with a custom shader. Either apply a custom shader directly to the image that would discard; pixels in the corner (plus you can do some antialiasing if you wish, like multisampling). Or draw four white rounded corners on top of the image.
You would have to pass corner radius as a uniform to the shader and do some basic math with sin() and cos().

Found this shader

5 Likes

Good morning folks,

there is even more help coming, you are just great!

@totebo has suggested slice-9 in his first post and you, @MasterMind have provided me with files you made for me. Just downloaded them. Thank you so much for this and for your detailed explanation. Sadly, there is only one like I can give you. And @sergey.lerg: thank you for your suggested solution to my problem and for the link. I have not ventured into the shader terrain yet and it is high time I did.

Seems I have my work cut out for today! Will show off my results later, if you like.

Lovely day to you all

Brigitte

Btw: is it possible to reply to several people at once so no-one is left out?

3 Likes

I think it depends on the settings people have. I think you usually get notified if there’s a reply to a thread you have participated in.

1 Like

That sorted then, great. Thank you!

@MasterMind, @totebo, I have found a new friend called slice-9. This is a really neat solution for my varying image sizes and with a tiny texture, too. Thanks for pushing me in this direction. I have read the manual when I started out with the editor but somehow did not occur to me to use this very useful node.
@sergey.lerg, my head is spinning after spending too much time with shaders today. But I WILL crack them.
But now I am calling it a day, off to my dinner.

3 Likes

Hi @sergey.lerg,

Well, shaders are not for me and I will probably NOT crack them.
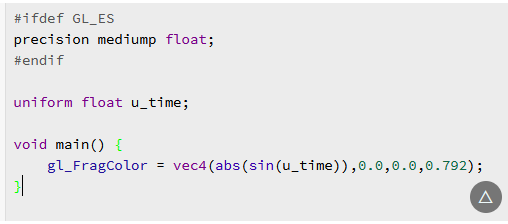
I can’t even reproduce this simple code from the Book of Shaders without errors.
example
But then, shaders might even not be ideal since my project is made up entirely of Gui scenes (and finished apart from the rounded corners).
If only the smooooooooth curve of the shader you found for me were not so beautiful… Ah, well.
Anyway: I had a lot of fun following @Pawel’s excellent tutorial Shaders for beginners and the Shadertoy tutorial.
I have now a blinking dog that sometimes gazes at the stars - he is so cool!

So, I will mark this thread as more or less solved.
Many, many thanks to (in order of appearance): @totebo, @MasterMind and @sergey.lerg. It was a pleasure to learn from you, and I learned a lot.

Till next time!

Many Greetings

Brigitte

@britzl, I forgot you! How could I? Thanks to you as well!

4 Likes