Hello Admins, Devs and Users, any help would be appreciated.
I am trying to use the displacement maps to get the displaced effect rather than create a geometry for my 3D models which will go into millions of faces. On the web, I was able to get these instructions for an older version of Defold which is no longer valid:
Create a New Project:
Open Defold and create a new project using the “Basic 3D” template.
Import Textures:
Drag your diffuse map (e.g., diffuse.png) and displacement (height) map (e.g., height.png) into the assets folder in your Defold project.
Create a Material:
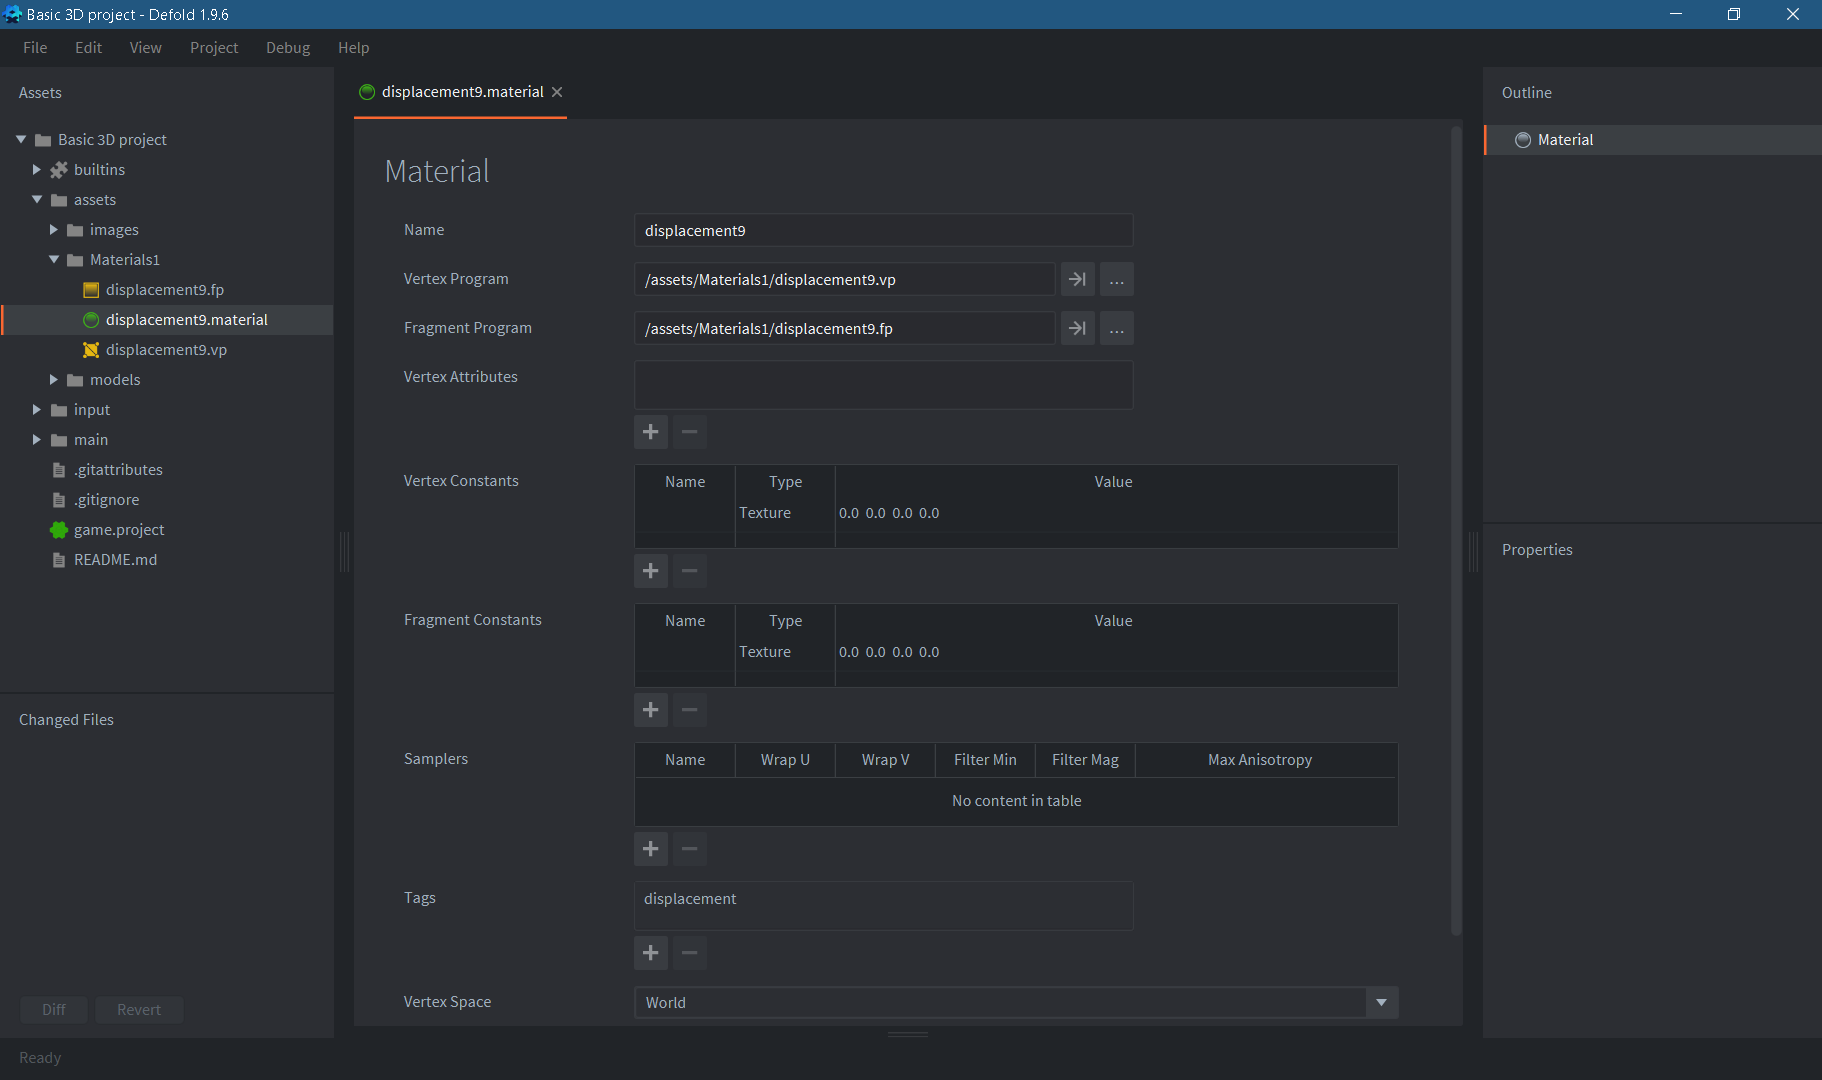
Go to Game → Materials and create a new material file named displacement.material.
Setup the Vertex Shader:
Right-click on the assets folder, go to New → Shader, and create a new shader named displacement.vp.
Open displacement.vp and paste the following code:
Open displacement.material and set the Vertex Program to displacement.vp and Fragment Program to displacement.fp.
Set the Tag to displacement.
Assign Textures in the Material:
In displacement.material, add two texture units:
Name: diffuseMap, Type: texture
Name: displacementMap, Type: texture
Create a Material File:
Create a new .material file in the assets folder (e.g., displacement.material) and set up the following properties:
Vertex Shader: displacement.vp
Fragment Shader: displacement.fp
Textures: diffuseMap, displacementMap
Tag: displacement
Create a Model:
Right-click on the assets folder, go to New → Model, and create a new model file named plane.model.
Set the material to displacement.material.
Assign the plane geometry (e.g., plane.dae) to the model.
Assign Textures to the Model:
In plane.model, assign diffuse.png to the diffuseMap slot and height.png to the displacementMap slot.
Update the Render Script:
Open your render script (e.g., main.render_script) and ensure it includes the material tag displacement.
Run the Project:
Save all changes and run your project.
You should see your plane surface displaced based on the height map.
Can anyone help me with creating displaced surfaces using the Height Maps/Displacement Maps?
I just want to know how to take a “Plane” mesh(just flat surface) and give it artificial geometry so as to save the game from millions and billions of polys.
You can find that there is a PBR extension/library written here: defold/defold-pbr
But this does not give any guidance in me trying to achieve the displaced geometry.
Defold is lacking a way to do as Godot engine does with PBR so easily by just dragging and dropping the PBR materials. The above github thing only helps with normal maps which only gives the illusion and shadow like output, making it look like 3d, but when playing a game, if you see the surface, you will see it is flat.
Godot, Unity, Unreal, CryEngine, etc gives us the height at each pixel of the map, making it look like real geometry with uneven surface, even if there is only one face. You can create an Plane object with 1 face in Godot, and apply the PBRs and it gives amazing results.
Please guide me to achieve that in Defold plssssss.
Like I said, I am not sure where I have gone wrong.
If you can guide me even from the beginning, like when I start with template “Basic 3D Template” / “Basic Empty” and how to proceed from there, then it would be great.
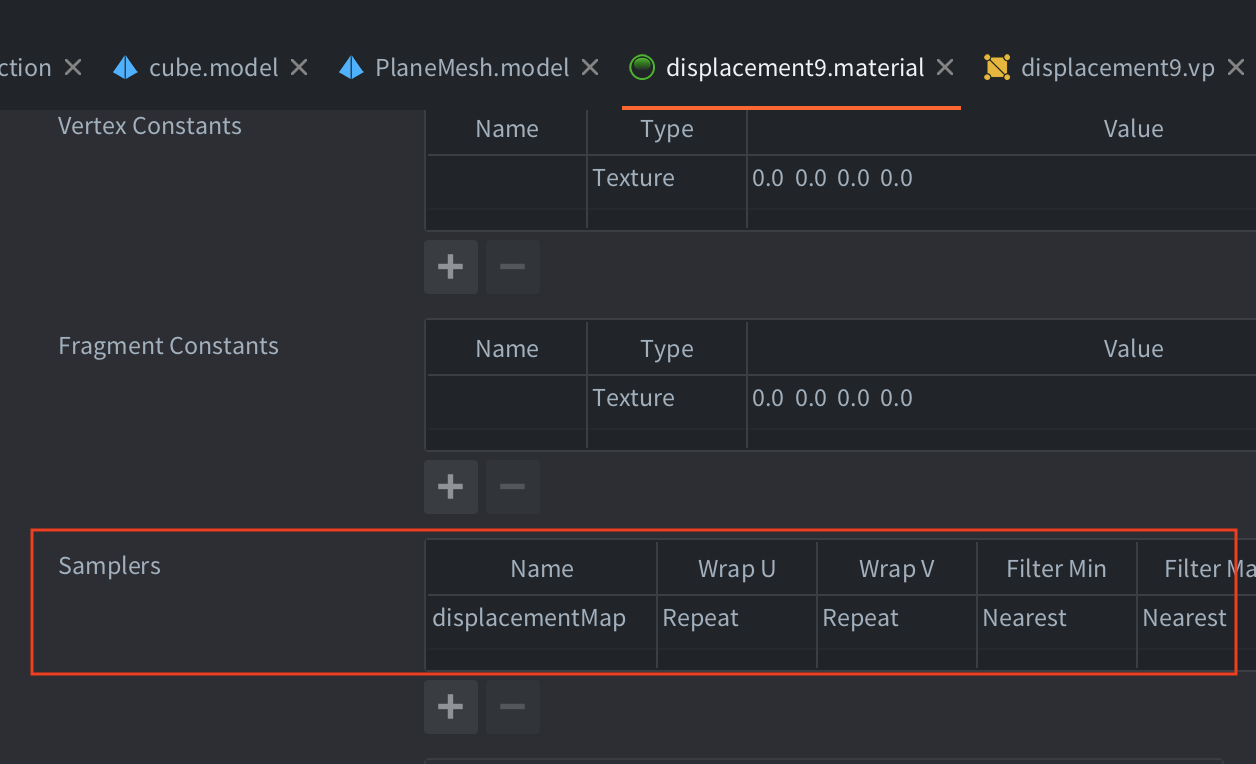
As soon as you add a sampler to a .material file it will show up as a new property in the properties view of any model which uses the material. In your case it is the “PlaneMesh.model”:
Can you please help me with one more request please…
I wanted to make a 3D FPS/RPG tutorial using Defold, in which PBR application is very much required. And for that the above instructions for working with PBR was found(initially listed steps). Can you guys kindly consider helping me with additional steps for adding Normal+Roughness maps to it please.
I have searched through the net and found no guide to follow through. Yes I know there are a few templates for working with PBR’s which I am unable to decipher, because most of them are written for OpenGL and not for Defold directly(in Lua, I mean).
Can any one of you kindly consider connecting with me(on Discord for only 30min to 40min a day) so that I can make and release a 3D game tutorial on Youtube for all Defold enthusiasts. I will be available at your convenience; at any time you feel you can guide me with some insights on the process please.
(Please let me know your thoughts on connecting with me on this one. Only after creating one “Full” Defold 3D tutorial, I will be confident of myself to hosting a permanent channel for all Defold game types like Racing, RPG, RTS, FPS, etc. I am moving away from my past life as a Car Mechanic. And when creating games or videos, it does not seem to discriminate on my background much. Hence I am totally psyched about it. Would someone plsssss care to connect.)