I have been looking for a way to do this for month, through shaders, through rendering, but unfortunately, my knowledge and skills are not enough to achieve at least some result
I really already regret my choice to make a game on Defold, because it is very difficult for beginners to create something of their own almost from scratch, but we have been making the game with a small team for 5 months and there is no way back, I understand that this is impudent on my part , but if you have an example of how you implemented it, please share
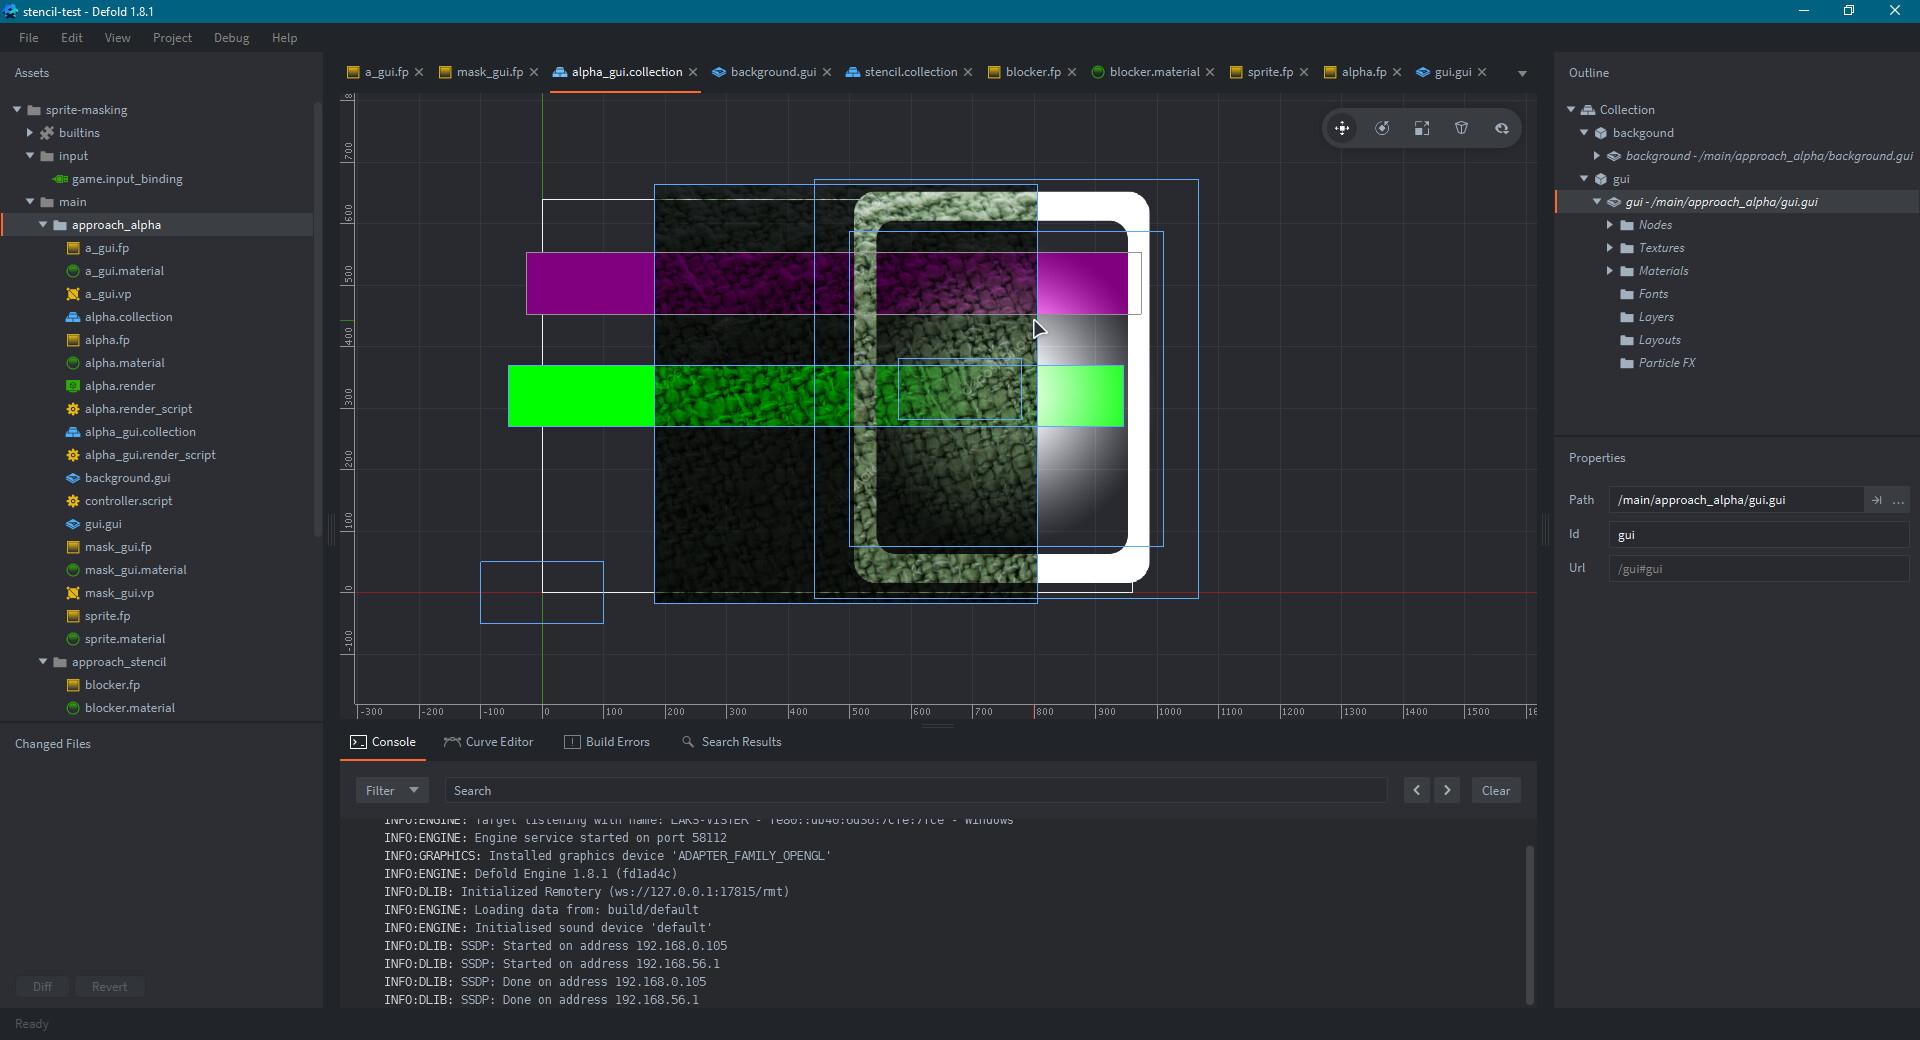
Does it have to be stencil buffer based? Ie does it have to work with gui layers? Otherwise achieving it with texture masks shouldn’t be that difficult if you do a bit of custom render script setup
I don’t quite understand the question, but I have many GUI layers in my project. We are making a very simple novel game and we use GUI for everything, even for the background, which is why it is impossible to render the GO, because the GUI is rendered last, but I think in the render, draw the GUI first, then the GO should show
Your post mentioned “stencil”, which is how the GUI layering system is built. It would be more technical to solve your masking if you need it to work exactly like a layer does in the GUI. Implementing the masking part of the look is easier as you can use a texture to do the actual masking. Would that solve your issue?
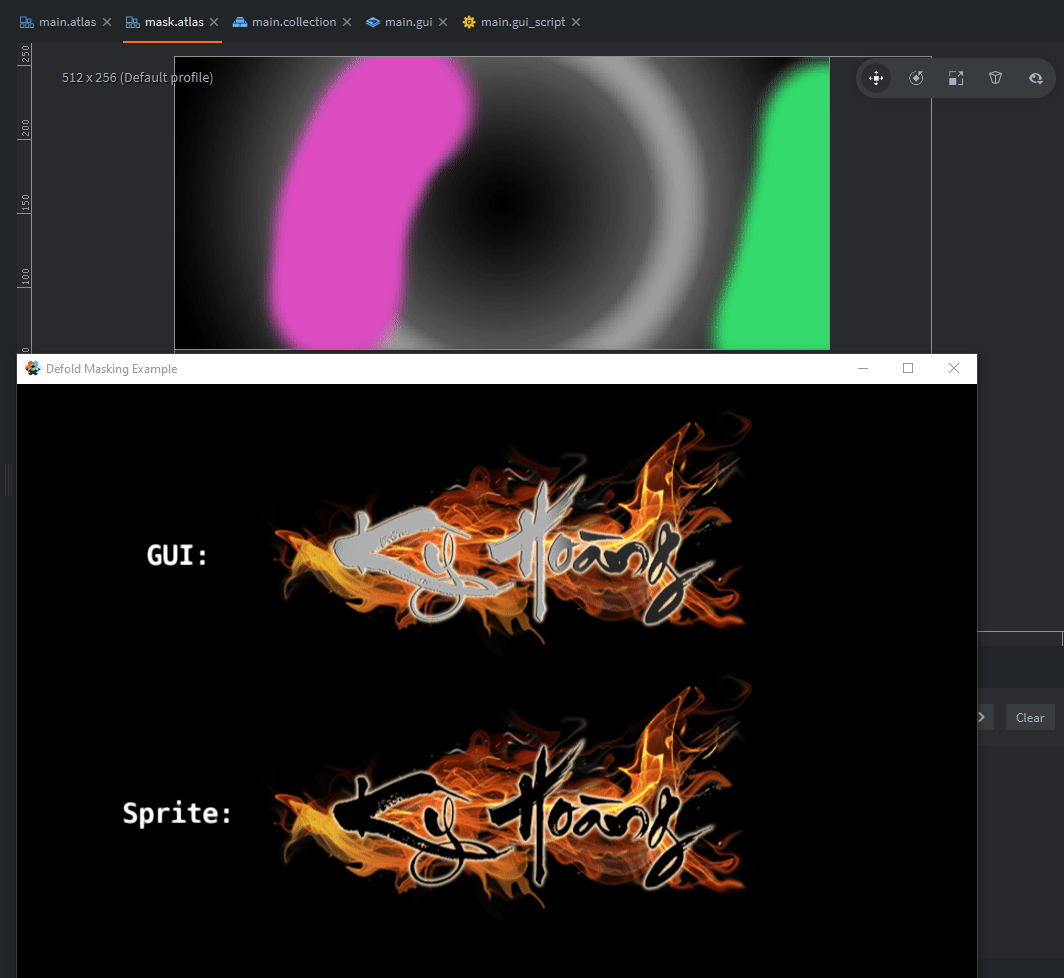
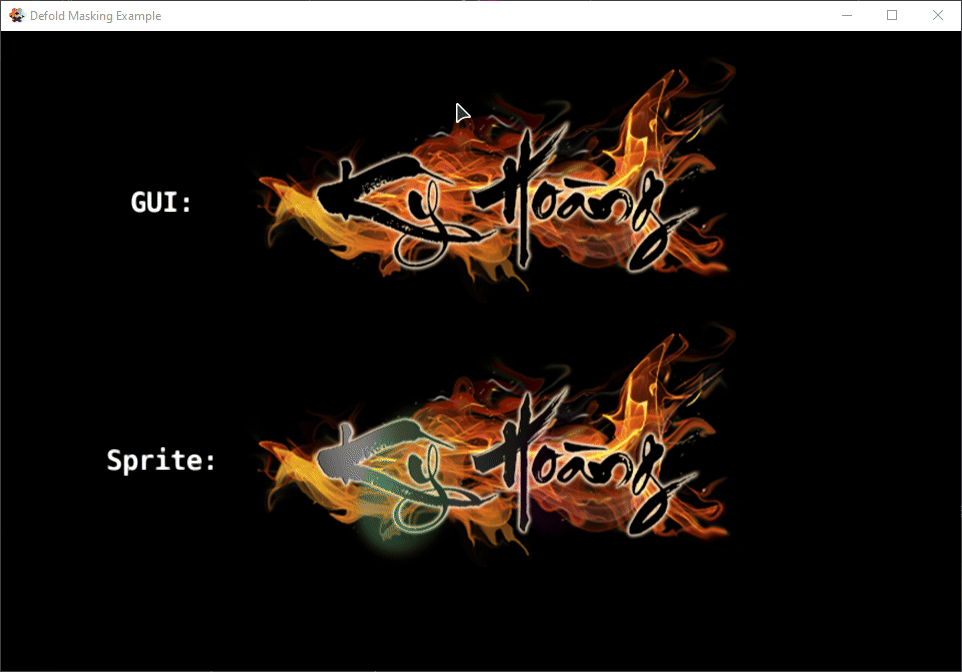
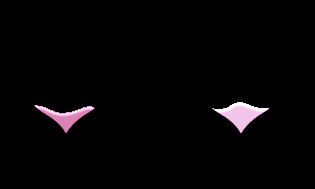
Instead of a single texture, its show the whole atlas and also in black and white.
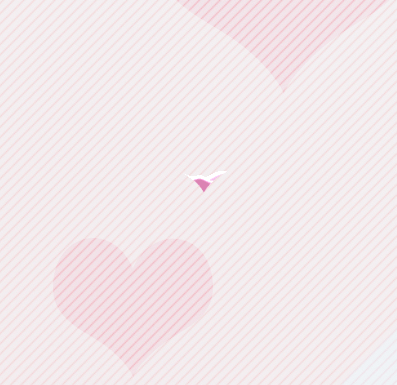
It’s all fixable, but I need more than just a texture, I need to show complex animation through the heart window (stencil), so I give up. My issue can be solved only by the knowledge and skills of shaders and rendering. I think I just realize what I want with frame-by-frame animation…
This is alpha masking technique, so the mask is always in black and white. The white will make the main texture visible while black will make it hidden.
I may know what you are looking for. Actually you can modify a bit to get what you want
Thanks everyone, I want to share the result I wanted to achieve. I would also like to make different speeds for the waves, but it is quite difficult, because the mask has coordinates relative to the texture to which it is attached, I tried to add a separate coordinate of the var_texcoord1 for the mask through the shader, but as with the Positions, this is technically not implemented in the GUI or I didn’t understand why it didn’t work.
Thanks again for your help!
I did as you said but it gave this result GIF, now no matter how i change the mask_position nothing changes.
My goal is for the mask to always stay in one position on the screen and the waves to move up and down and slightly left and right.
For now, I implemented the moving heart mask down, and the waves up with the same speed, this way I make the “standing effect” of the mask in a static position:
function update(self, dt)
local speed_y = 5
local speed_x = 10
self.mask_postion.x = self.mask_postion.x - 1/speed_x * dt
self.mask_postion.y = self.mask_postion.y - 1/speed_y * dt -- move down
msg.post("@render:", "set_mask_position", { position = self.mask_postion })

self.current_pos.x = self.current_pos.x + 128/speed_x * dt
self.current_pos.y = self.current_pos.y + 128/speed_y * dt -- move up
if self.current_pos.y >= self.origin_pos.y - 30 then
	self.current_pos.x = self.origin_pos.x
	self.current_pos.y = self.origin_pos.y - 128
	self.mask_postion.x = 0.35
	self.mask_postion.y = 1
end
gui.set_position(self.wave_1, self.current_pos)
You do not set position of the node. After set the fragment sharder as in my above, removing the code bellow the line msg.post("@render:", "set_mask_position", ...) might help.
I need help again I’m trying to implement different movement logic for two masks, but only the last wave_2 works, more precisely, wave_1 also works, but according to the movement logic of wave_2. I understand why this happens, but I don’t understand how to fix it
-- render GUI
--
local camera_gui = state.cameras.camera_gui
render.set_view(camera_gui.view)
render.set_projection(camera_gui.proj)
render.enable_state(render.STATE_STENCIL_TEST)

if self.maskable_nodes["wave_1"].mask_sampler then
    if self.maskable_nodes["wave_1"].mask_position then
        if not camera_gui.frustum.constants then camera_gui.frustum.constants = render.constant_buffer() end
        camera_gui.frustum.constants.mask_position = self.maskable_nodes["wave_1"].mask_position
    end
    render.enable_texture("mask_sampler", self.maskable_nodes["wave_1"].mask_sampler)
end
render.draw(predicates.gui, camera_gui.frustum)
if self.maskable_nodes["wave_1"].mask_sampler then
    render.disable_texture("mask_sampler")
end

if self.maskable_nodes["wave_2"].mask_sampler then
    if self.maskable_nodes["wave_2"].mask_position then
        if not camera_gui.frustum.constants then camera_gui.frustum.constants = render.constant_buffer() end
        camera_gui.frustum.constants.mask_position = self.maskable_nodes["wave_2"].mask_position
    end
    render.enable_texture("mask_sampler", self.maskable_nodes["wave_2"].mask_sampler)
end
render.draw(predicates.gui, camera_gui.frustum)
if self.maskable_nodes["wave_2"].mask_sampler then
    render.disable_texture("mask_sampler")
end

render.draw(predicates.debug_text, camera_gui.frustum)
render.disable_state(render.STATE_STENCIL_TEST)
render.disable_state(render.STATE_BLEND)
That’s why I’m not happy with this solution. You can just use it very limited.
If you want to use it for 2 different nodes in the same GUI scene then I think you can clone the material to a new one with different constant name and mask texture name. And in render script you do not double render.draw(predicates.gui...) line, just double others (with different names)
Hope you understand what I’m saying
Also consider to use frame-by-frame animation if all you need is just that heart. It will be more clearly and easy to work with