Normal map lighting for 2D Pixel Art sprites

Hi! :wave:

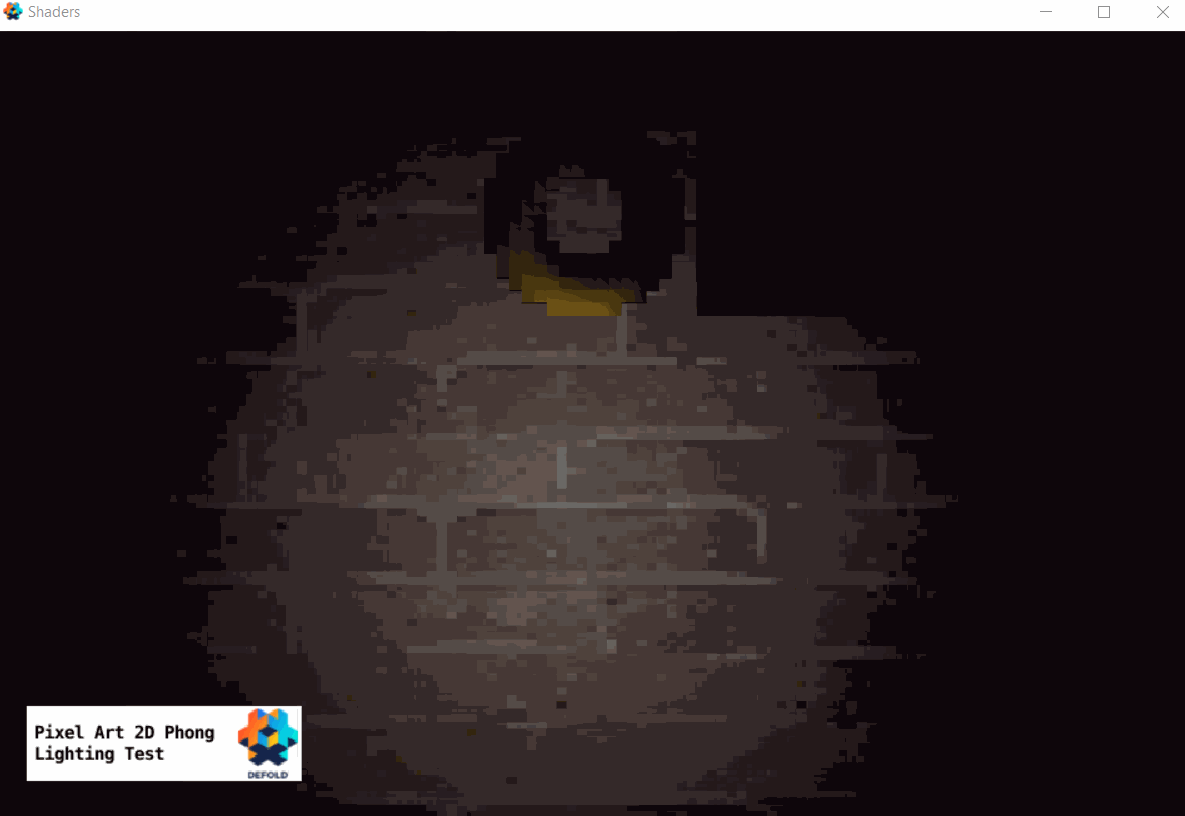
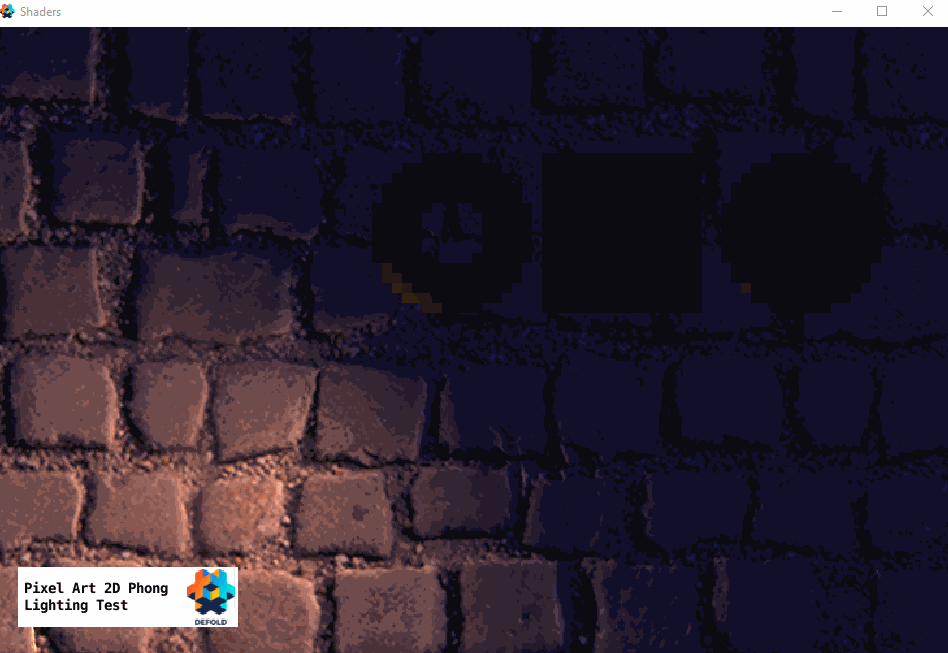
I am playing now with shaders to apply a lighting/shadow effect on my pixel art sprites for Witchcrafter. This use case is very specific, but the idea could be used for high res sprites and high res normal maps. The main issue with this is lack of support for multiple textures for sprites - therefore the common approach to have two sprites - normal map and color sprite forces us to utilize 2 draw calls and join the data in the render target :confused:

But letā€™s be a little bit more clever and economical with draw calls!

In Defold it is a little bit hard. To make lighting in one draw call, you need to do it in one fragment program of a sprite and you need to provide all the data needed as uniforms.


Changing different part of sprites - outfit

Moreover, because I am making an RPG, my previous fragment program for hero sprite is using some color coding for changing part of outfits to match currently worn inventory:

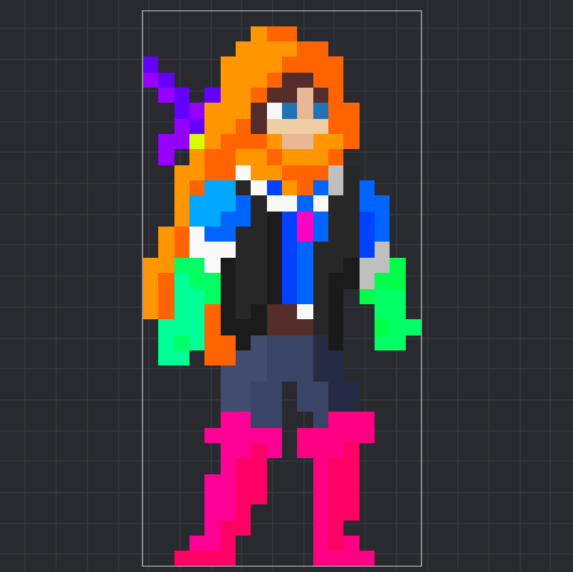
The color palette is specially selected, to easily distinguish the values of RGB in fp - cloak is orange, gloves are cyan, boots are magenta. Such pixel art is even more convenient to animate in traditional frame to frame animation, because the selected colors are very distinguishable.

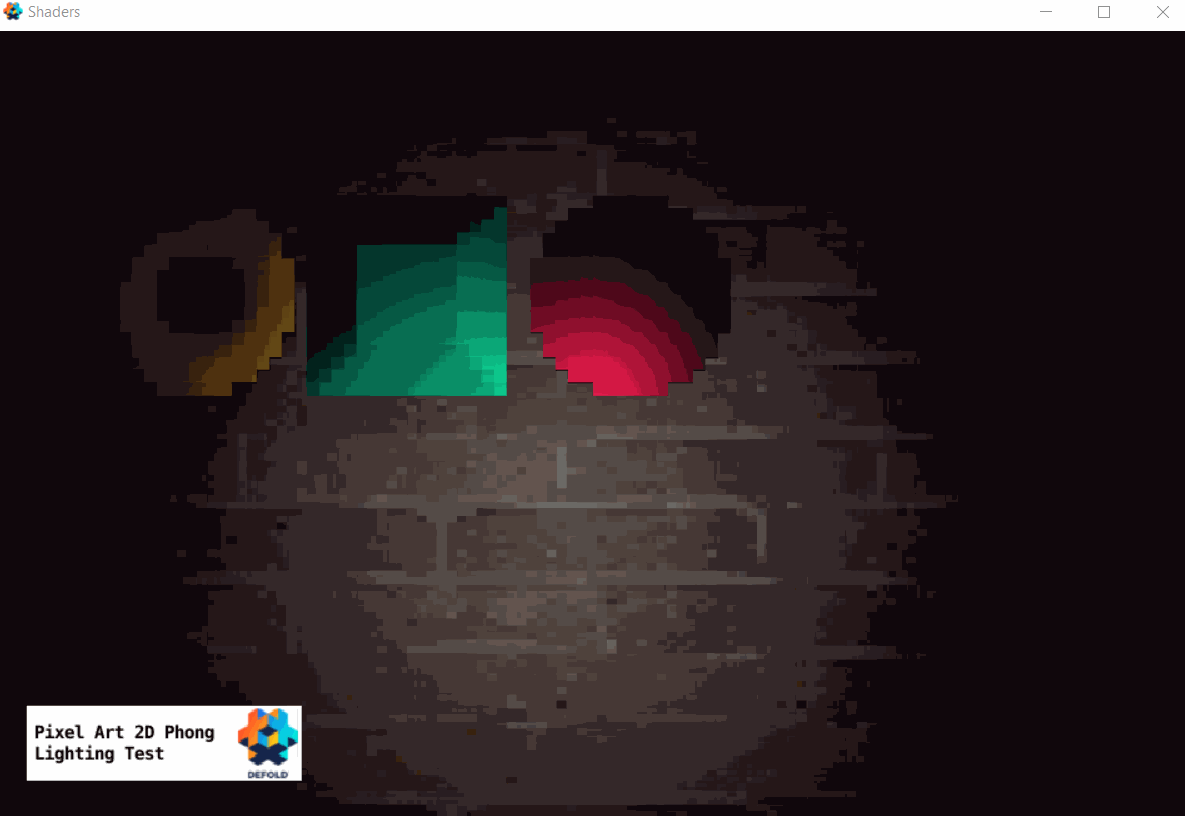
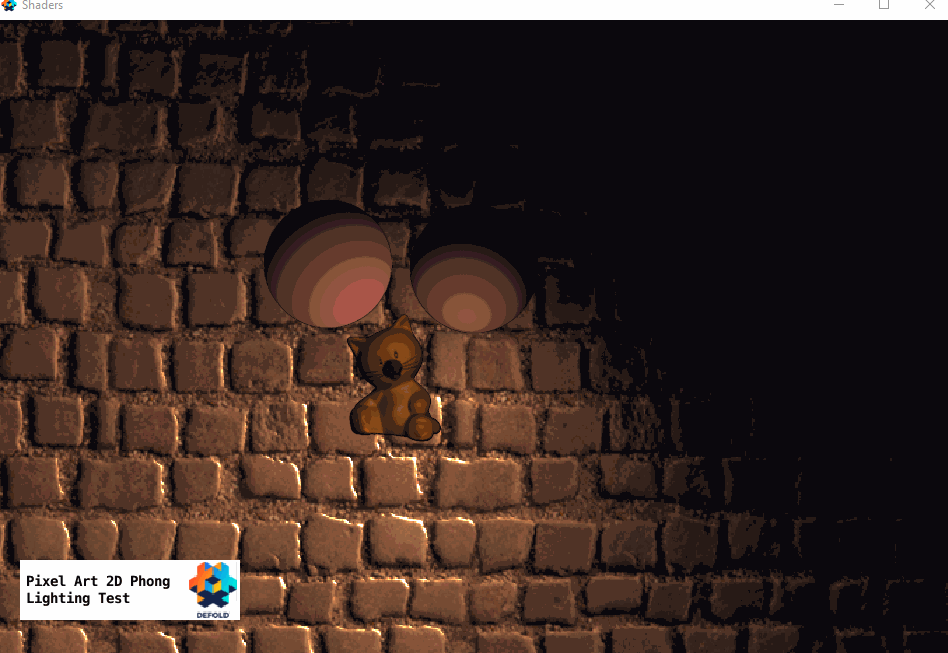
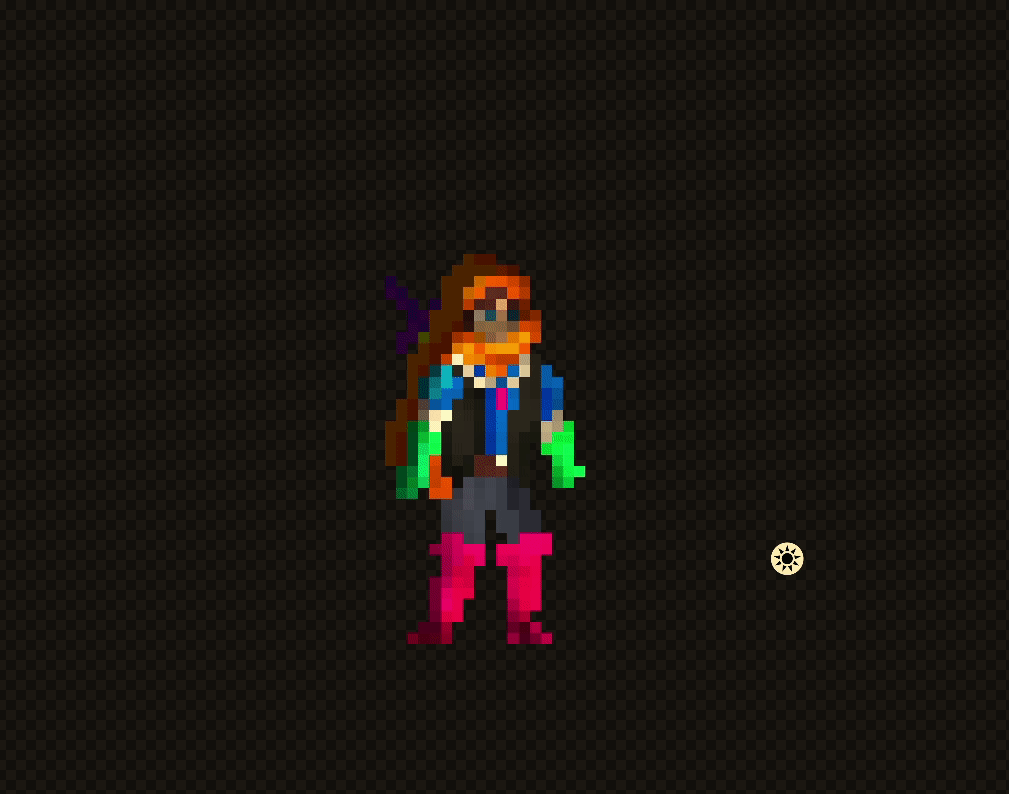
You may notice above picture has already even shading on them, but this assumes that the main source of light is always in front/left side of the sprite. When sprite is flipped to go left, the shading is still static, so the main light source looks like is from front/right. This is accepted in many games, but for a witchcrafter who can create custom, dynamic sources of lights with fire spells, this looks unnatural, when a campfire is on the right side of such sprite - it was bothering me a lot :confounded:

Anyway, the whole sprite is then changed by fp to this according to given data passed to fp in uniforms, so I could have custom colors of each part:


Normal maps

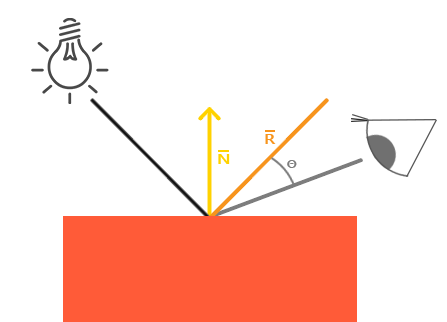
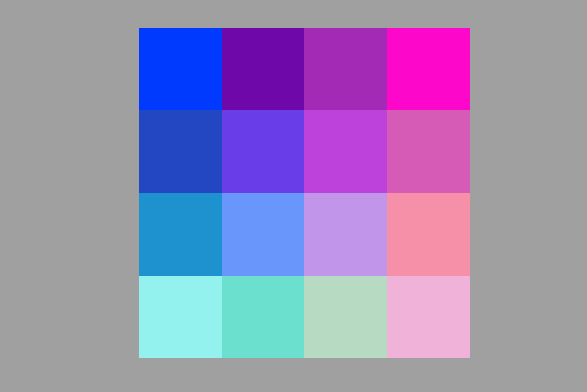
But to have normal-map-like data I would need to change the approach. Normal maps utilize 3 channels (RGB) to represent the vectors normal to the surface being lit up:

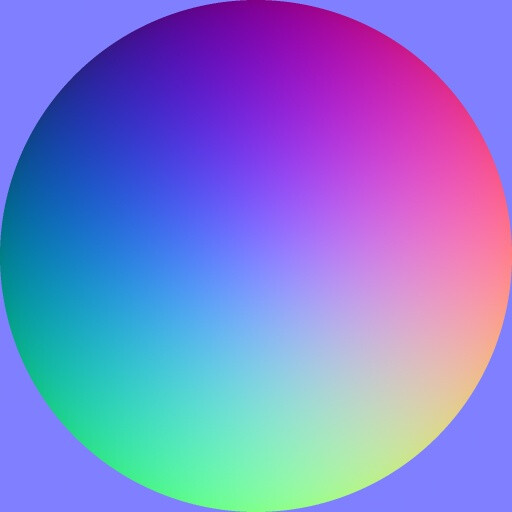
The Red value increases goinf from left to right, Blue increases goling from bottom to top and green increases to the left bottom corner. With this you can create another sprite, so called ā€œnormal mapā€, that will represent a 3D-like structure of the object, that you can draw yourself or use a software that helps you draw it, like Sprite Dlight or, as below, Sprite Illuminator:

Screenshot from 2022-05-21 17-00-09
With instant preview in Sprite Illuminator:

For example an awesome game - Eagle Island is doing such trick for main characterā€™s sprite:

Or stealth game The Siege and the Sandfox for every sprite and tilemaps:

As you can see above the two sprites can be merged in the game engine and given a data about lighting (either with other texture with drawn lights or some other uniforms-based solution) you can achieve a fully lit, dynamic object. Unfortunately, for pixel arts using a full scale normal map it outputs very high res lit object, which looks smooth, but it does not ressemble any hand-drawn pixel art, because it has two many tones in the color pallete :art:

To reduce the smoothness you can use a reduced color pallete for normal map, but you need to also polish your normal maps, preferrably all by your hand! :paintbrush:


Proof of Concept

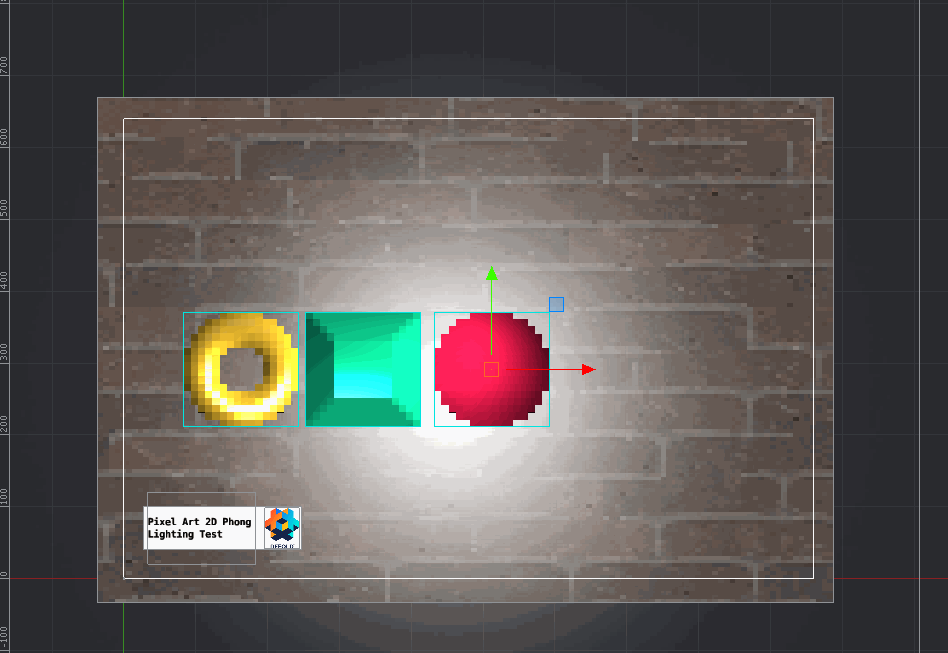
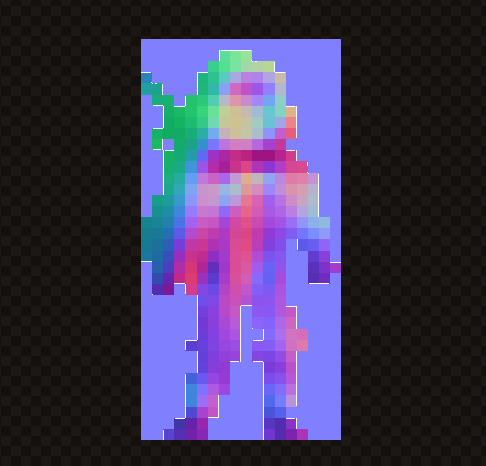
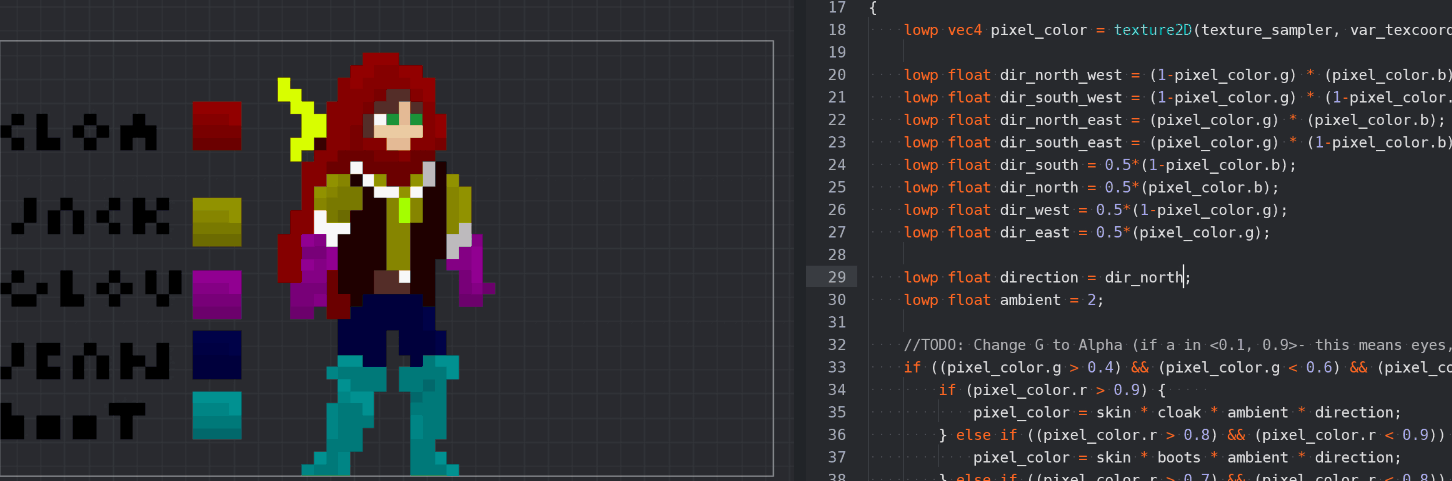
For the Proof of Concept in Defold I created the most simple map in 8x8 resolution:

image

Having in mind I also want to change the color of each part of the equipment I decided to use Red channel for specifing the part, and G and B channels to map it to normal map, so for each parth I have separate normal maps:

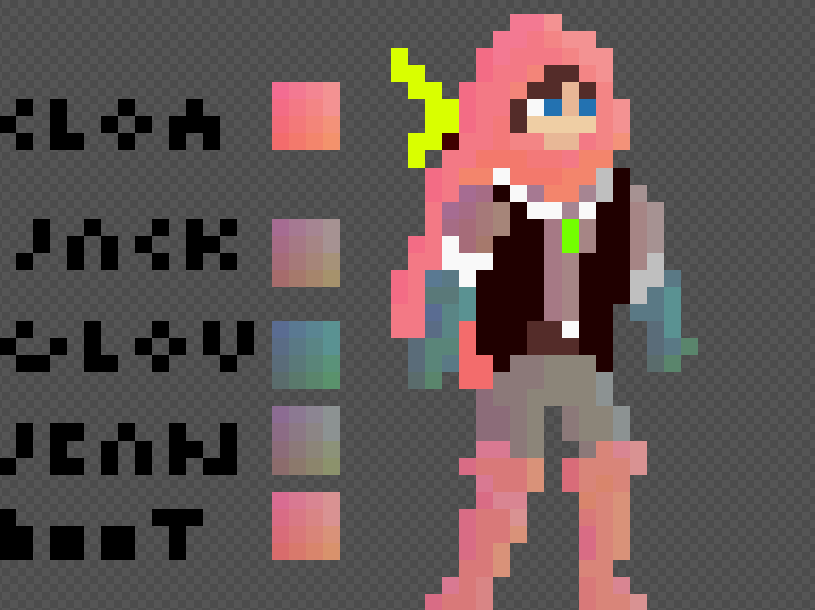
Drawing it is a tedious job, but I will try to figure out a script for this in the future. The colors are similar, because for example each part has a constant Red value, e.g. 243, 160, 90, etc, to distinguish it in the fragment program and if given fragment/pixel has a Red value in the color of 243 I am changing the whole color of the pixel to the color given in uniform ā€œcloakā€ for cloak color. And analogically for each part.

So I could use such sprite and make a fragment program (attached at the bottom of the post) and modify all colors, separating them by Red value like described above and by Green and Blue channels to specify a normal - all are multiplied by given lighting data. The normals are cheated here a little bit, as you may noticed. This is because the squares are representing already lit object, from the left-bottom side. This is then recalculated in fragment program to ressemble proper lighting. This is not perfect, but good enough to start with. The end effect in the editor looks like this:


Summary

Thatā€™s it. This is just a first attempt at doing such lighting in Defold. Making it into production might take some time. I am leaving the link to the repository - take it as an example and learn what you can do! :wink: If you have any thoughts, ideas, tips and hints - I would be very grateful! :heart:

Linked topics:

2d material with a normal map - sprite shading if defold possible? 2D lights and shadows sample
2D lights and shadows sample
2d image materials + lights
Simple 2D Lighting
2d light implemetations

My public repository for this experiment:

31 Likes

Thatā€™s really cool!
I always find normal maps to be a bit of a pain so I was looking at alternatives and trying this approach

10 Likes

Oh my, Powerhoof are gods of shaders for Pixel Art! This looks great and (or but) is bound to the style! I admit that normal maps are cumbersome, but that way I could achieve a very dynamic lighting and still leave sprites in limited color palettes.

2 Likes

Do we have a way of calculating normal maps on a mesh that is rotated? Or simply put, in a mesh which texture doesnt point toward positive z axis?

If itā€™s a fixed rotation, can you not ā€œswizzleā€ the normal in the shader?
E.g. normal = vec3(normal.x, -normal.y, normal.z) (Iā€™m totally making the rotation up here since I donā€™t know what you want)

Iā€™m getting closer to results I was looking for - this is clean Phong lighting (well, without specular yet) applied to sprites in Defold:

When I figure out, how to move it further and I will understand everything happening here, I will surely share how I did it in more details :smiley:

(Gif quality is terrible, sorry!)

I needed though to create sprites in a way I could extract more data from it, but this time I didnā€™t blend it into one textureā€™s RGBA only (as above), but just draw normal map below, and specular map below.

ball cube donut

This way in fragment program I could offset the coordinates from the sampler a bit:

lowp vec2 sampling_coord = var_texcoord0.xy;

// Get Albedo
lowp vec4 color_albedo = texture2D(texture_sampler, sampling_coord.xy);

// Get Normal (from same texture, but offset below)
sampling_coord.y -= 0.25;
lowp vec4 color_normal = texture2D(texture_sampler, sampling_coord.xy);

// Get Specular (from same texture, but offset below)
sampling_coord.y -= 0.25;
lowp vec4 color_specular = texture2D(texture_sampler, sampling_coord.xy);

Itā€™s Forward rendering.
I get light position from constant passed here and calculate direction (but I think Iā€™m wrong here, because Iā€™m not sure Iā€™m getting proper fragment position)

// Get Light direction
lowp vec3 light_dir = normalize(point_light_pos.xyz - var_world_coord0.xyz);

Obviously Iā€™m following LearnOpenGL, so this particular code:

// LearnOpenGL (part of fragment program):
vec3 norm = normalize(Normal);
vec3 lightDir = normalize(lightPos - FragPos); 

And they got FragPos from vertex program:

// LearnOpenGL (vertex program):
out vec3 FragPos;  
out vec3 Normal;

void main()
{
    gl_Position = projection * view * model * vec4(aPos, 1.0);
    FragPos = vec3(model * vec4(aPos, 1.0));
    Normal = aNormal;
}

So I donā€™t know if my var_world_coord0 is the same as FragPos - is it?

Then I calculate diffuse:

// Calculate Diffuse color
float diff = max(dot(color_normal.xyz, light_dir.xyz), 0);
lowp vec4 color_diffuse = diff * point_light_col;

And put it into output color:

gl_FragColor = (AMBIENT + color_diffuse) * color_albedo;

And this is all done in sprite.fp, so itā€™s not so optimal, but I donā€™t know yet how to convert it to Deffered Lighting, because I donā€™t know how to render multiple textures (albedo, normal, specular) on sprite, except drawing multiple sprites with different materials (or textures) in the same place. Then I could put it to quad and in quad I could do Deferred Lighting for the whole frame.

4 Likes

Adding Specular

Hereā€™s a specular applied:

I need to define a view position here and I see I must learn thoroughly it, because I struggle with understanding how to define the vectors (and canā€™t visualize them, even conceptually yet)

This is the code addition to spriteā€™s fragment program:

// Get View Direction
lowp vec3 view_dir = normalize(VIEW_POS - var_world_coord0.xyz);

// Calculate Reflection Direction
vec3 reflect_dir = reflect(-light_dir, color_normal.xyz);

// Calculate Specular
float specular = pow(max(dot(view_dir, reflect_dir), 0.0), 32);
color_specular = (specular * point_light_col * SPEC_STRENGTH);

And you add it in the end:

gl_FragColor = (AMBIENT + diffuse + color_specular) * color_albedo;// * color_normal;

Constants are defined like this:

#define VIEW_POS vec3(0.0, 0.0, 1000.0)
#define SPEC_STRENGTH 0.001

Because, I donā€™t need to change view (orthographic game), I think, the vector should be always somehow normal to the plane Iā€™m watching, right? So, is it correct even? :smiley:

image

In my case Theta Īø would be the same as Normal N. I think the calculation might be simplified because of this, but I donā€™t know yet how.

Good point for it being in a Spriteā€™s fragment program is that I could ā€œpreviewā€ it in Editor (It is without Light Maps, because this is blended on quad later on), so there are definitely bugs in my calculations (regarding this positions and direction vectors, because you see it does not behave naturally):

Edit: After tinkering a little with parameters, adding background with normal and specular as well and adding dynamic light position on last mouse click I have:

Only one light for now, I donā€™t know how to scale properly, I guess only option is to add more constants to materials, but thatā€™s not so clever :confused:

Anyway, only after learning a lot I was able to at least get closer to what I wanted to achieve quite some time ago. Itā€™s easy now, but I canā€™t say it was easy at the beginning in Defold, so I hope to change it soon! :heart:

7 Likes

The issue is clearly visible - direction of light is somehow always ā€œpointingā€ to/from the left bottom center. How could I make it point from viewers point of view (middle of screen, with Z around 100)? To make circular like light, like I would be pointing with a flashlight where I click? :flashlight: :sweat_smile:

// Get Light Direction
lowp vec3 light_dir = normalize(point_light_pos.xyz - var_world_coord0.xyz);

Where position of mouse point_light_pos is set from script:

function on_input(self, action_id, action) 
    if action.released then
	    msg.post("@render:", "set_point_light", {pos = vmath.vector4(action.screen_x, action.screen_y, 100,0)})
    end
end

Vertex program of the sprites defines var_world_coord0 as in default sprite material:

void main()
{
    gl_Position = view_proj * vec4(position.xyz, 1.0);
    var_texcoord0 = texcoord0;
    var_world_coord0 = position.xyz;
}

Gif is banding colours, tomorrow I will record mp4.

11 Likes

Love this! Well done!

1 Like

Thanks to @jhonny.goransson for helping me find the issue with wrong light direction!
Now the forward lighting is also implemented for tilemaps + attenuation is taken into account:

ezgif.com-resize (2)

But boy-oh-boy - drawing normal maps for pixel tiles is a challenge :sweat_smile:

8 Likes

Hey, has there been any progress on this? Iā€™m trying to figure out how to do this too

I might be able to gather it up in some project I could share in some time, but I am waiting for a feature in Defold that allows to set multiple textures per sprite to make it as easy for 2D as it is for 3D :wink:

3 Likes

Wait, so what you had been working on itself wasnā€™t with any normal maps, how were you calculating brightness so that it matched with the geometry of the object? I would love to see a compilation of all that youā€™ve already worked on

1 Like

There I explained it :wink: Itā€™s a workaround to have information about normals and e.g. specular, but it requires manual work to create such textures properly :smiley:

Soon, weā€™re introducing multi texture for sprites, which will make this a lot easier.
Itā€™s half done, but needs some editor love to get finished.
I hope to have it in before christmas, but I have no guarantuee for that.

8 Likes

Alright, thanks. Do you think youā€™d be able to upload the work youā€™ve already made to have full clearance on the code, even though later updates will facilitate this process? Sorry if I sound adamant

holy crap! thats really awesome! i could totally use some normal mapping in my next project. (light based stealth game).

1 Like

The 2d lighting writeups and shares have been awesome to follow. There are very talented people here. Iā€™m brand new to Defold. Normal mapping / 2d lighting advancements would be amazing. Anyone here suggest additional resources / learning material? Happy 2024 to you all.

2 Likes

I can share that we are working on multi-texture support for sprites. The runtime part is done and @vlaaad is working on the editor:

Once this is done youā€™ll be able to use multiple textures on the same sprite to achieve effects with normal maps etc

3 Likes

This is wonderful. Thank you for posting! Iā€™m very interested in making the most out of 2d lighting in my project. I was looking for this under PRs on Github. Thanks again for sharing.