** UPDATE 5/24/24 This guide still works well however some things have changed you can now save all animation tracks to a single .glTF file and skip exporting one by one and also skip using the .animationset file altogether. **
In this guide we will cover exporting 3d animations from blender then setting them up in an animation set in defold. Using Blender(3.6.1) and Defold(1.4.8) glTF format.
Some things to note before animating:
- Single root bone for your armature skeleton.
- Single animation per file. Defold cannot use exports with more than one animation. For multiple animations we instead use exports that have data from a single animation and we setup an (.animationset) that links each animation export, then it’s used in the (.model) > Animations properties.
- Pre baking animation is not necessary.
So you have some animations ready to go in blender and now you want to bring them into defold. I have created an animated coffee cup model that we will use for this guide. We will need to export a file for the mesh & armature without any animations. This file will be used for the skeleton and mesh set in the model and animationset. Then we will export each individual animation in separate files to use in the animation set for playback in defold.
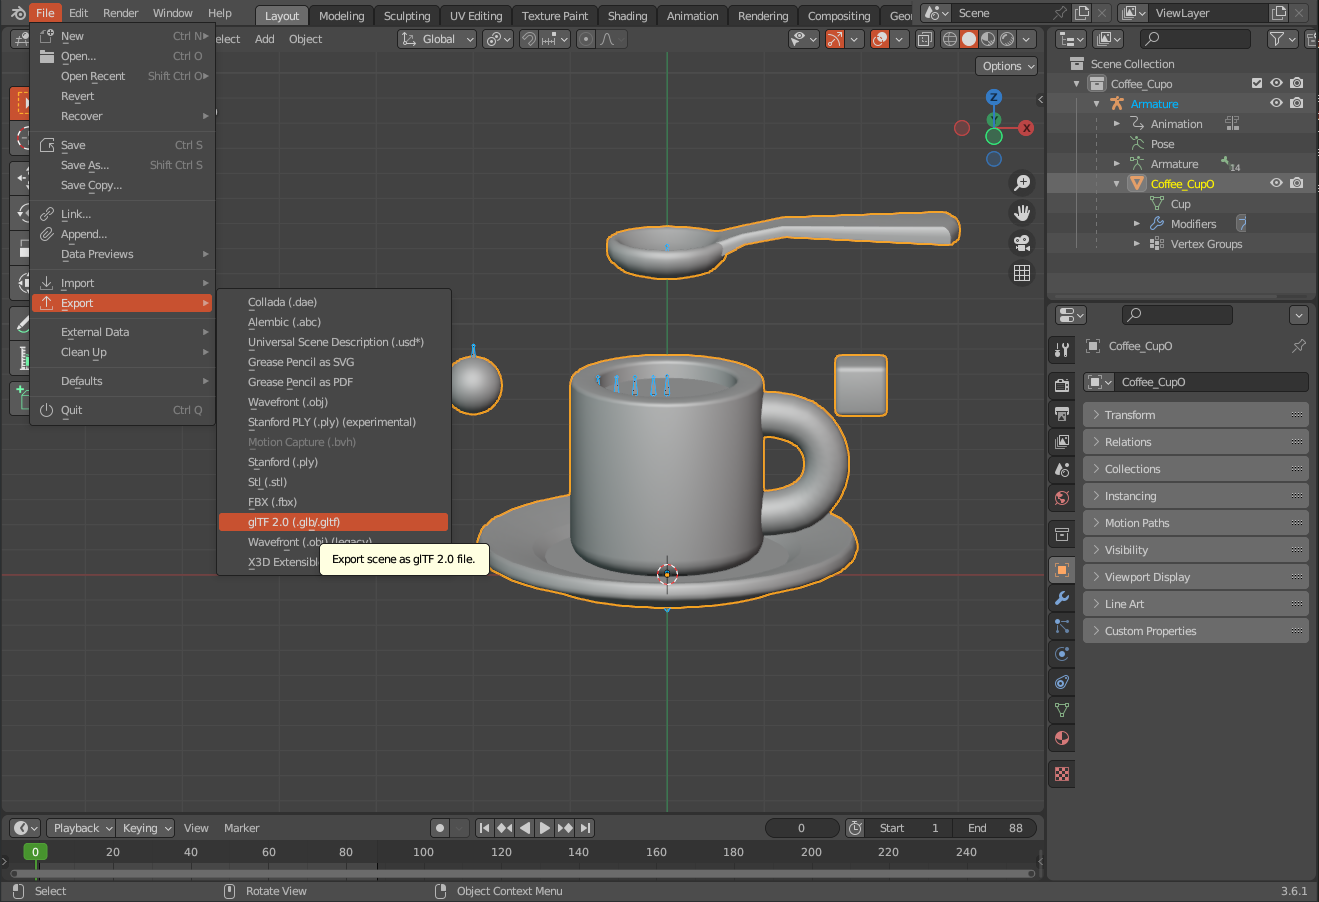
I have a rigged coffee cup model that’s ready for exporting, lets get started. Select the model and skeleton rig then export to glTF ( File>Export>glTF 2.0 ).
In the settings we will make sure to select the following:
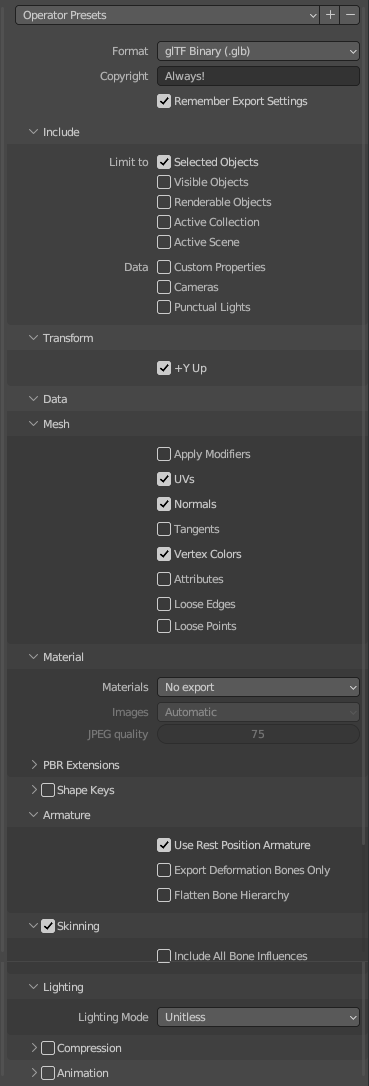
- Limit the export to Selected Objects instead of the whole scene.
- +Y Up same as in defold.
- When it comes to Mesh Data it is really up to your project if you are going to use some of these settings or not. UV’s we will definitely need to draw the textures to the model, multiple UV sets are supported in defold with glTF. Normals you may need in the shader for things like lighting and can be accessed in the shader via normal attribute (
attribute mediump vec3 normal;). Tangents are supported and can be accessed in the shader via tangent attribute (attribute mediump vec3 tangent;). Vertex colors are supported in defold and can be accessed in the shader via color attribute (attribute mediump vec4 color;). - Materials we don’t need to export because we setup our own materials for use in defold.
- Armature rest position we just use the 0 frame.
- We want to use skinning for our animation. Note: when we use skinned animations in defold our model material must be set to world for vertex space and cannot playback in local space.
- We don’t need lighting information I like to set this to Unitless instead of exporting the pbl data.
- We do not use compression in defold and we do not need to check animation for this first export.
Tip: In blender you can make a preset for these settings.
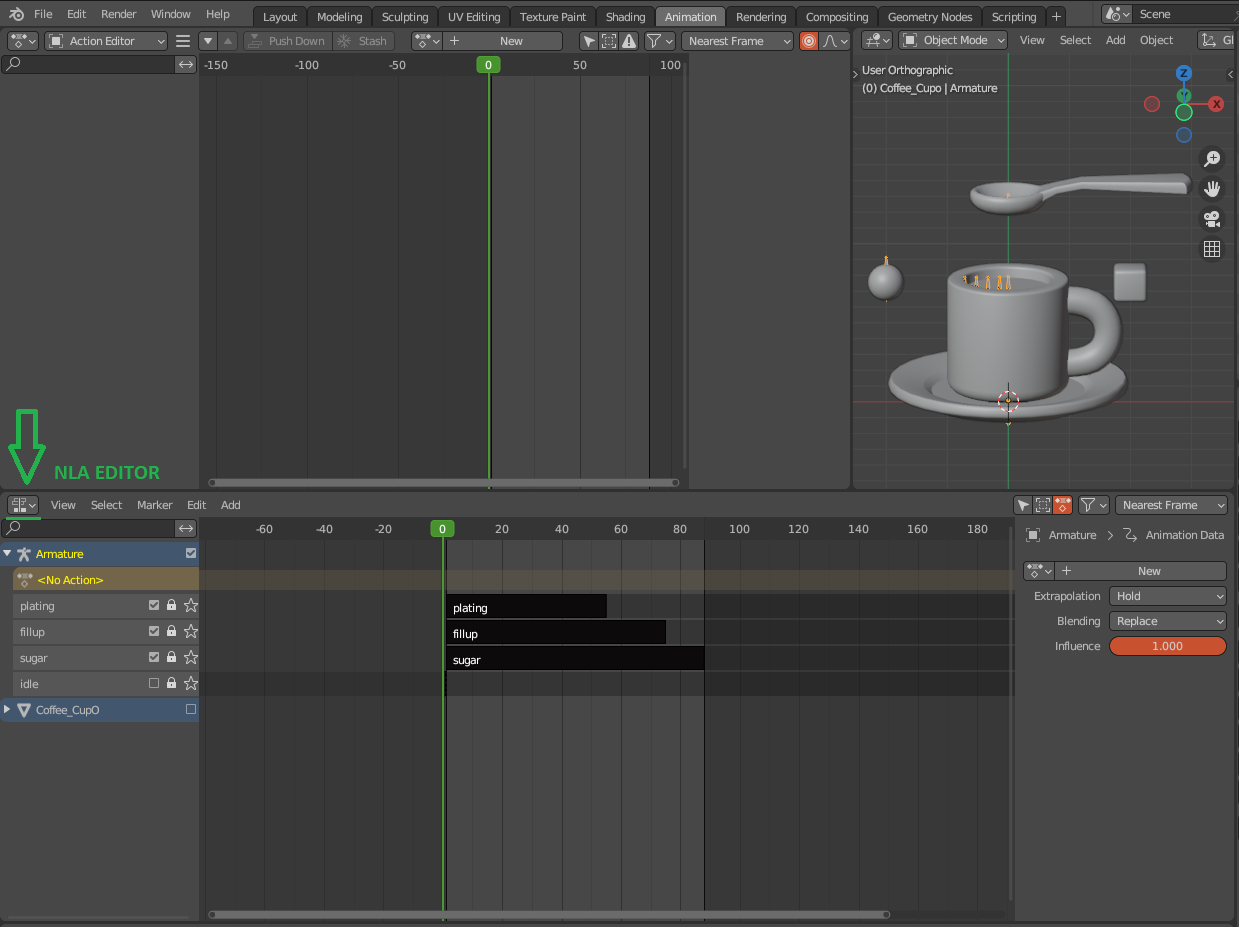
Export the mesh and rig to a folder in your 3d project. Next we will move on to the animation exports. A brief description of animation in blender- each animation is setup as an action which you can use the action editor to edit/create these animations. Then the animations actions are stashed into NLA tracks. Each Action can be edited/tweaked when needed by activating them in the action editor. For exporting we will use the NLA editor. Editors are shown here:
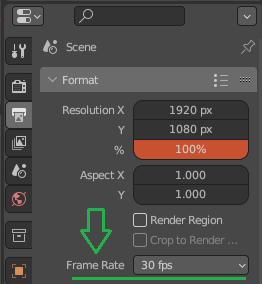
Something to also note is that glTF exports animation playback speed as fps and should be set in blenders output properties > Frame Rate.
** Heed This Warning ** Before exporting the animations its important to make sure to backup your blend file before taking the next steps. The reason why is because glTF exports all actions in the NLA editor and in defold we can only use one animation per file. So this means the next steps we take will be to remove actions other than the single one we are exporting and if you accidentally save the blend file while the actions are not stashed in the NLA editor then if you closed blender you would lose the animations because blender will clean up unused action data-blocks by default. If that did happen you could try to restore to previous backup as blender does make backup files. Making backups of your work before exporting you will insure not losing anything from mistakes.
Ok lets get to exporting an animation. In my coffee cup project I have 4 animations to export and I will begin with the “plating” animation. Starting off by only selecting the skeleton armature then in the NLA editor Shift + Selecting all the actions other than the one I want to export.
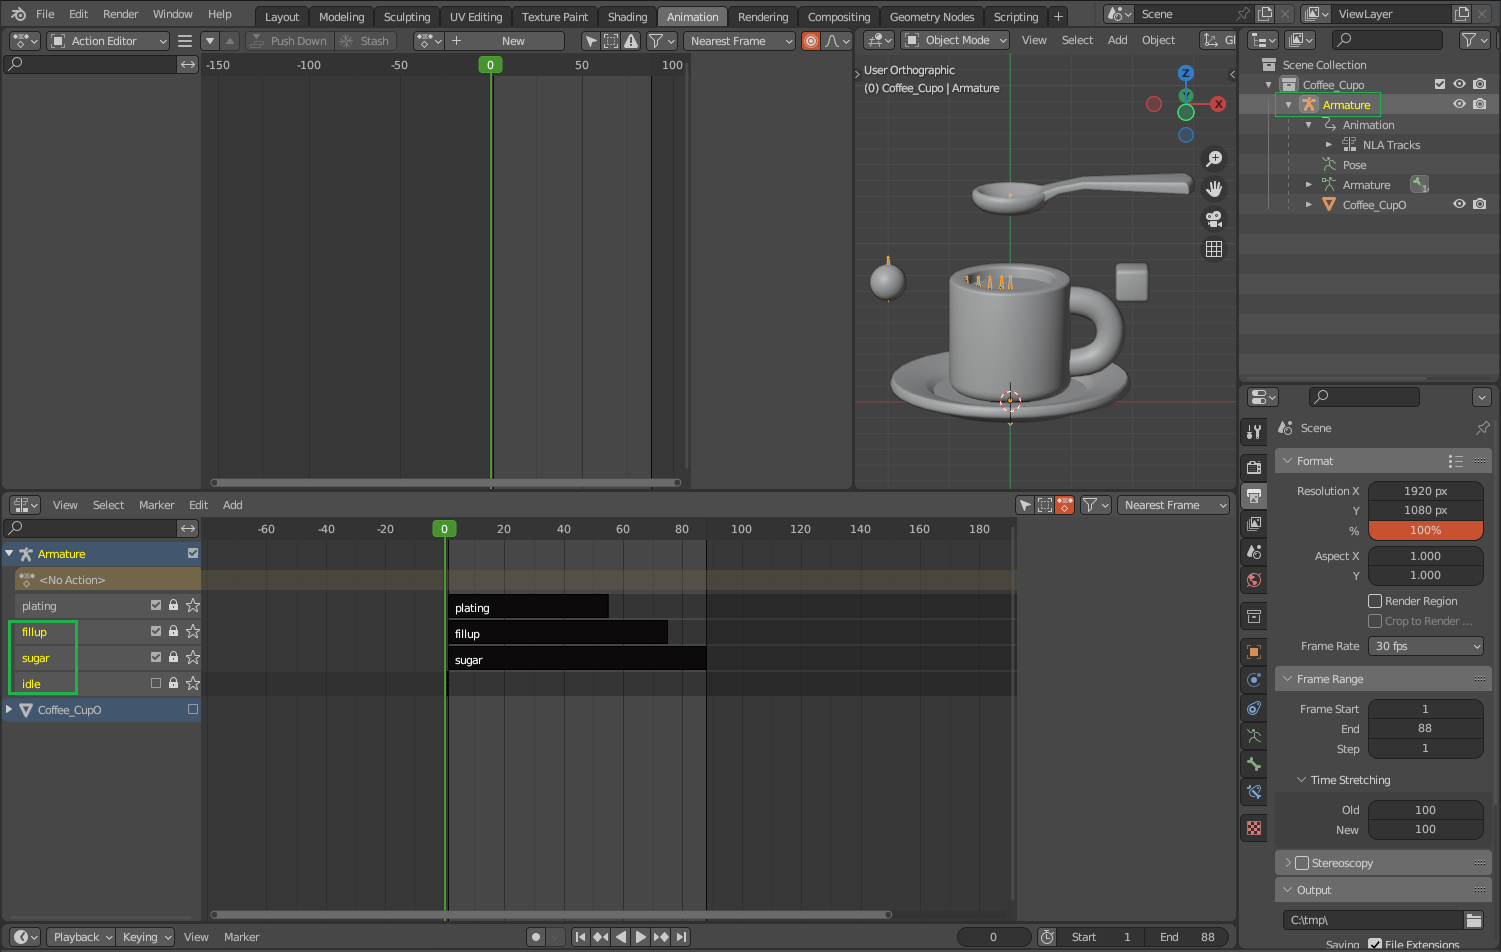
Then press X or the Del key to remove the selected action tracks. Now we should be left with one track that we want to export, lets do it. As before we go to ( File>Export>glTF 2.0 ) and we keep the same settings except this time we will tick the animation section and change some things.
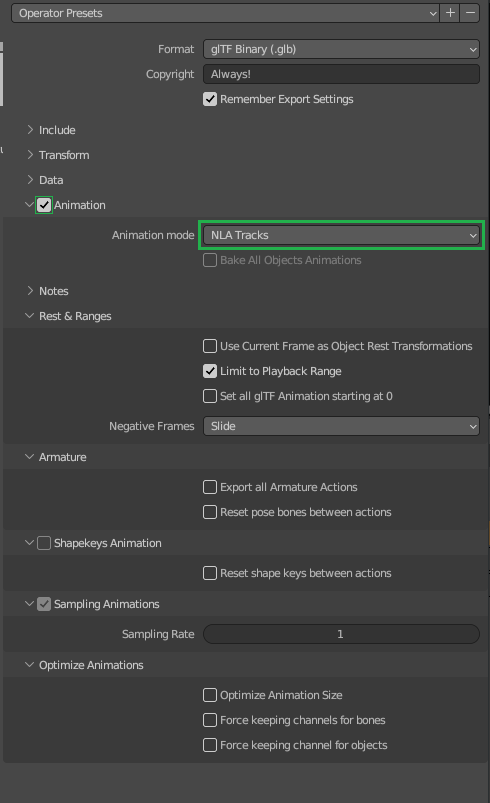
- Change the animation mode to NLA Tracks
- Limit to Playback Range (set in timeline). I also set manual range in NLA track properties for each track.
- Enable sampling
- For the optimization settings you can use some of these depending on your project specifics. Removing duplicate keyframes may create smaller file size but you will be loosing those keys.
- Force Keeping channels for bones; this may be handy if some channels are not being used in the animation yet the channels are keyed.
Now export the animation to your project. So for any other animations select the armature only and repeat the same steps and settings as before. So now we should have all the exports ready for defold.
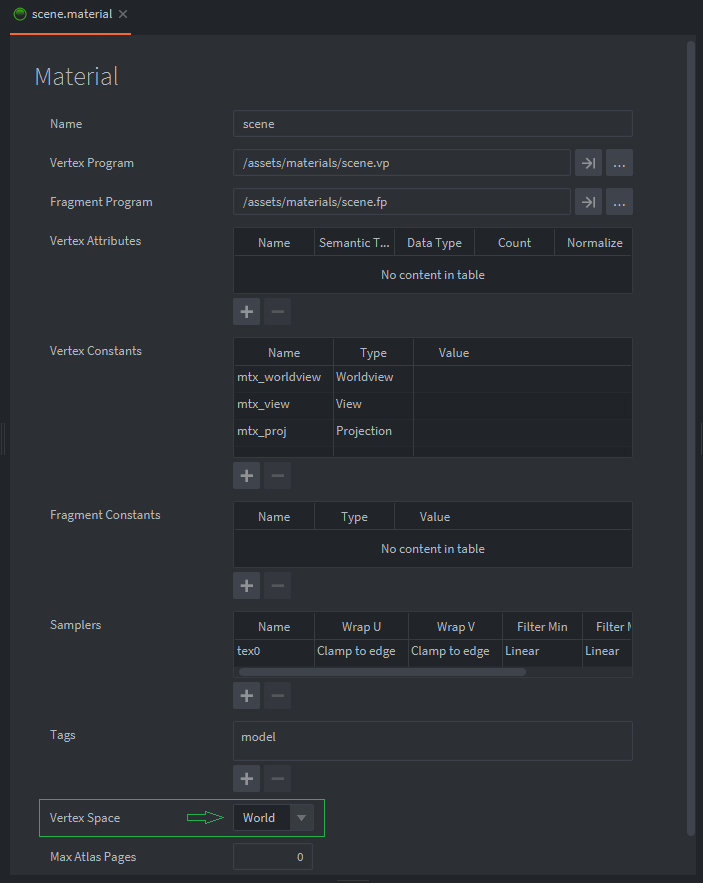
You’ll want to have a 3d project started in defold if you didn’t already and bring those exports in. If you do not already have one started the basic3d template can be chosen in the NEW PROJECT section when launching defold. Now one thing we need to do is create a material for our animated model. As previously stated we need our material vertex space to be set to world. If needed we can copy the model material from the builtins.
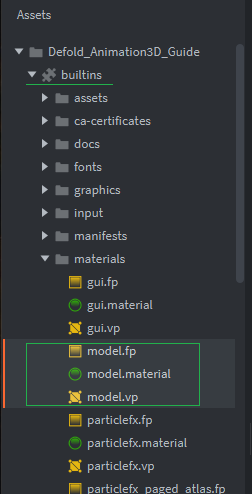
Copy and paste it into your project then make sure to change the vertex space to “World”.( This material uses diffuse lighting in the shader and may not fit your project. I provided an example project below with unlit material/shader if you need it. )
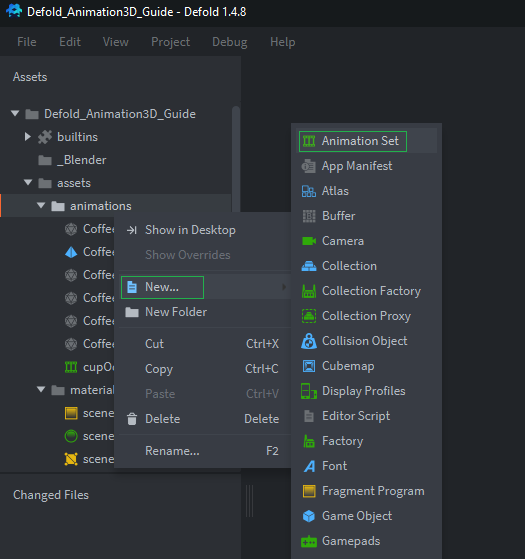
Next we create an .animationset file by right-clicking in the Assets pane.
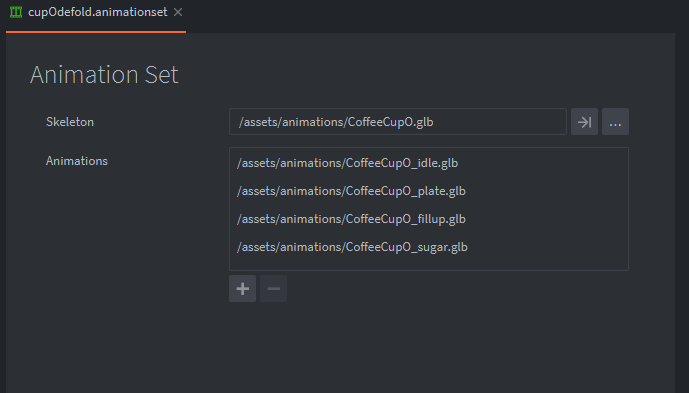
In this file we set the first export we created of the mesh and armature in the Skeleton section. Next We add all the animation exports to the Animations section by pressing the + button for each of them.
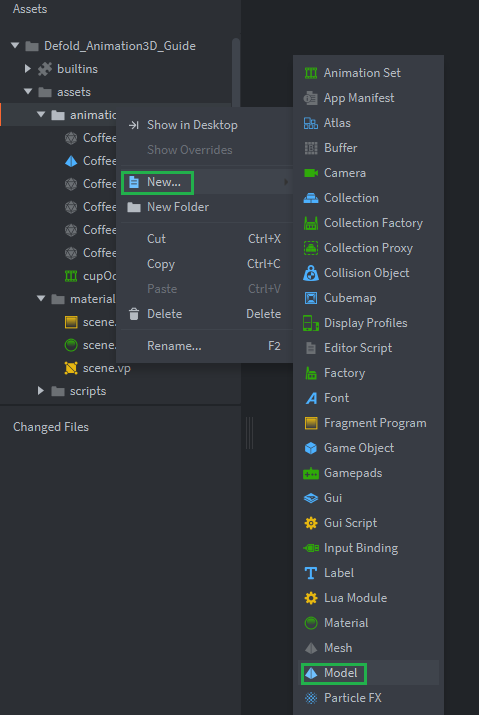
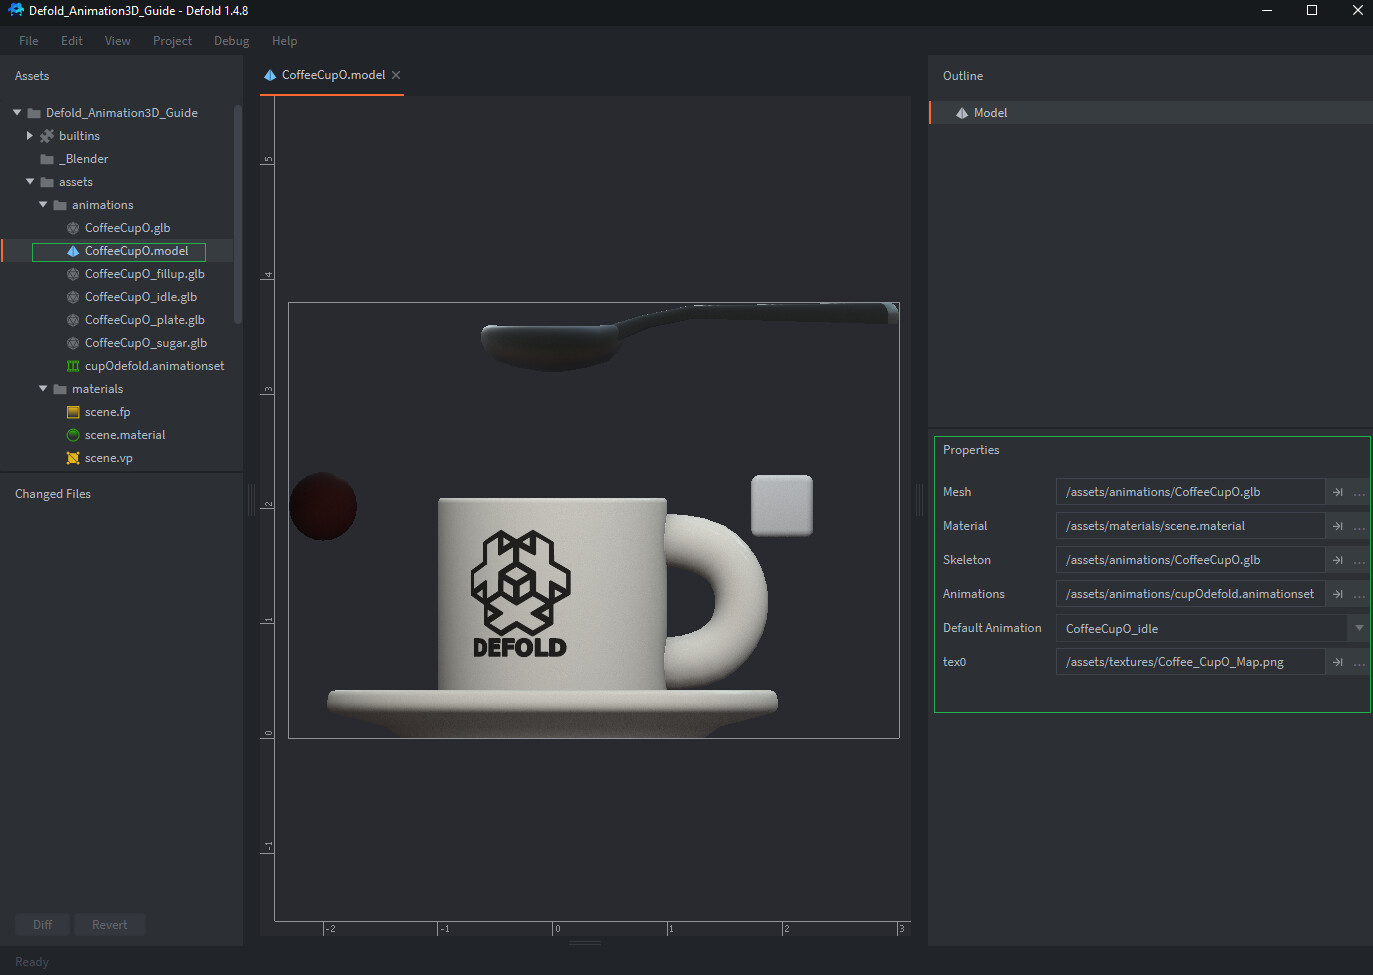
Now we need to create a model by right clicking in the Assets pane and choosing model.
Then open it up, in the properties pane we can set the mesh and skeleton to the first export we created. Next add the material we created. Then in the Animations here we apply the .animationset file. It’s up to your project to choose a default animation or not and of course in the tex0 slot we can apply our models texture.
The model is now setup for animation and you can add this model to a collection. The animation can be played using model.play_anim() api for this can be found here: Model API
I created a sample project showing how its all setup and included the blender file which can be found in the docs/_Blender folder.
Please reach out if you have any suggestions or find any errors.
Cheers!~ ![]()