Recently spending time exporting animation from Blender has been a little time consuming and sometimes frustrating. Once I learnt what I needed to be doing I managed to get animation working perfectly fine.
This post is not a “all encompassing animation tutorial”. But, it will include:
- How your blender objects need to be structured
- What modes you need to export from and why
- How to setup the settings on the DAE export
- How to setup the incoming DAE object in Defold
Please reference these excellent posts about animation as well. Hopefully this will be an additional guide of info to expand the knowledge of this process.
Defold 3D resources:
https://github.com/yeqwep/Toufu-3D-project
I hope the owners dont mind these cross posts.
You have Built a model in Blender
Ok, what now. Lets make sure the model you have built has the right structure and properties. What you need in your model:
- 1 material
- 1 mesh
- 1 bone root
- 1 or more animation actions (only 1 usable from each file export).
Further discussion is available here:
Specifically that the material export is not important for Blender. Because you set the material in Defold model component properties.
A sample structure looks like this:
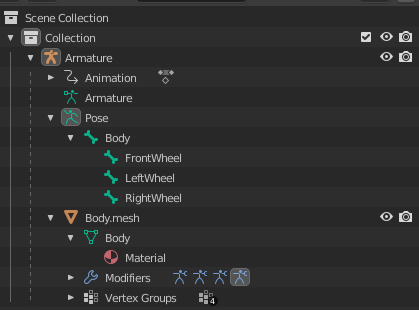
Note: the material is located in the mesh. If you want animation you will also need vertex groups for skinning vertices to the bones.Also note that the Pose contains multiple bones that influence the skin vertices. But we are getting ahead of ourselves.
Once you have a structure like this, you need to do two more things.
1. Bake animations.
Note: Based on discussions on the discard messages (above) with @NERDFIGURE Baking is apparently not necessary to do.
Update confirmed what @NERDFIGURE points out. Although, I have had to bake a couple of times, so Im not sure what Blender is doing to make this necessary.
This will generate animation frames that are exported. As mentioned in the other references select your bones while in “Pose Mode”
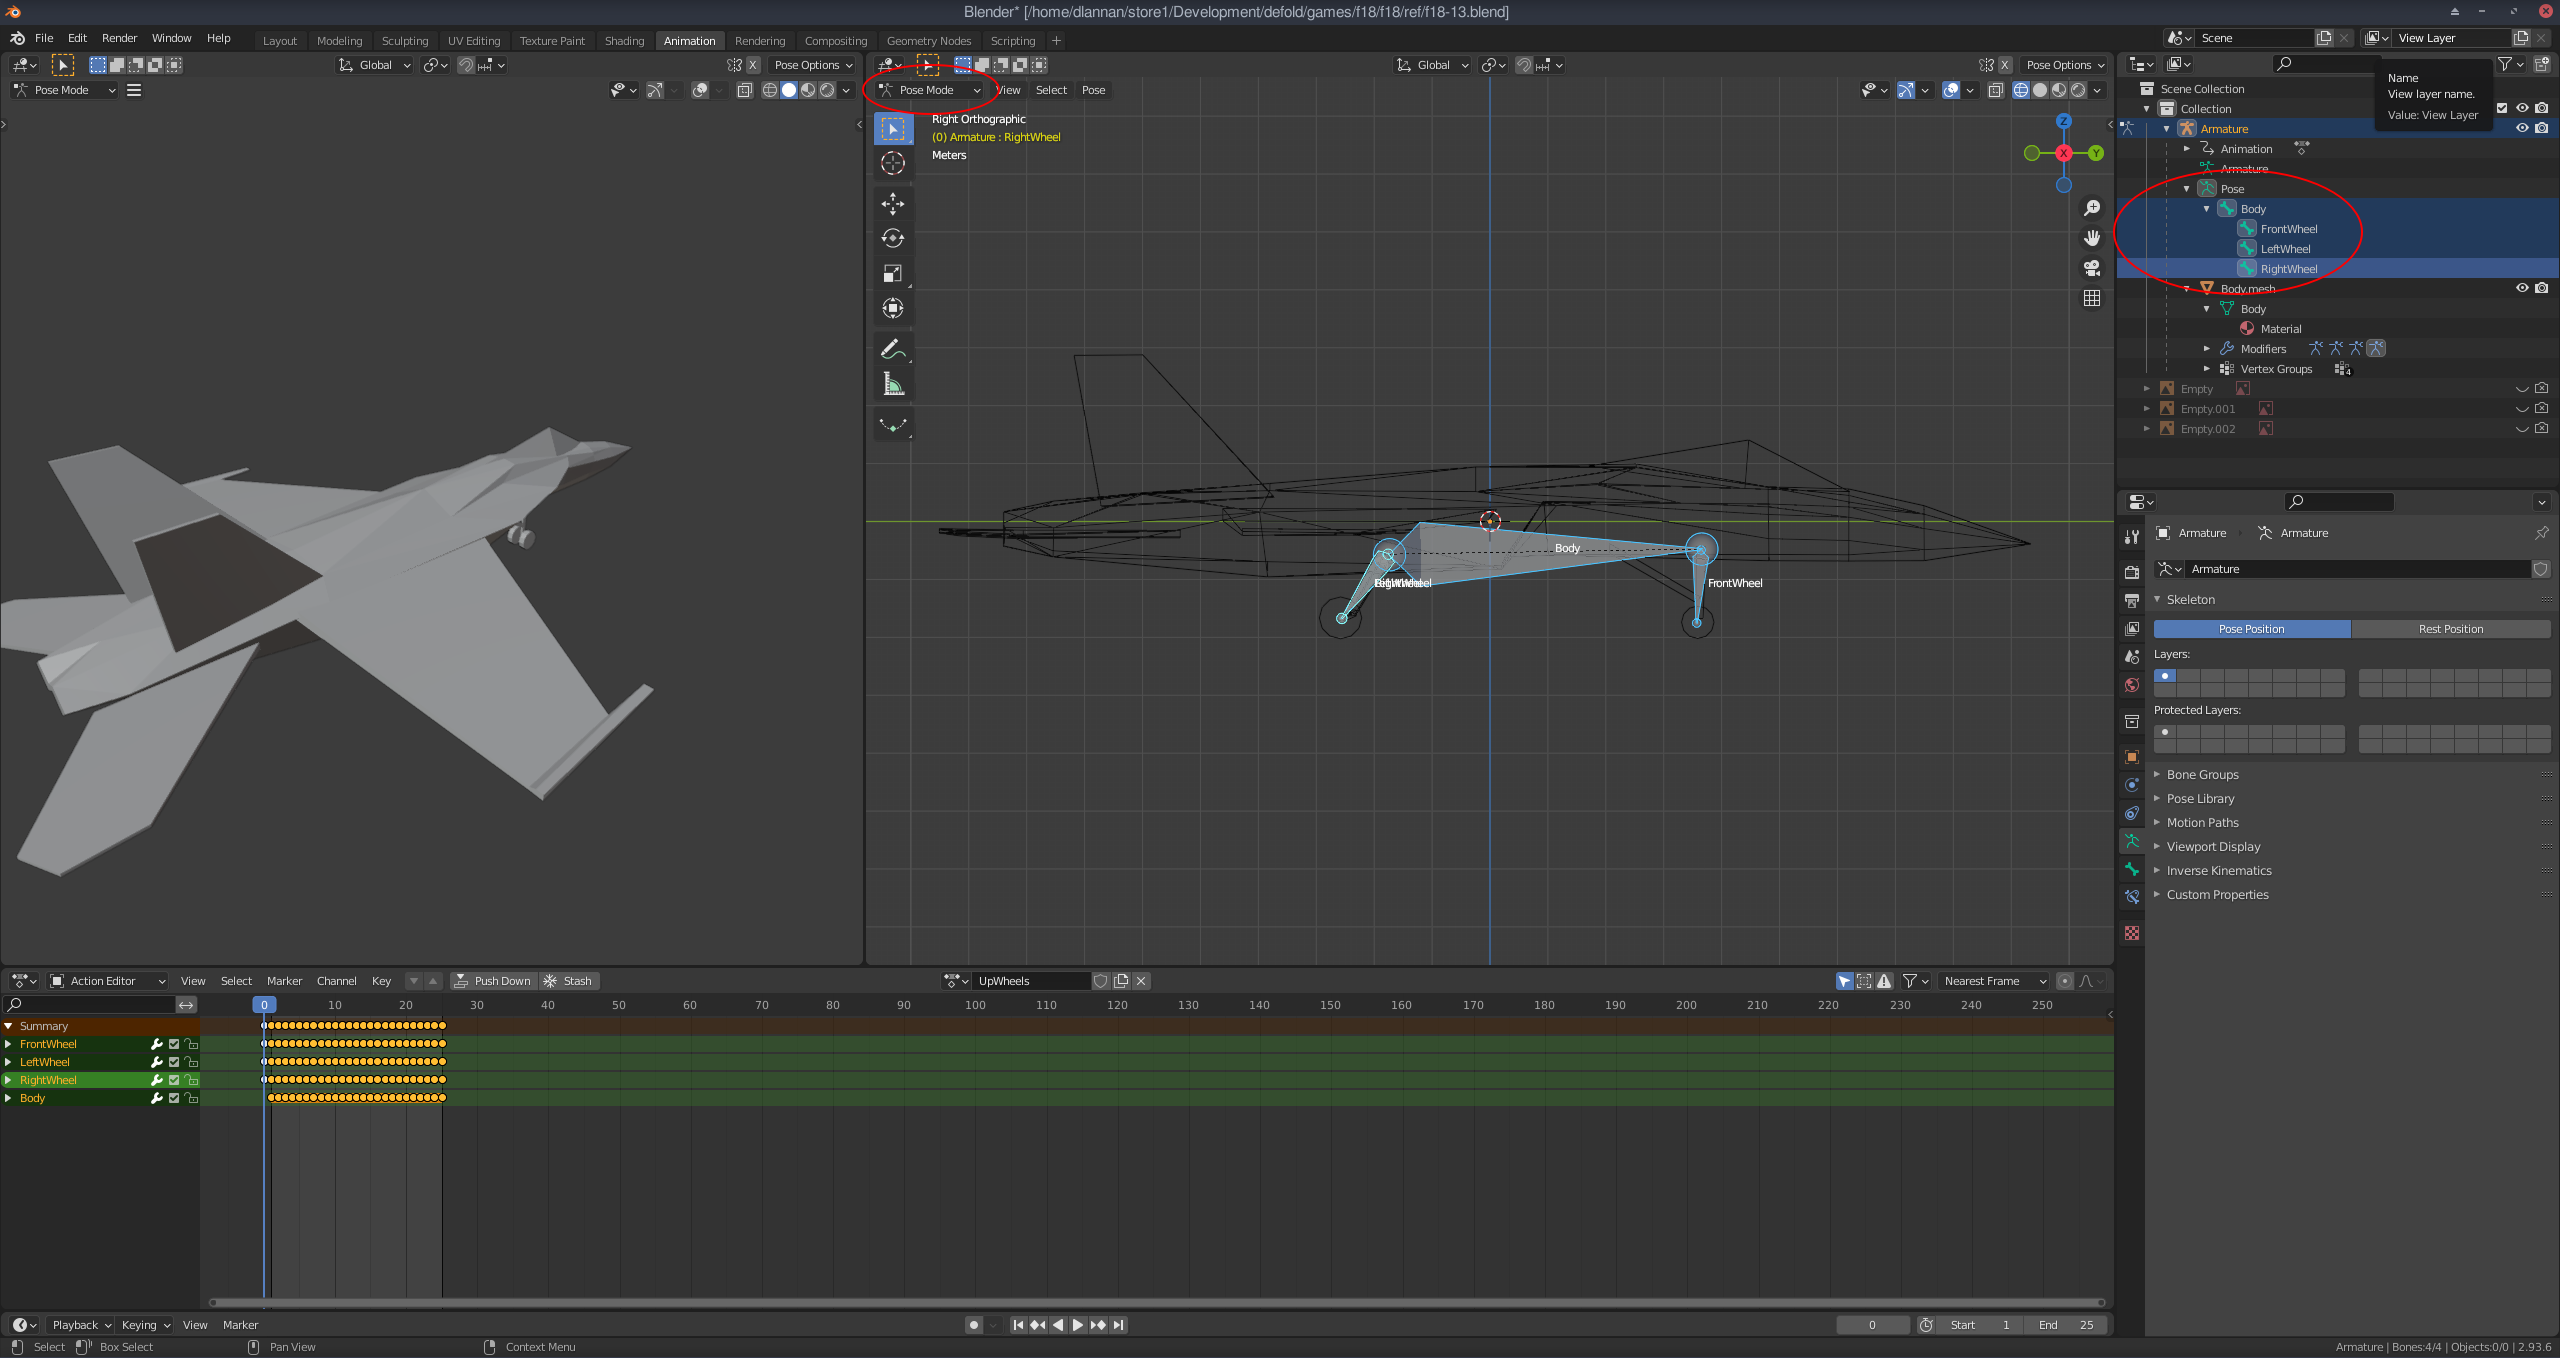
Select the menu operation: Pose → Animation → Bake Action. A popup window should appear.
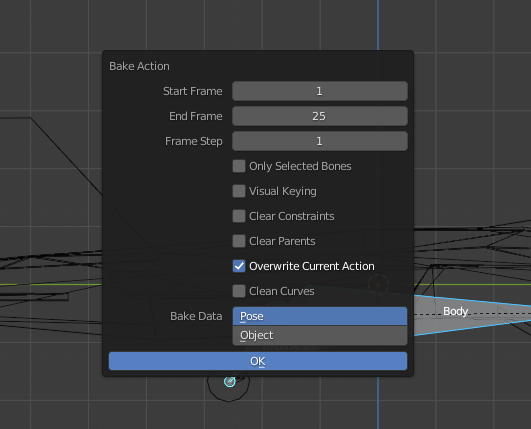
- Ensure you select the amount of frames you want.
- Tick only “Overwrite Current Action” (or you will end up with a new action generated each time)
- Choose “Pose”
And then click ok. You should see a little notification from Blender at the bottom of the screen saying that a number of objects were baked.
2. Check and Export
Check there is only one material, one mesh and one bone before continuing. Also your animation dope sheet should have a key on every frame (as above).
Make sure you stay in Pose Mode when exporting - this is primarily for animation. For normal meshes (static) you can export from Object mode.
Update: You do not need to be in Pose mode as some people have mentioned to me. This is tested to be the case, but you need to be careful when selecting your export objects for dae.
Always make sure you select the Mesh Object and the Armature Object before exporting, and make your you specify “Export Selected” when doing so. This works in Object Mode.
You can export in Pose mode if you want also.
Select the mesh and the pose objects.
Select File → Export → Collada (Default) dae
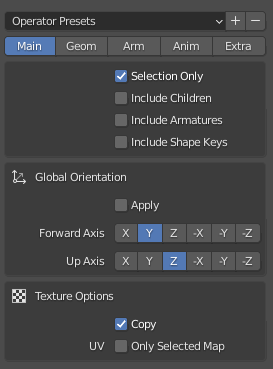
Exporting settings
The Export settings panel will appear and you should set the panels like so (also shown in other reference links). I made a preset so I didnt have to remember the settings ![]()
Main:
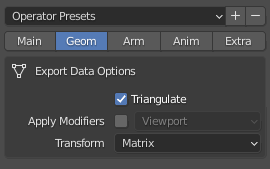
Geom:
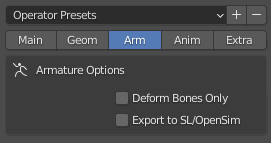
Arm:
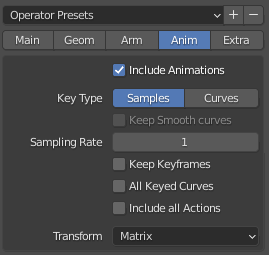
Anim:
Extra:
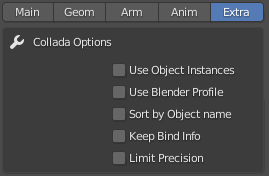
Once these are set, choose a filename and press the “Export COLLADA” button.
Export Summary
[ PREVIOUS SUMMARY REMOVED - NOT RELEVANT NOW]
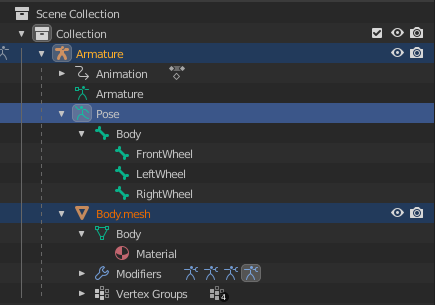
When exporting make sure you have the Mesh Object and Armature Object selected in Object mode. In Pose mode make sure you have the Mesh Object and the Pose Object selected.
This means, Defold doesnt seem to recognise the structure when you load in the dae (fails to load the file).
Also, make sure your Root bone connects “spatially”. Unconnected bones seem to have undefined transform behaviors when loaded in. Anim works fine, but the sub bone origins are not kept.
Defold Import
To import the DAE file create a new Game Object (go) to be used as the main node for your model.
Then add a model component to the game object. You should have a Defold Properties panel like below.
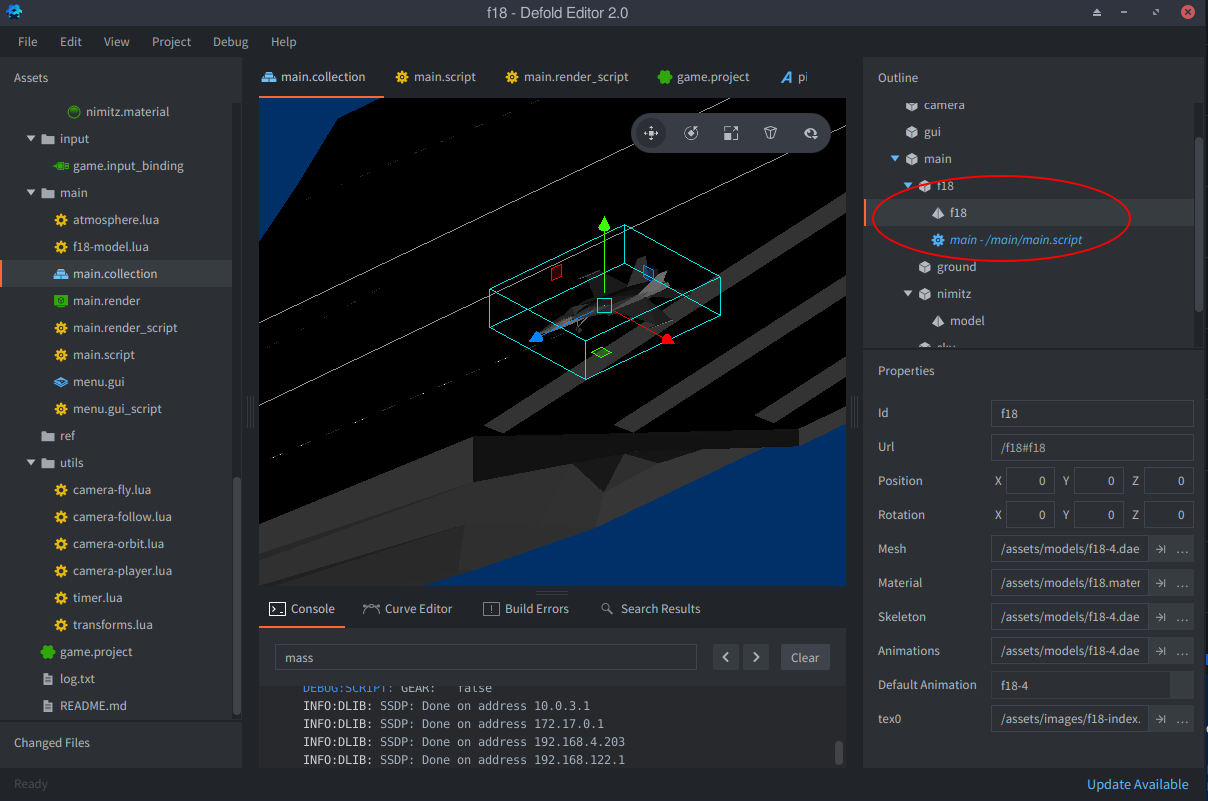
Then set each of the model properties Mesh, Skeleton and Animations to the DAE file you exported.
Make a material and assign the texture image you used in blender.
Select the Animation that you want to use as default as well.
Script
To use the animations I use the one of the methods described in the Defold Animation link.
Add the following to your init function in the script attached to your game object with the model.
Note: self.f18 is the string name for your model ie: “/f18#f18”
model.play_anim(self.f18, "f18-4", go.PLAYBACK_NONE)
This should prep the anim for the mode.
Then during update or events or messages I use:
go.animate(self.f18, "cursor", go.PLAYBACK_ONCE_FORWARD, 1, go.EASING_INOUTQUAD, 3)
This plays my animation forward to the end (1) over a 3 second period. The landing gear on the f18 goes up!
To play the animation in reverse, dont use BACKWARD
go.animate(self.f18, "cursor", go.PLAYBACK_ONCE_FORWARD, 0, go.EASING_INOUTQUAD, 3)
Which makes the landing gear go back down again.
You should now be able to animate your 3D however you want!! ![]()
Thanks to all the authors of the docs and forum posters. Its very rewarding to see that little f18 doing is thing ![]()
Happy Holidays!