Bladeball - Devlog and tutorial by beginner

Hi, I am planning on making a series in which I will show how I made the game step-by-step.

Since I am also a beginner with very little experience in coding and making games, this series will be perfect for those who have just started out like me.
I’ll go over the various issues I’ve had and the confusion I’ve experienced while trying to learn how to code.
I will also discuss art and game design.

Do note that I am a beginner, so everything I wrote may not be good examples, especially the codes.

There are also posts on my Ko-Fi divided into chapters so everyone can follow along easier:

13 Likes

The Game:

Its resolution will be 128x128 pixels.

And there are multiple levels, traps, enemies, and a boss fight.

I am not sure about the goal and theme of the game yet, but that will come later, when I finish coding the game mechanics.

There will be a post about this in the future.

For now, the title of the game will be Blade Ball.

Because the player will use a wooden blade and ball to attack enemies, this name might change when I have better name ideas.

Blade:

The blade does not deal damage to enemies because it is made of wood, but it can be used to knock them back.

Its primary function will be to hit the ball and cause it to bounce more times.

Ball:

The player can create a magic ball that can bounce when it collides with a wall or the player’s wooden blade.

Unless you upgrade, there can only be one ball on the screen at a time.

Each time it bounces, the ball will become faster and deal more damage.

But it will explode when it hits an enemy.

This mechanic can be used by the player to one-shot bosses.

But I believe this will not break the game experience because this will require some skills since the ball will move very quickly. In fact, I had several upgrades planned to make it simpler for the player to take advantage of this mechanic.

Player:

You will have a health bar to take damage from enemies or traps.

Also, you can dash to avoid enemies or position yourself to hit the ball again to increase its damage.

Upgrades:

Each time you kill an enemy, you will gain some experience.

When the experience bar is full, you will be rewarded with an upgrade.

I will try to make these three types of upgrades ( that I made up):

Effect: Give the ball an effect like making enemies frozen, bleeding, poisoned, etc.

Stats: Change the ball’s stats like speed, damage, or even its size.

Special: For instance, when a ball bounces, it may discharge tiny balls or pierce foes rather than explode.

14 Likes

Awesome, keep it up! I really dig your artstyle :slight_smile:

6 Likes

Thank you a lot :grinning_face_with_smiling_eyes:

4 Likes

Create the project:

Okay, when you launch Defold, click on the New Project button and choose the Empty Project tab.

You can rename the game by retyping the words in Title (2), and you can set the game file location by clicking the three dots (3) next to Create New Project.

Make sure you set the location in an empty folder.

And then click “Create New Project,” of course.

Setting up the folders:

Having a folder structure will help keep your game more tidy.

I will make three folders called: graphics, scripts and sounds.

Because this is a small project, I believe the three folders listed above will suffice.

There is another way of organizing that I know of, like this:


where you set everything related to the player in a Player folder, and you can do the same thing with enemies, maps, or items.

Or you can combine both methods somehow.

7 Likes

These steps are super basic for most of everyone here, but because this is a step by step tutorial so I still made this.

Adding Images:

When you want to add an image to the game. Your first step is to create an atlas.

  • Atlas is an image containing multiple smaller images, this should be the same as a spritesheet.
  • Atlas can also help you optimize your game’s performance.

So I will right-click in the graphics folder and create our first atlas.

I will name it to player

Then you can drag all the images in the Graphics folder

  • Don’t try to drag them into atlas, (4) was to show that I change the atlas name to player.

Now you can actually add images to the atlas.

I added the sprite of our player, and we will have something like this.

You can see the border around the sprites, it turns out that is to prevent texture bleeding.

From what I found in Google Images, texture bleeding may look something like this:

One of them had to be correct.

So you would want to leave it there. This is only visible because I use a very small sprite.

Adding Game Objects

Now you need to double-click “main.collection,” and on the right side of the screen you will see the collection tab.

  • A collection is a file used to structure your game. They are typically used to structure game levels, groups of enemies, or characters built out of several game objects.

Just follow all the steps, and we will have our first game object.

  • GO is short for game object.

  • Game object is used to contain components, like sprite, sound, etc…

You need to double-click the three dots in Image to choose the resource for our sprite.

Also change the default animation, there is only one option for now, so you can’t get it wrong.

You will notice the sprite is extremely blurred. To fix it we will need to go to the “game.project” > graphics.

Change both the min and mag filters from linear to nearest. This should give you a pixel-perfect image.

On my other screen, the sprite is still slightly blurry when I build the game, checking the High DPI option fixed this.

And now we have this.

8 Likes

I just realized that posting the tutorials on the forum might not be the wisest choice. Because the majority of active users on here have most likely been using Defold for years, and very few are new.
I planned that after having a playable game, I would upload the project to Itch io and continue the tutorial there.
Hopefully, it would attract new people to the engine. And this tutorial can help more beginner in making games.

2 Likes

I think this is a great place for tutorials. You’ll also find that as people answer questions, they’ll sometimes link to relevant threads for extra context. If someone asks about a tutorial for example, your thread might be linked. :slight_smile:

3 Likes

That would be awesome :grinning_face_with_smiling_eyes:
In the future, I’ll continue to make tutorials here, but I also want to post one on Itch to see how that goes.

3 Likes

Your tutorials are great, detailed and provided in an affordable and visually attractive manner! :heart_eyes:

You can definitely try posting them everywhere possible :wink:

1 Like

I appreciate it :grinning_face_with_smiling_eyes:

Some changes:

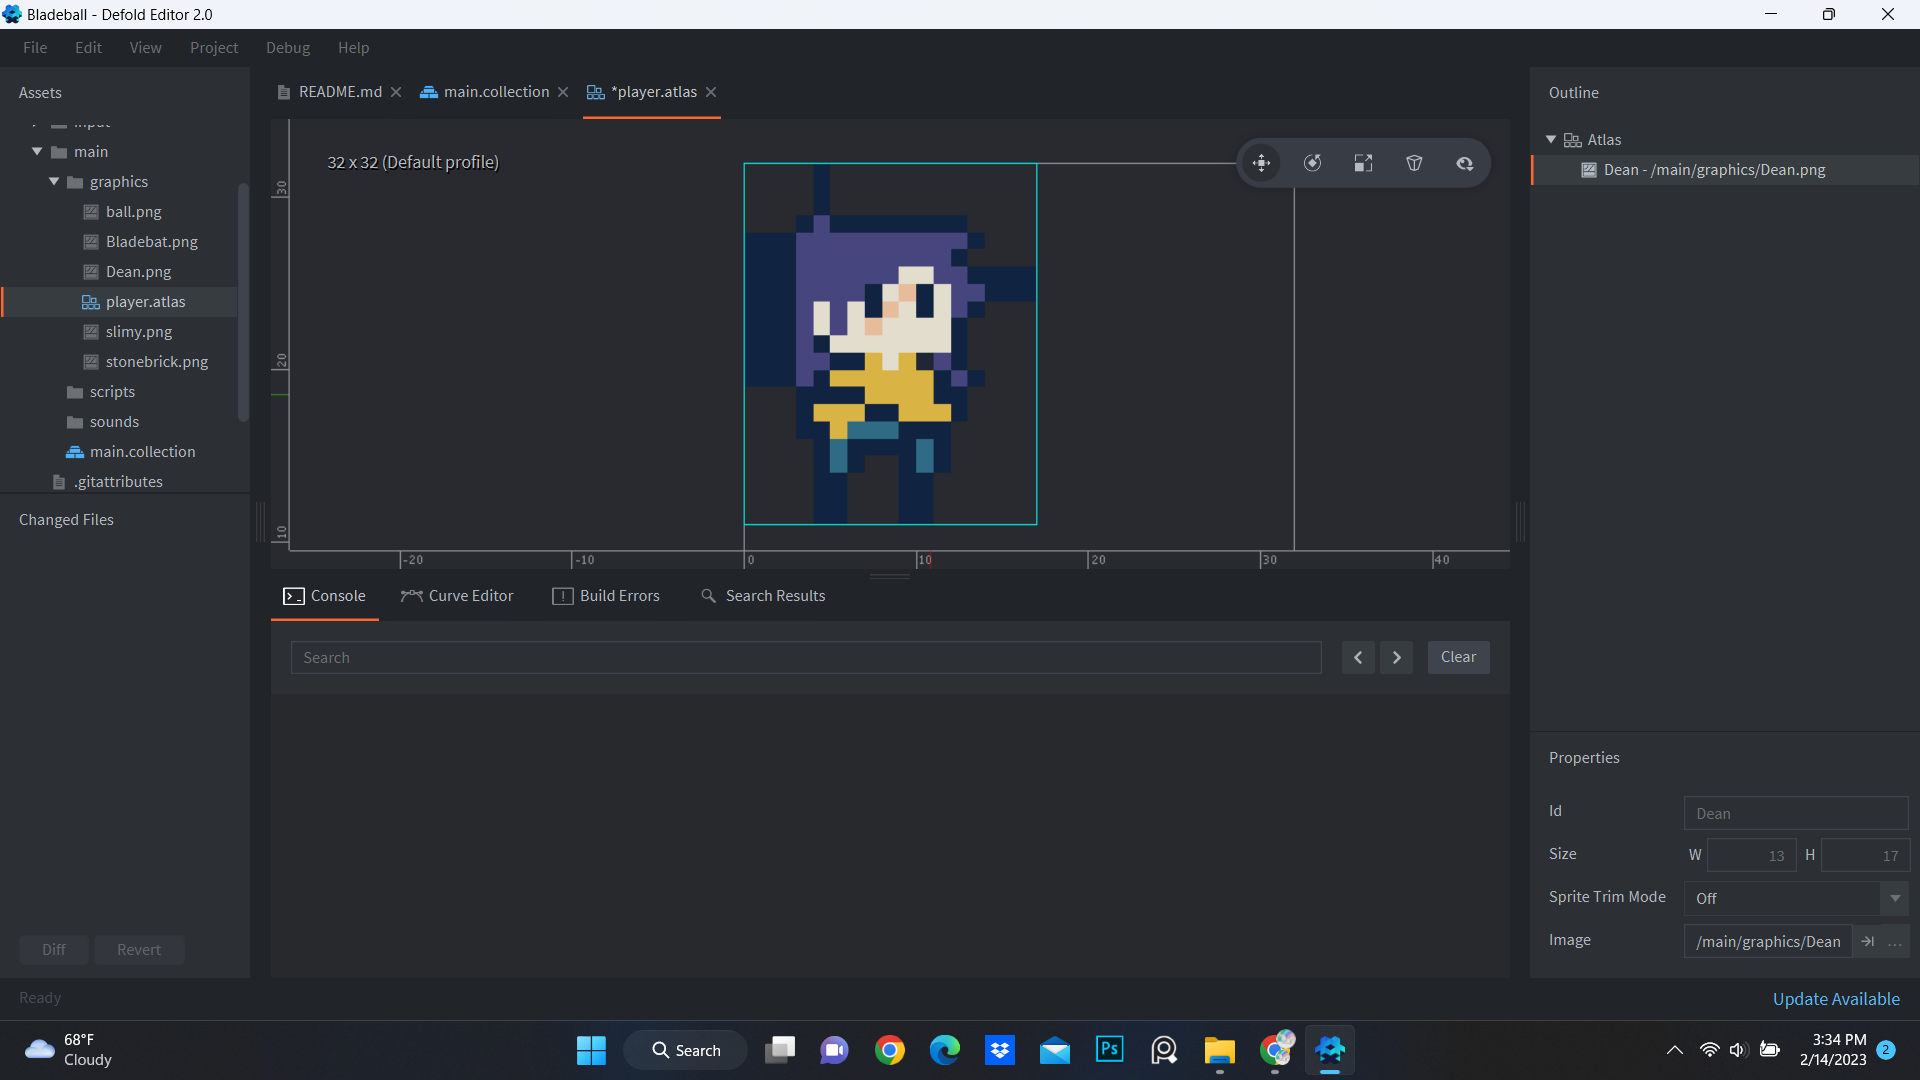
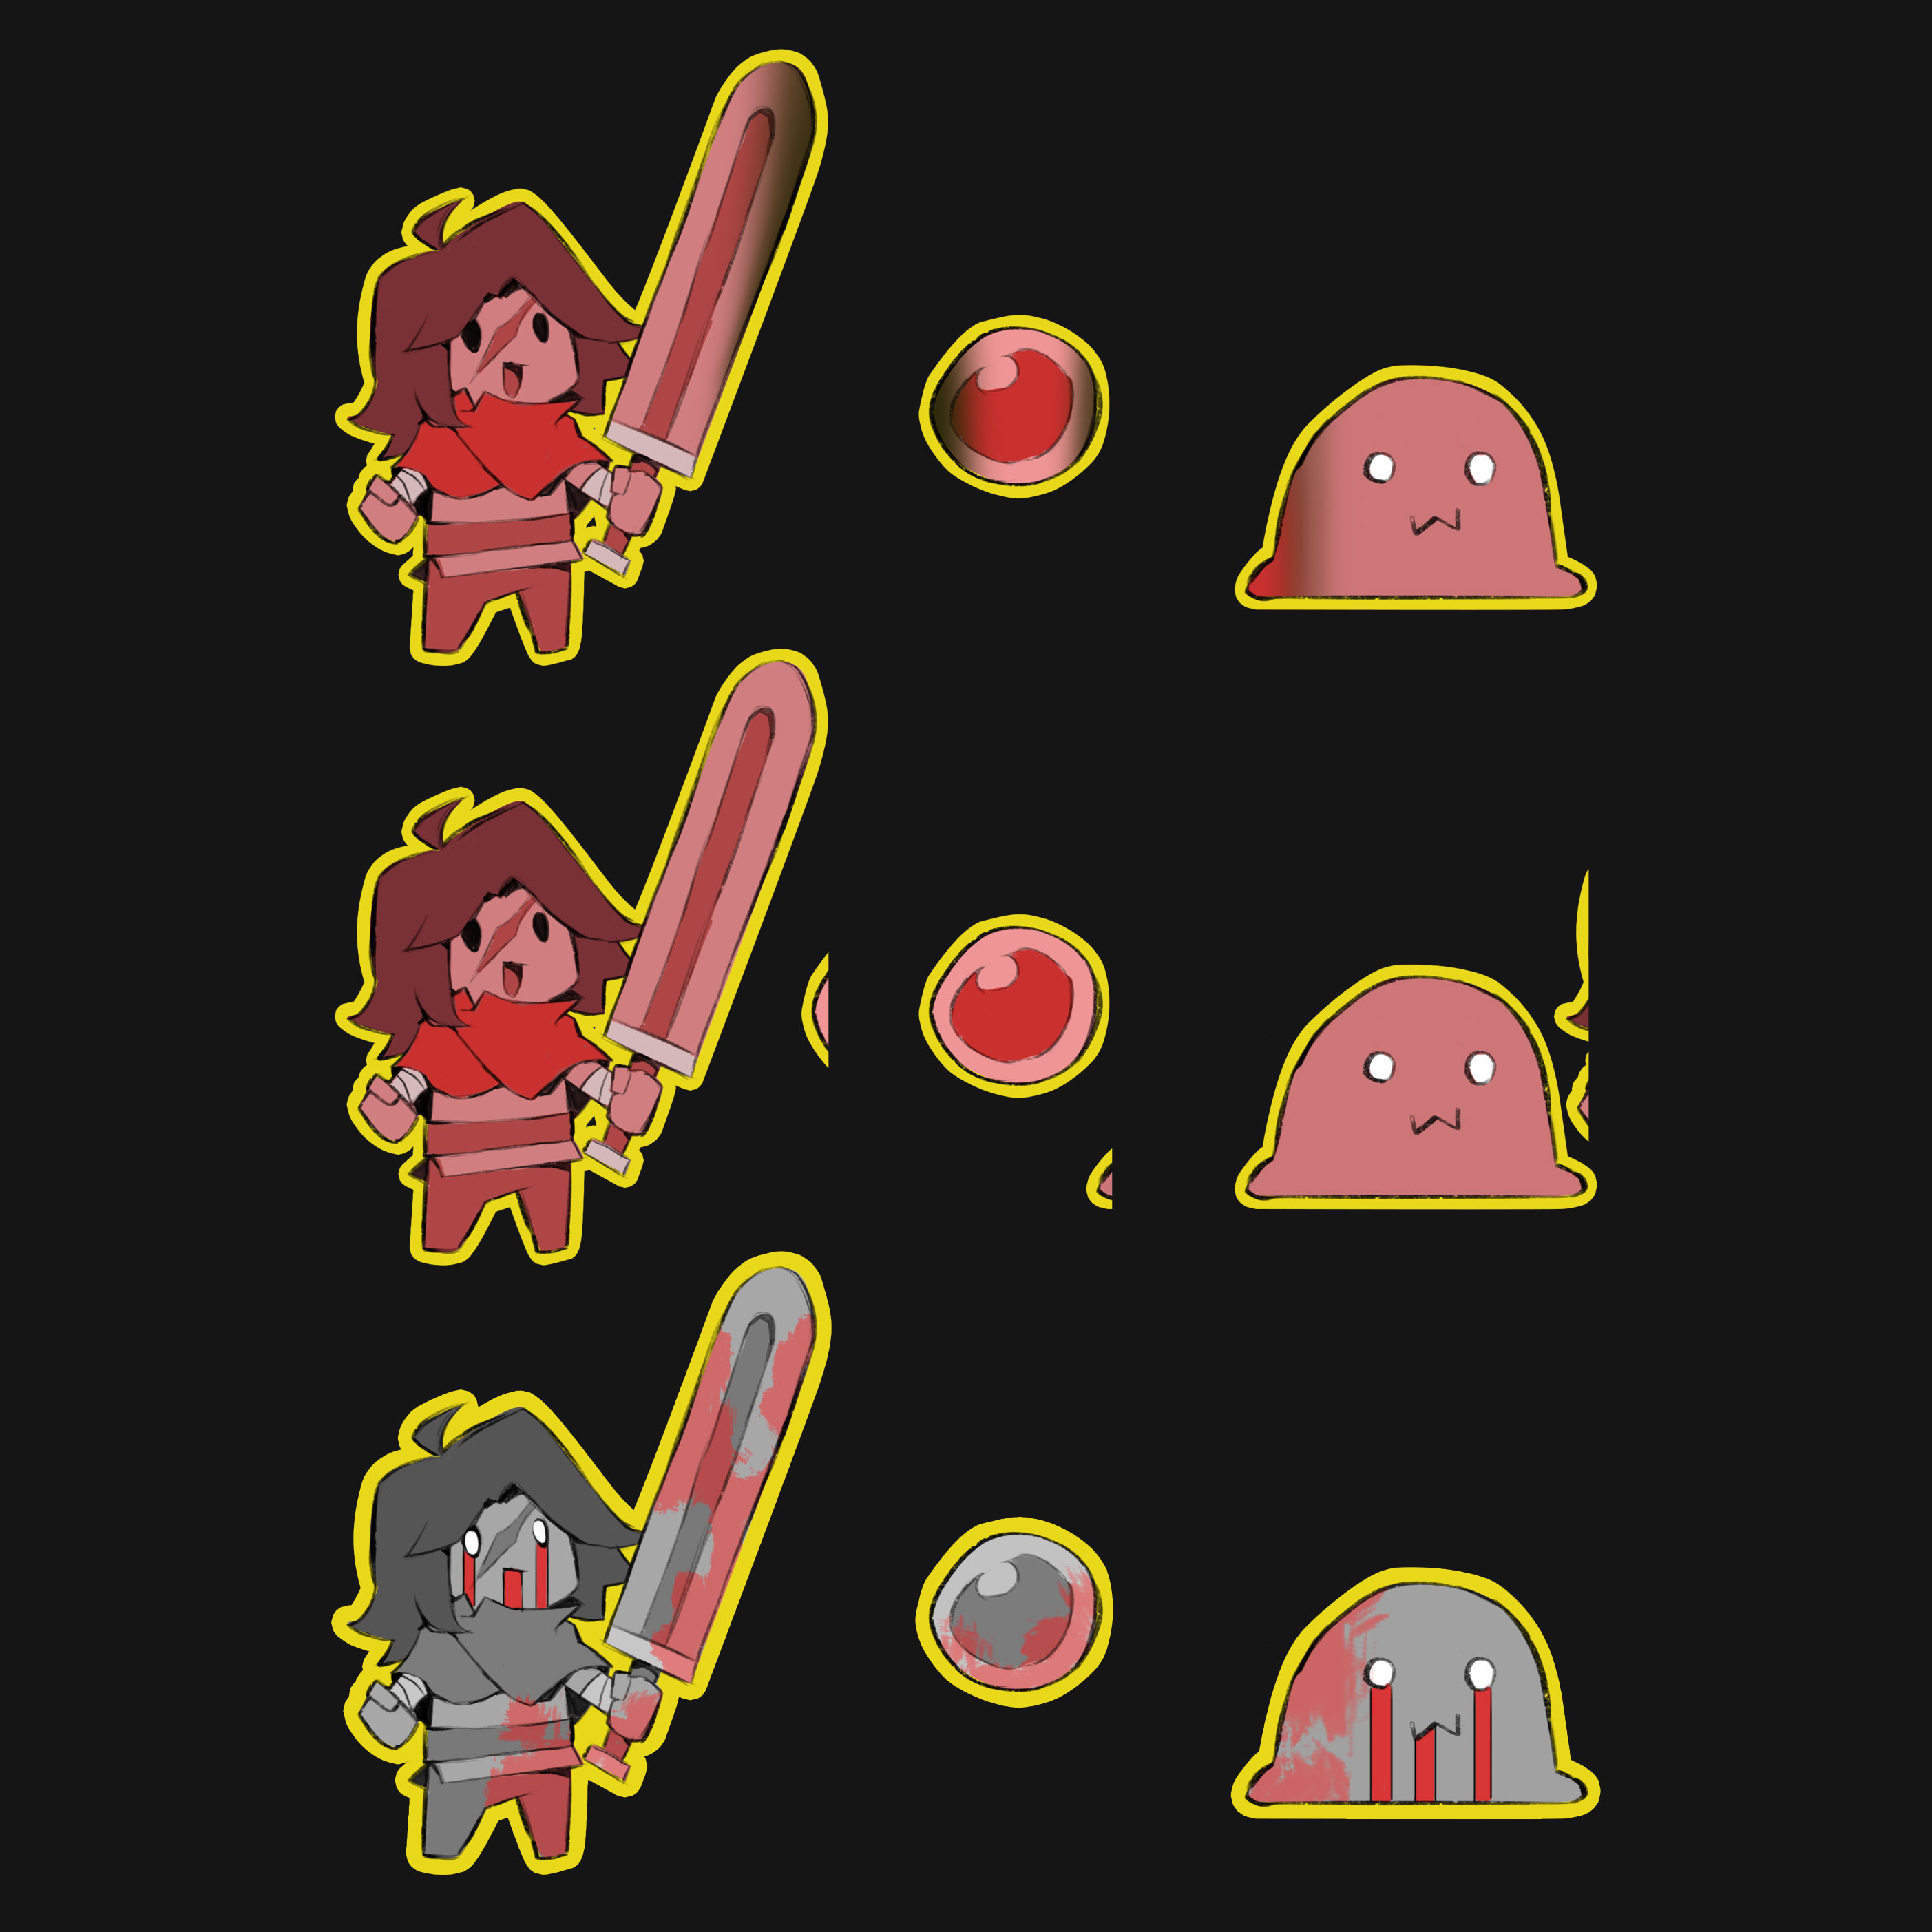
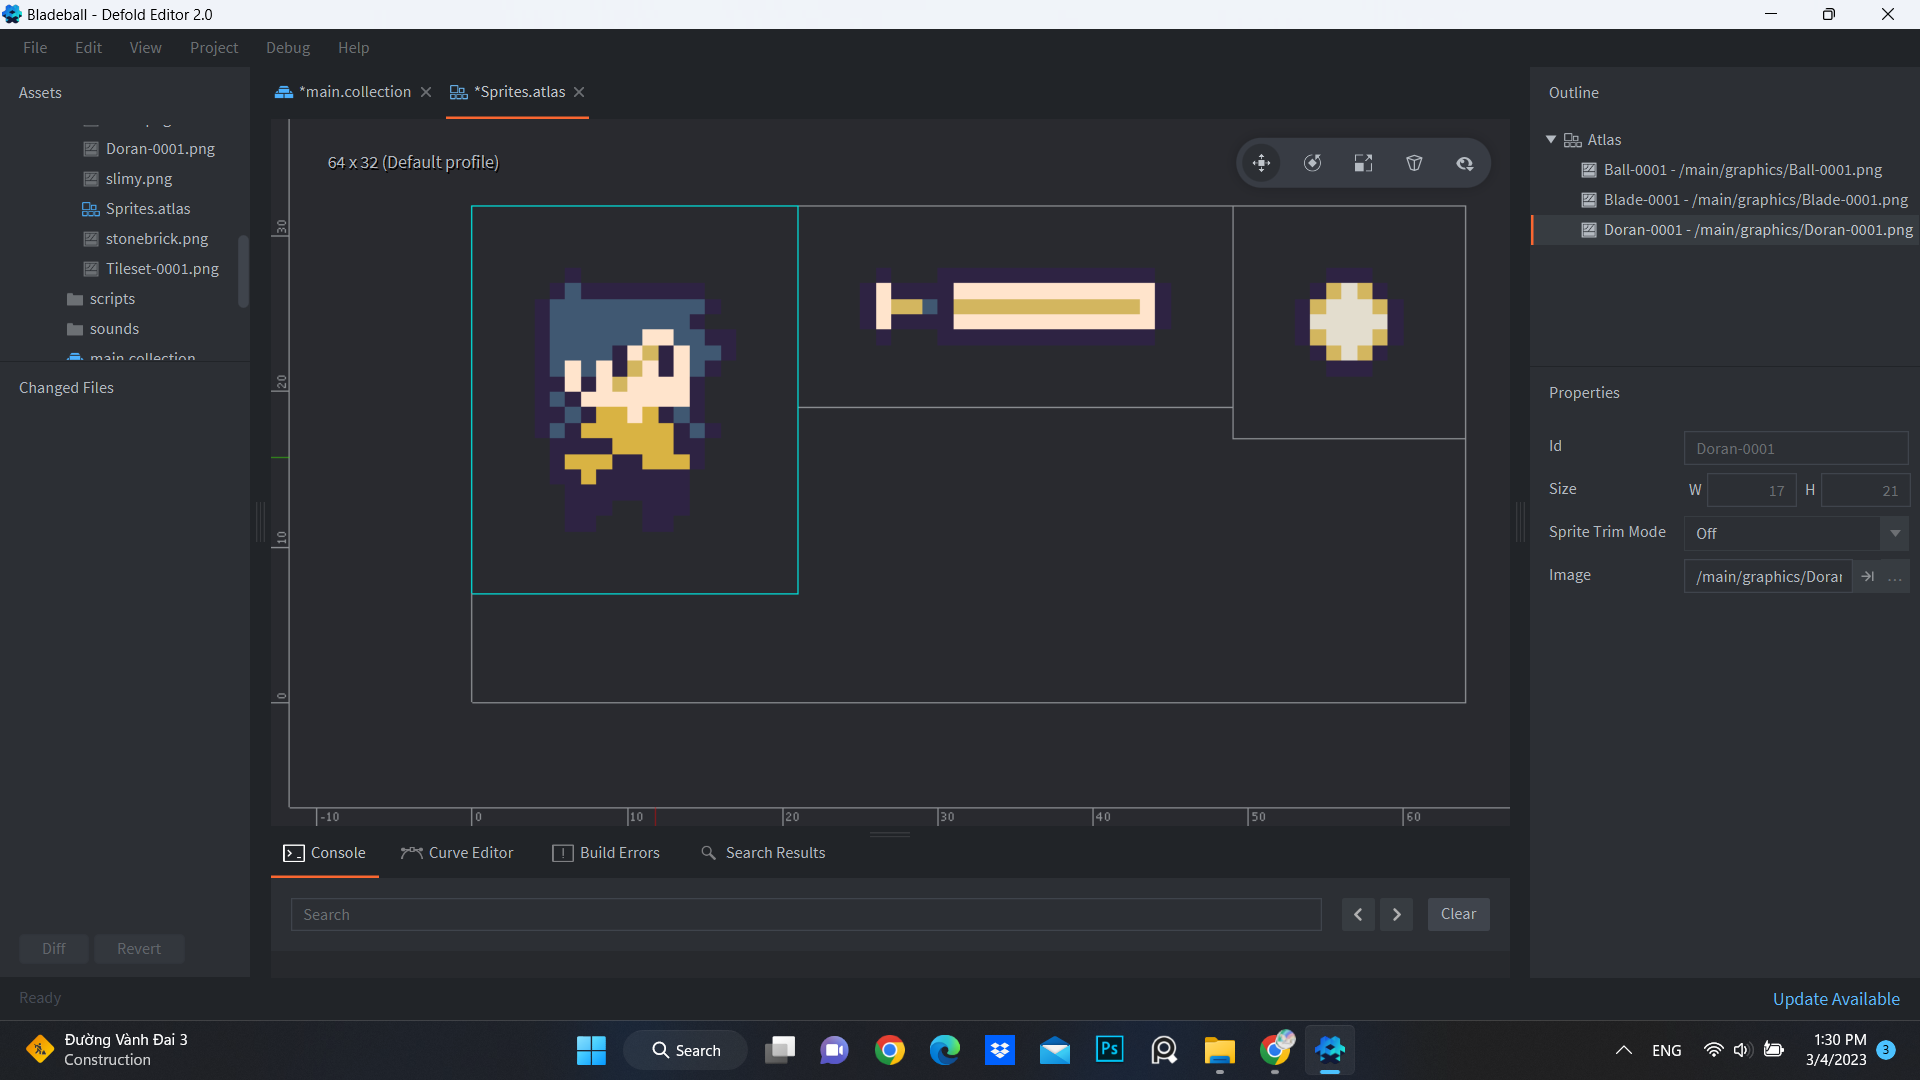
I made a small change in the color palettes, and I realized that if I export the sprite with a gap, there won’t be borders coming out of the sprites. The Extrude Borders are still there, just not visible anymore.

So yeah, this is a beginner’s tutorial made by a beginner after all (´。• ω •。`).

I also changed “player.atlas” into “sprites.atlas” because it seems we only need one atlas for this project.

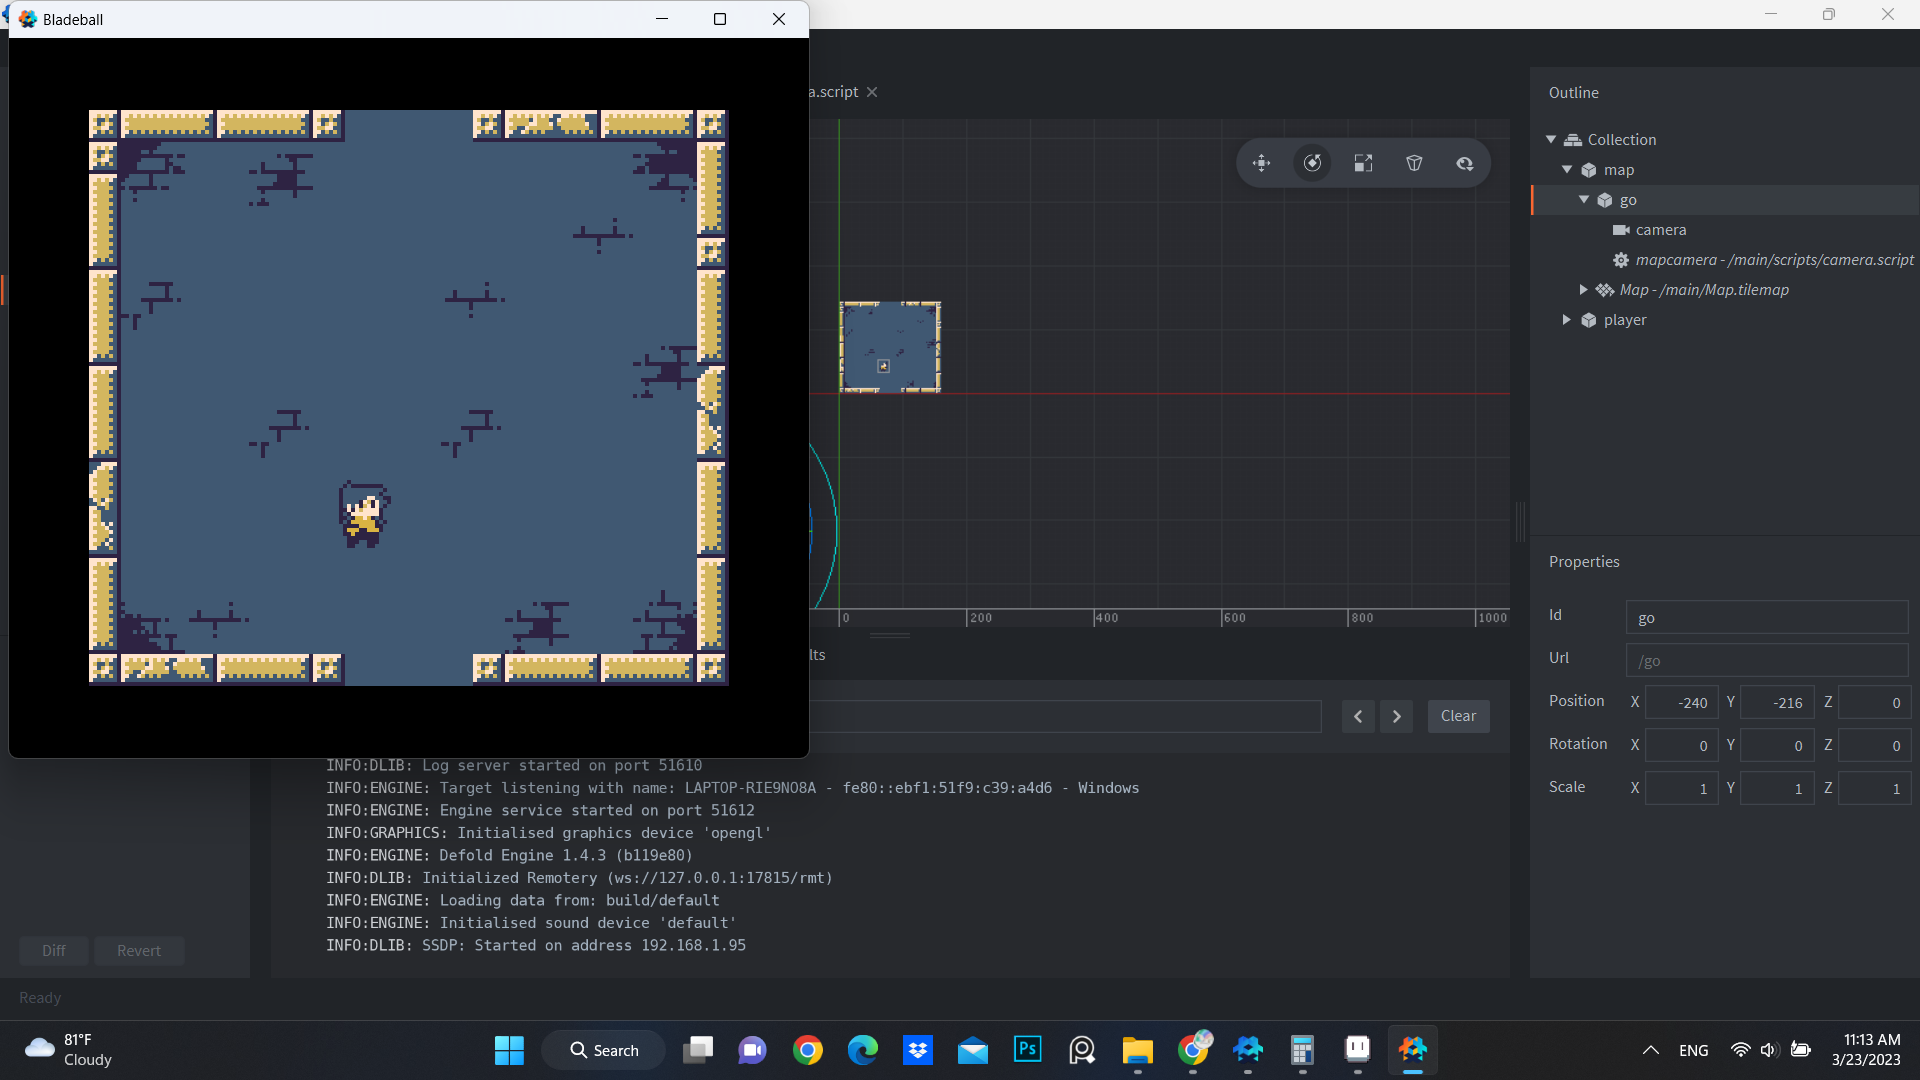
In this tutorial, I planned on showing how we can make the camera follow the player. However, I see a flaw in the game’s design.


If the map is bigger than what the player can see, the ball will just go outside of the screen and bounce around.

This makes it difficult for the player to hit the ball because they cannot see where it is.

Even if the player manages to hit it a few times, the ball will just go super fast, sometimes kill enemies off-scene, and disappear without the player’s notice.

Although we can fix this issue by adding an arrow that points to where the ball is and a number to tell how far it is from the player, and maybe a scene shake to tell the player it is destroyed.

But that’s too complicated; a simple fix is just to make the player see the whole map.

So we need to create the map first instead of making the camera.

To do that, we need to have a Tile Map.
And the Tile Map uses Tile Source as its… uh, source.

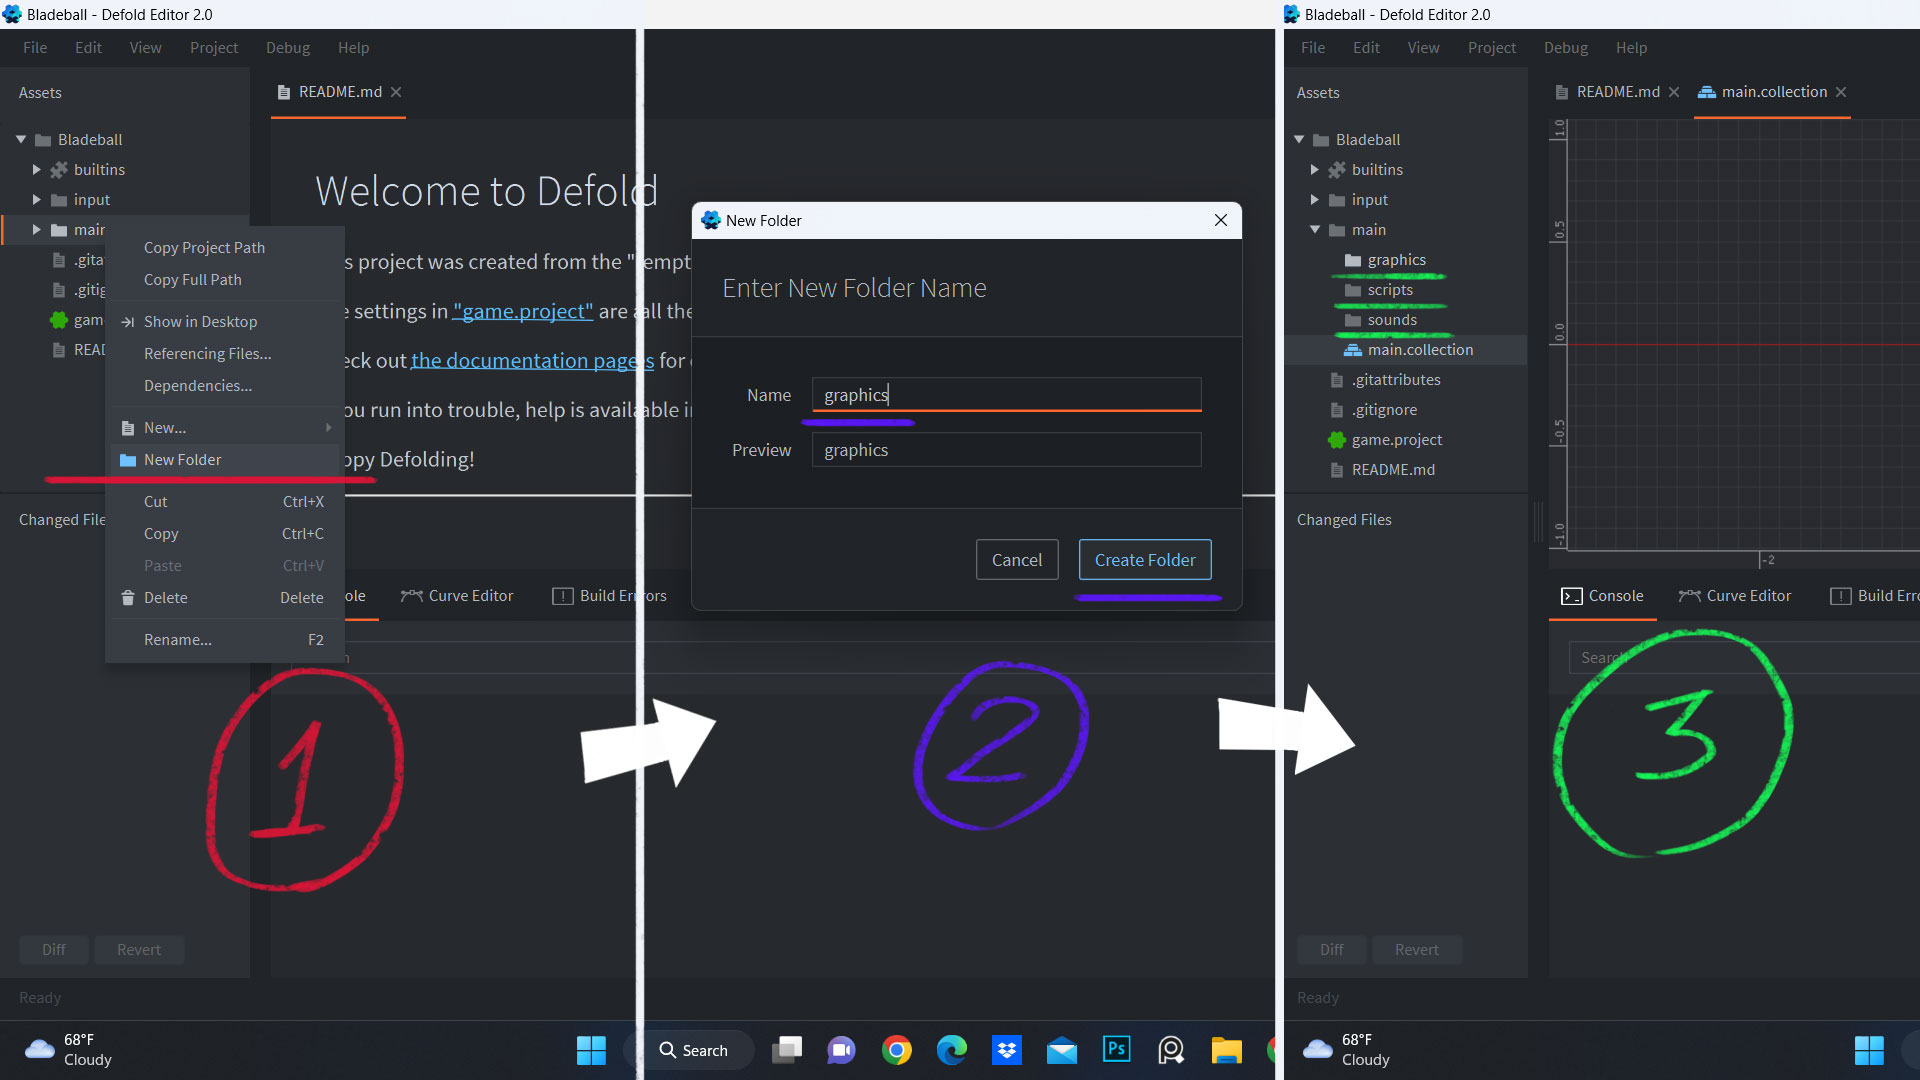
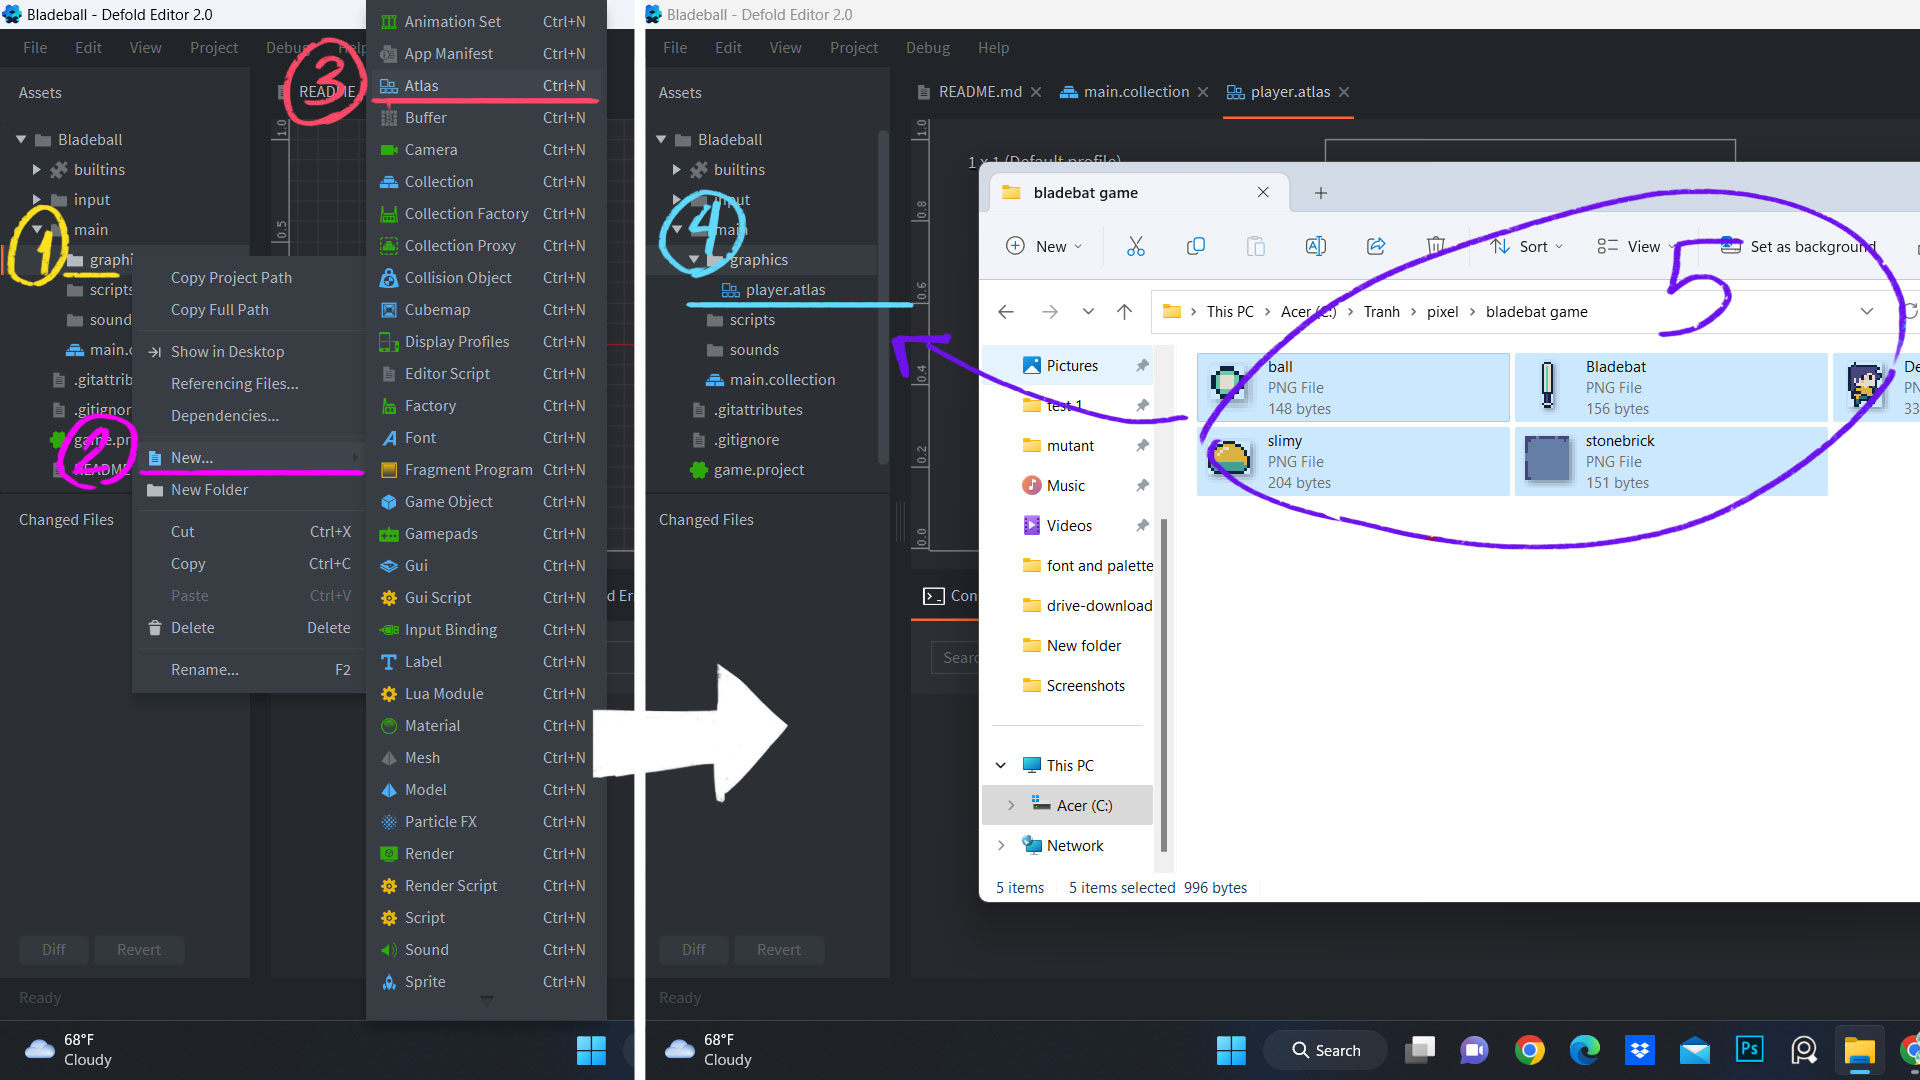
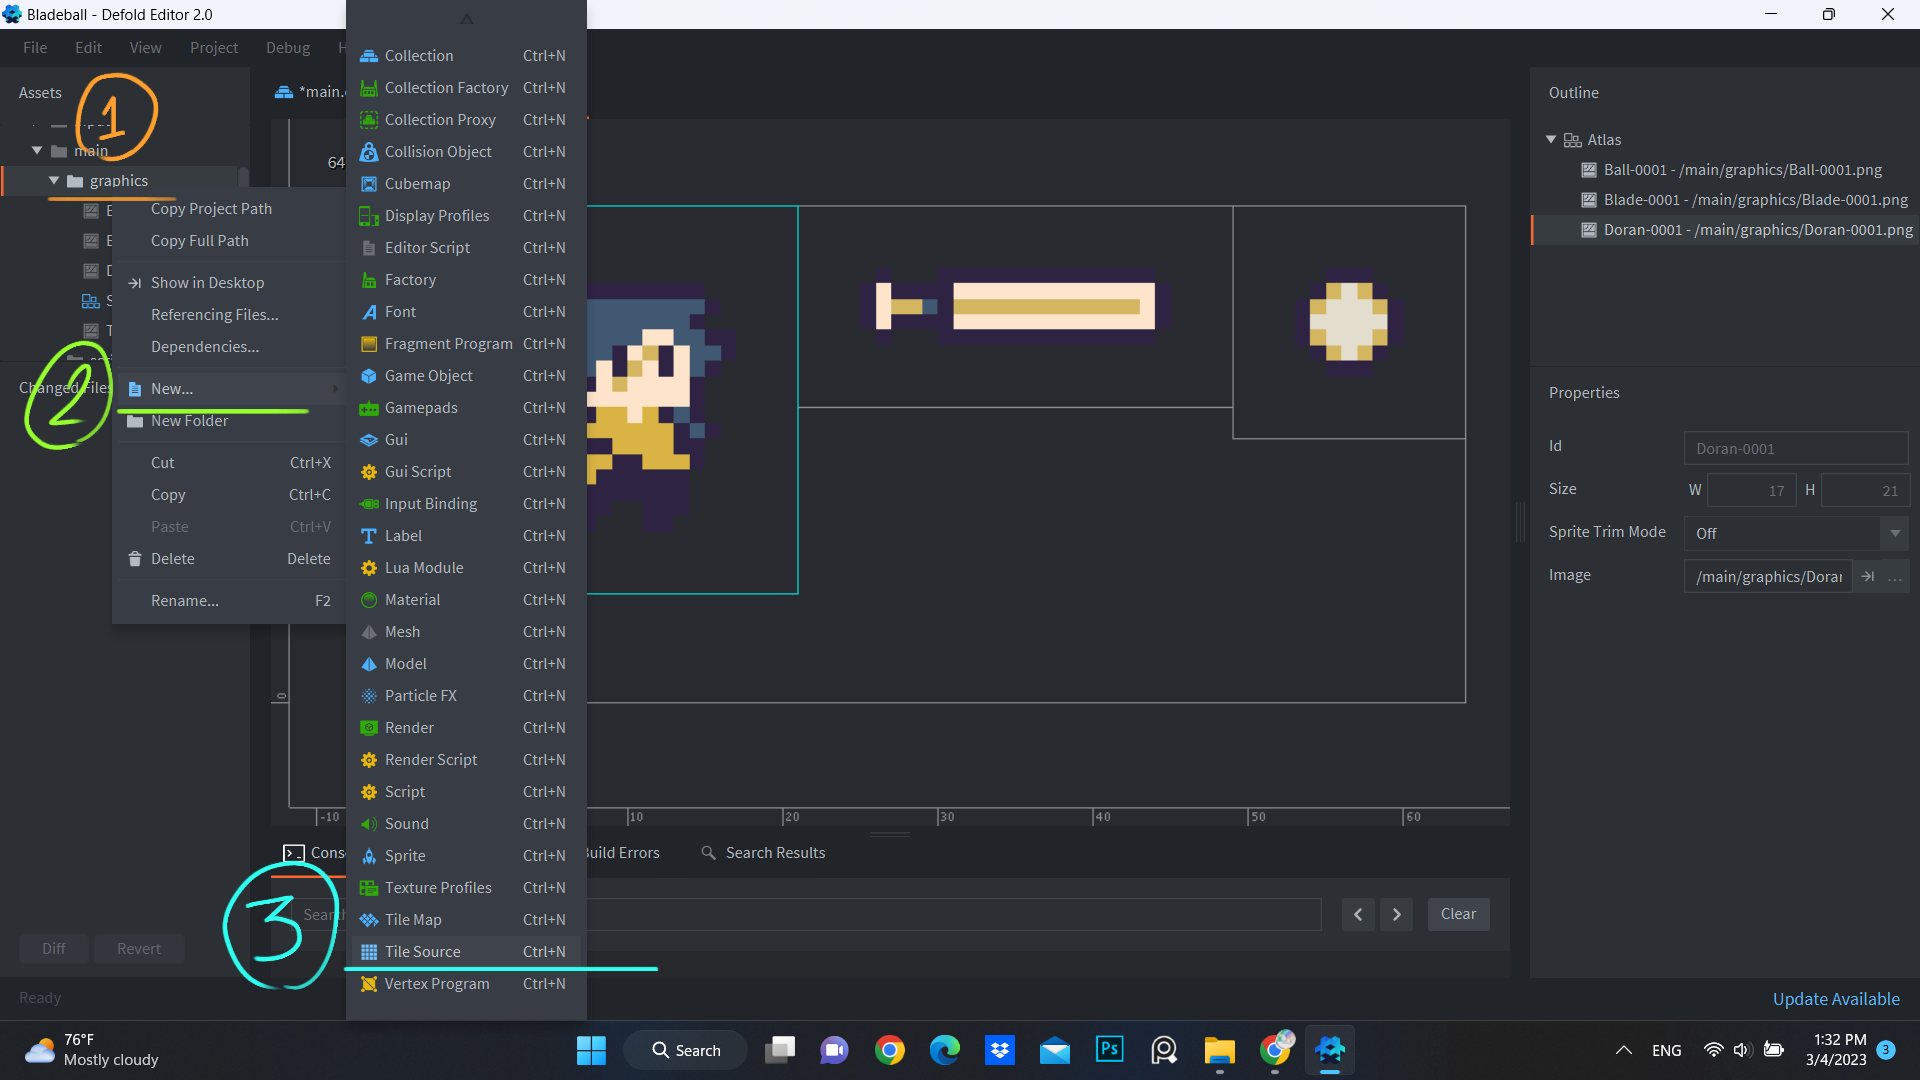
Just right-click in the graphics folder and scroll down a bit, and you will see the Tile Source option.

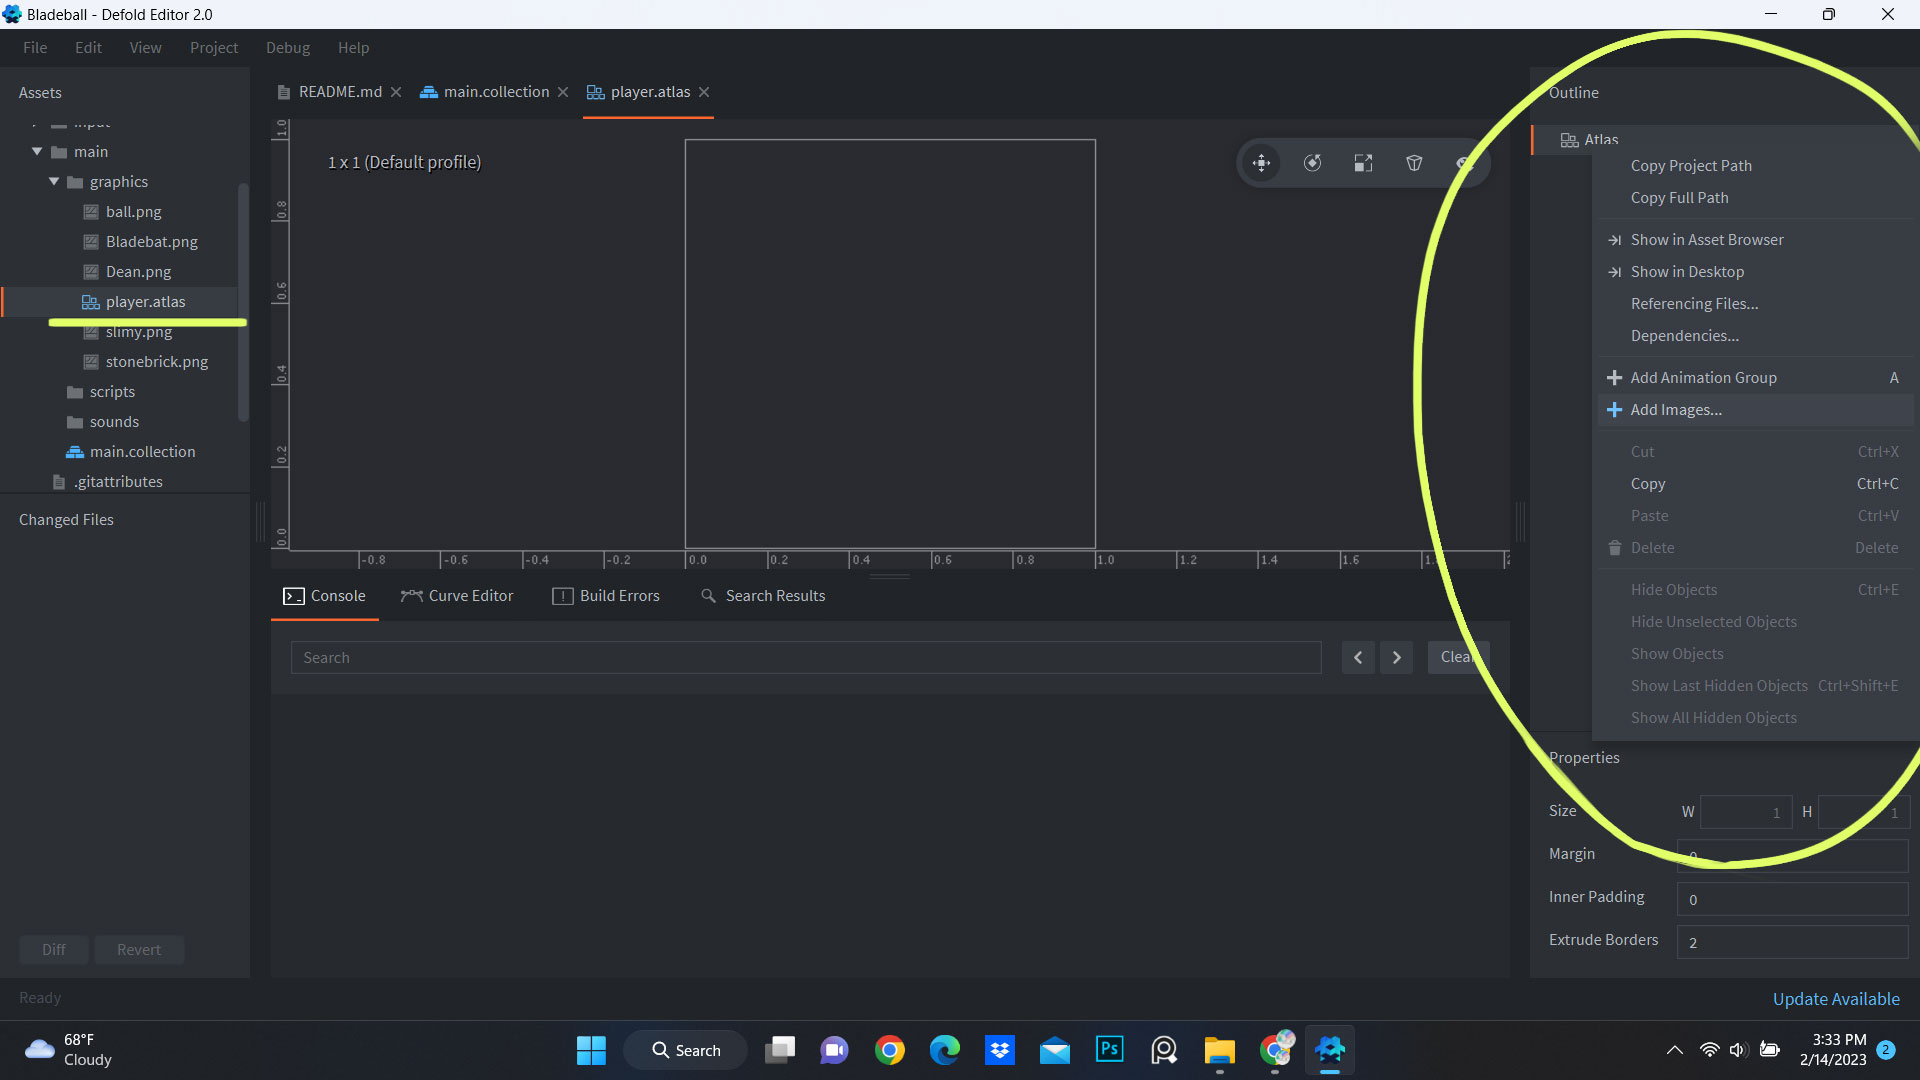
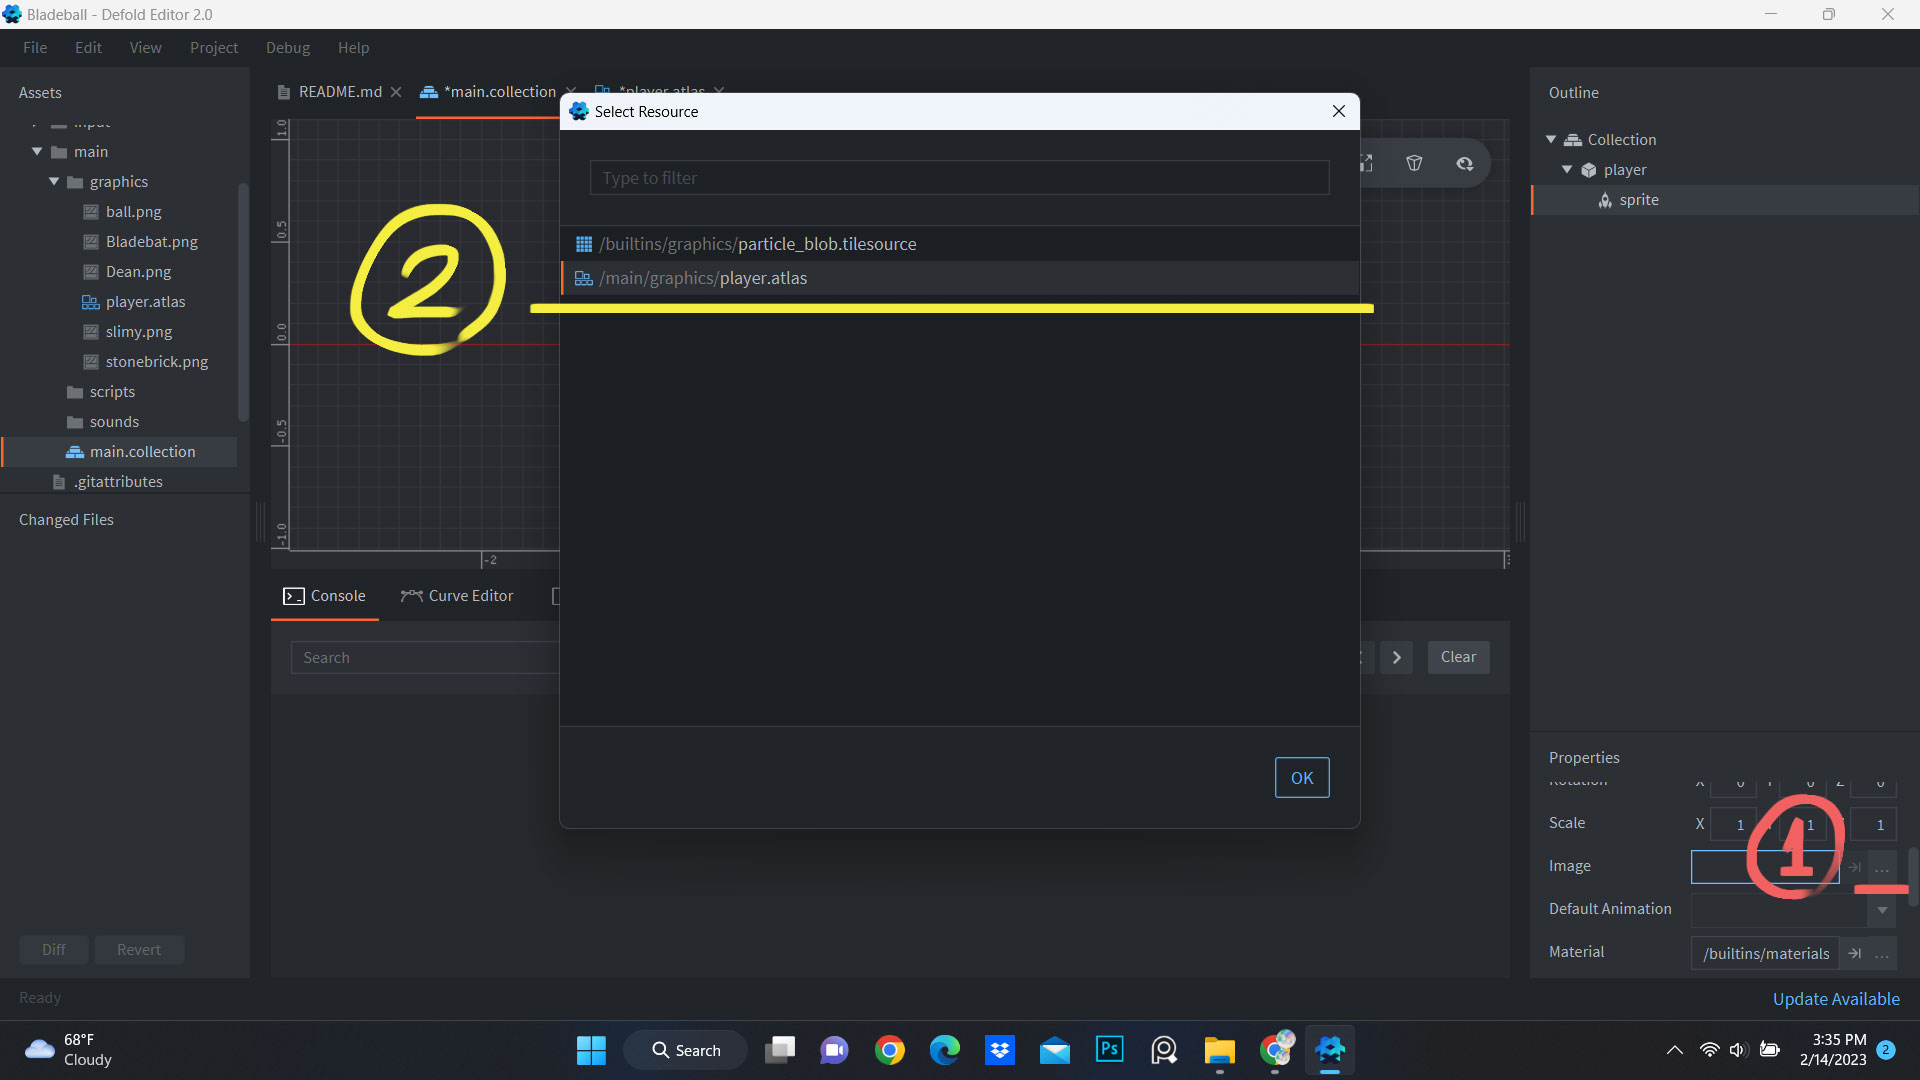
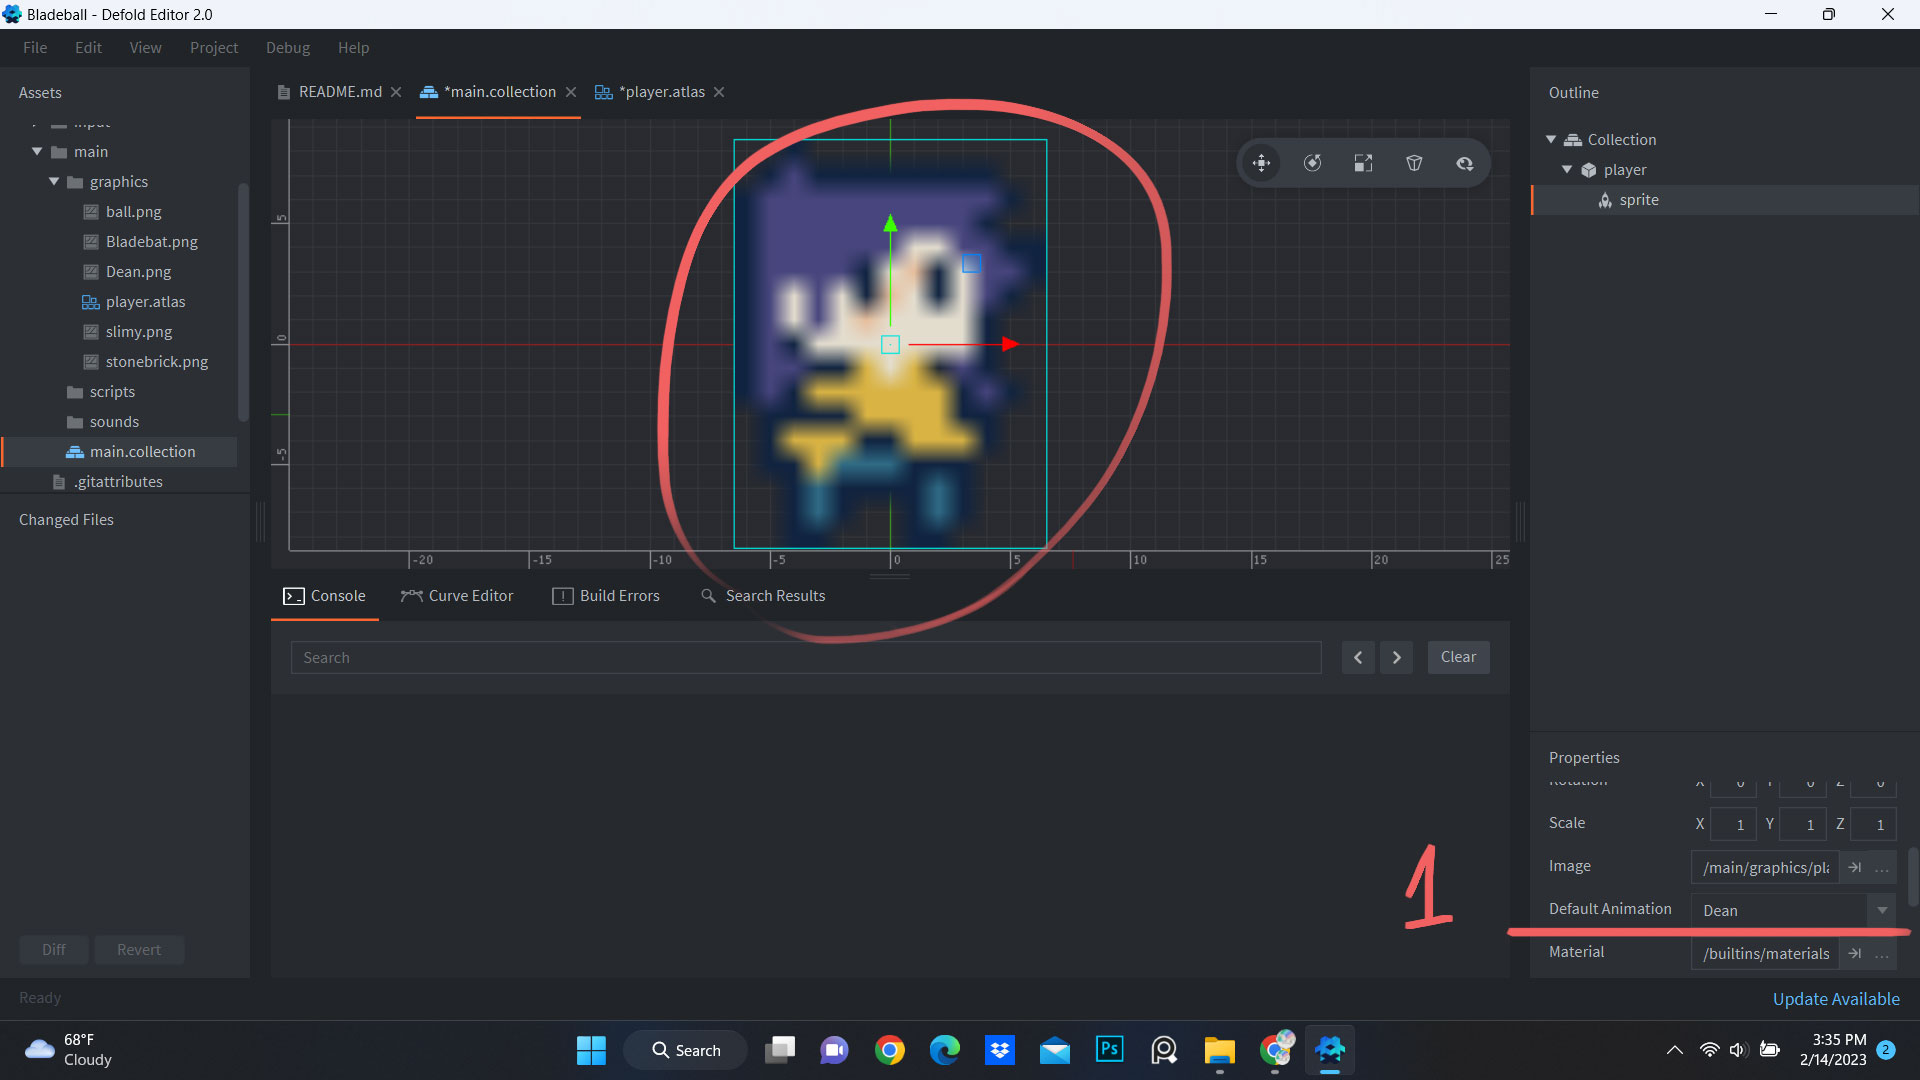
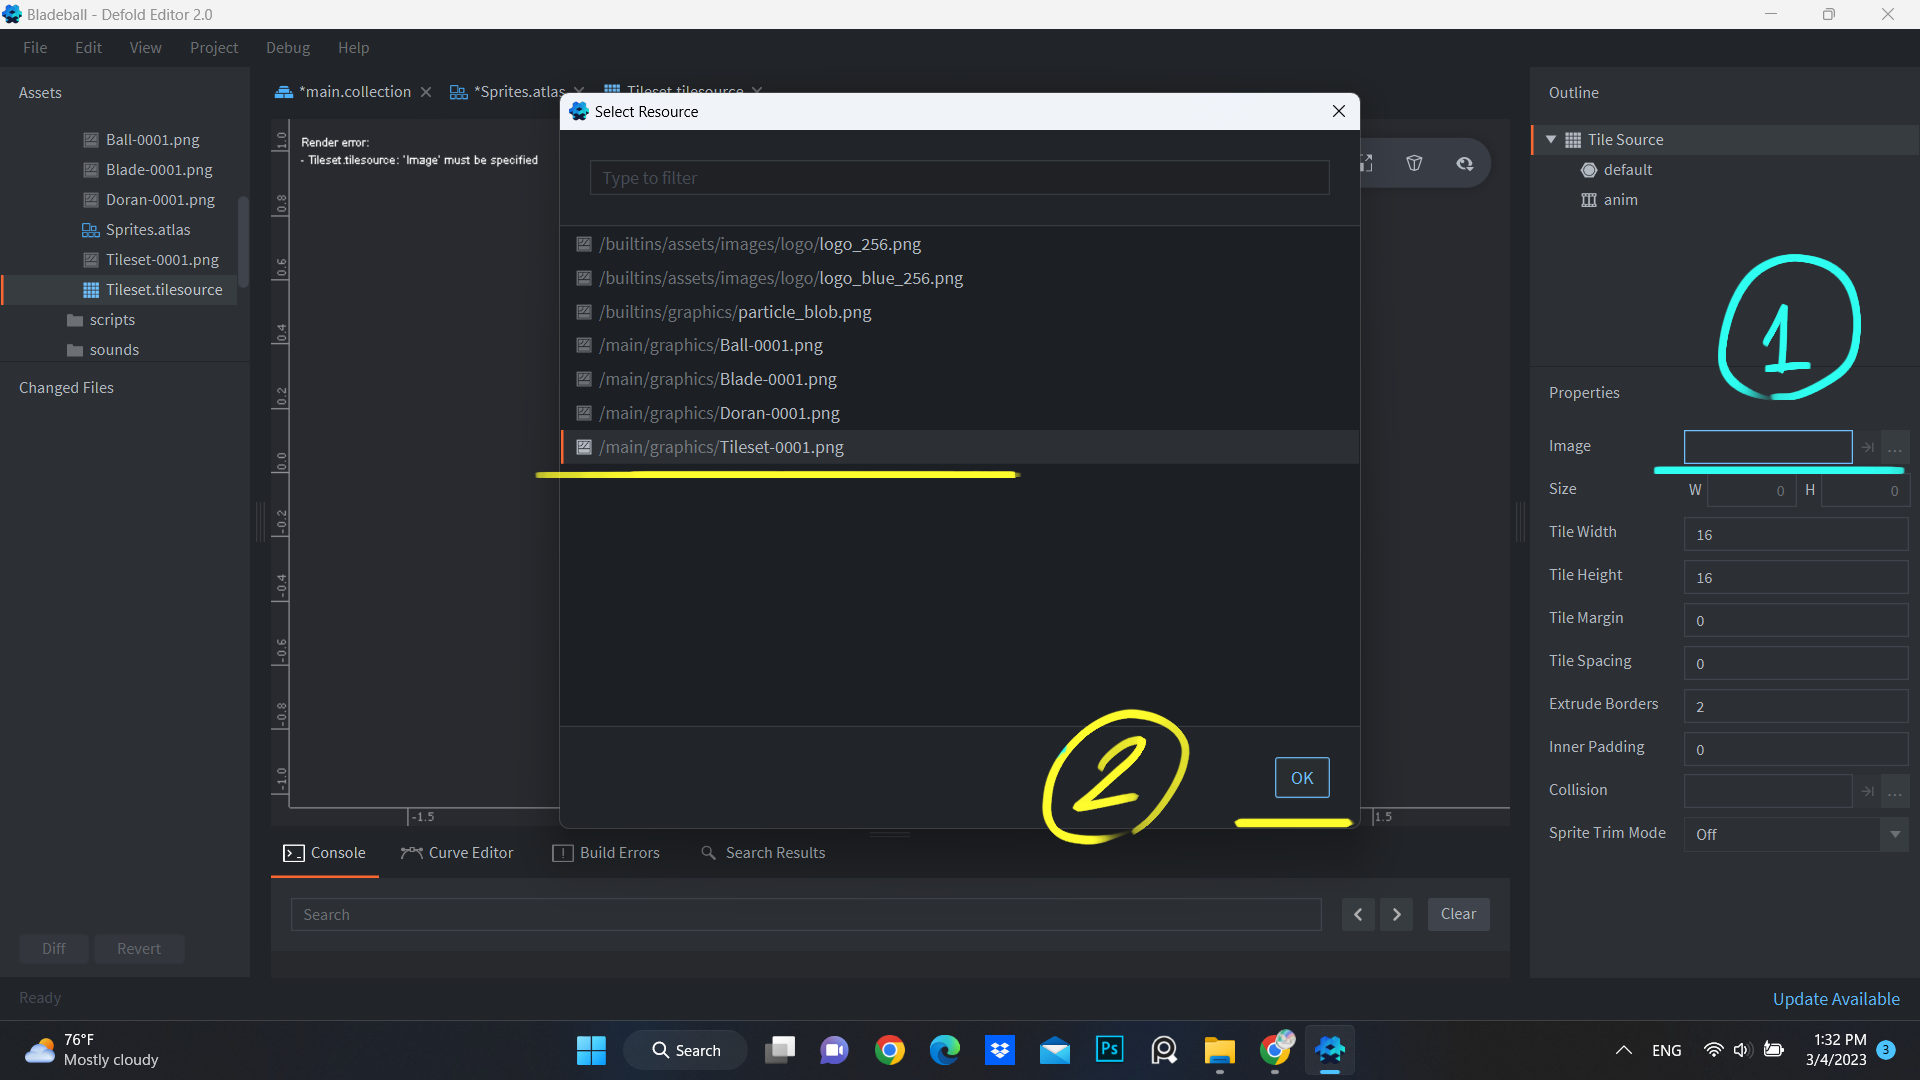
Click the three dots in the image section and choose the tile set you use.

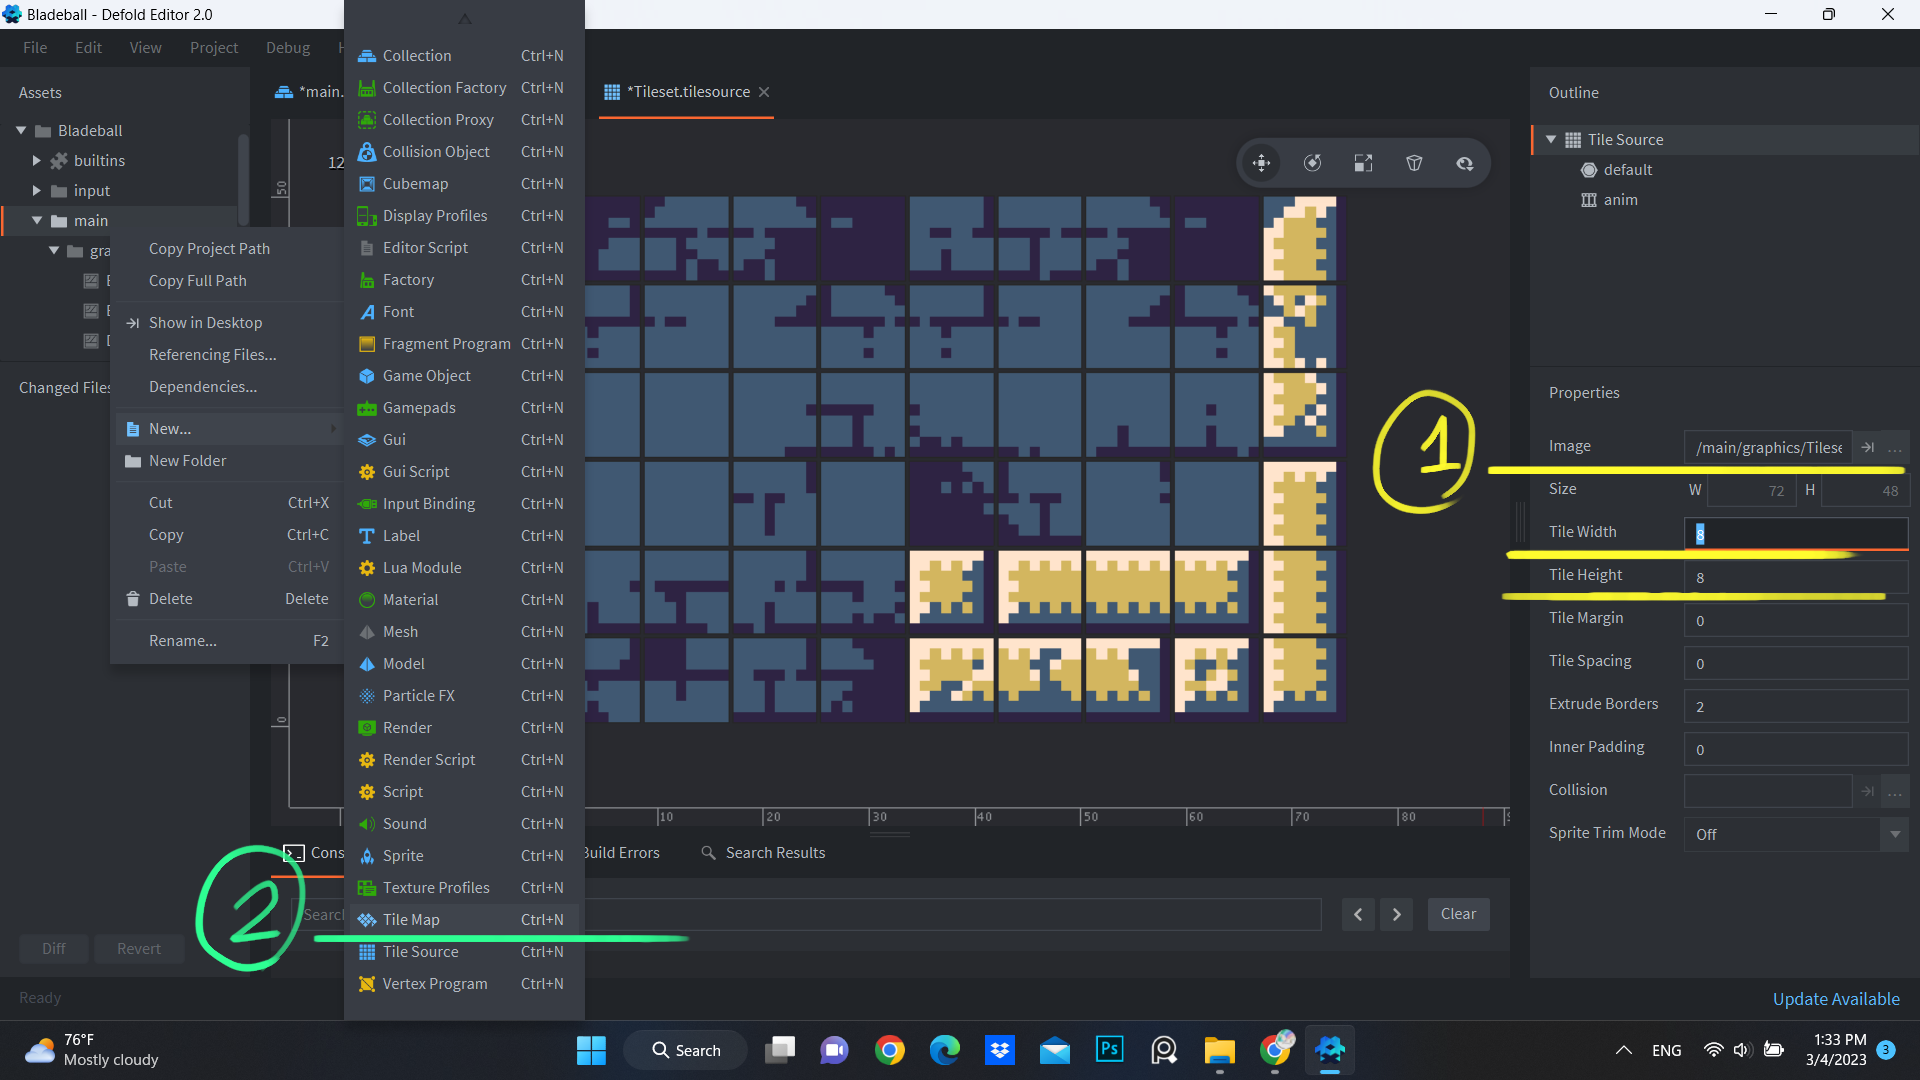
Then change Tile Width and Height to fit your tile size, mine is 8x8 pixels.

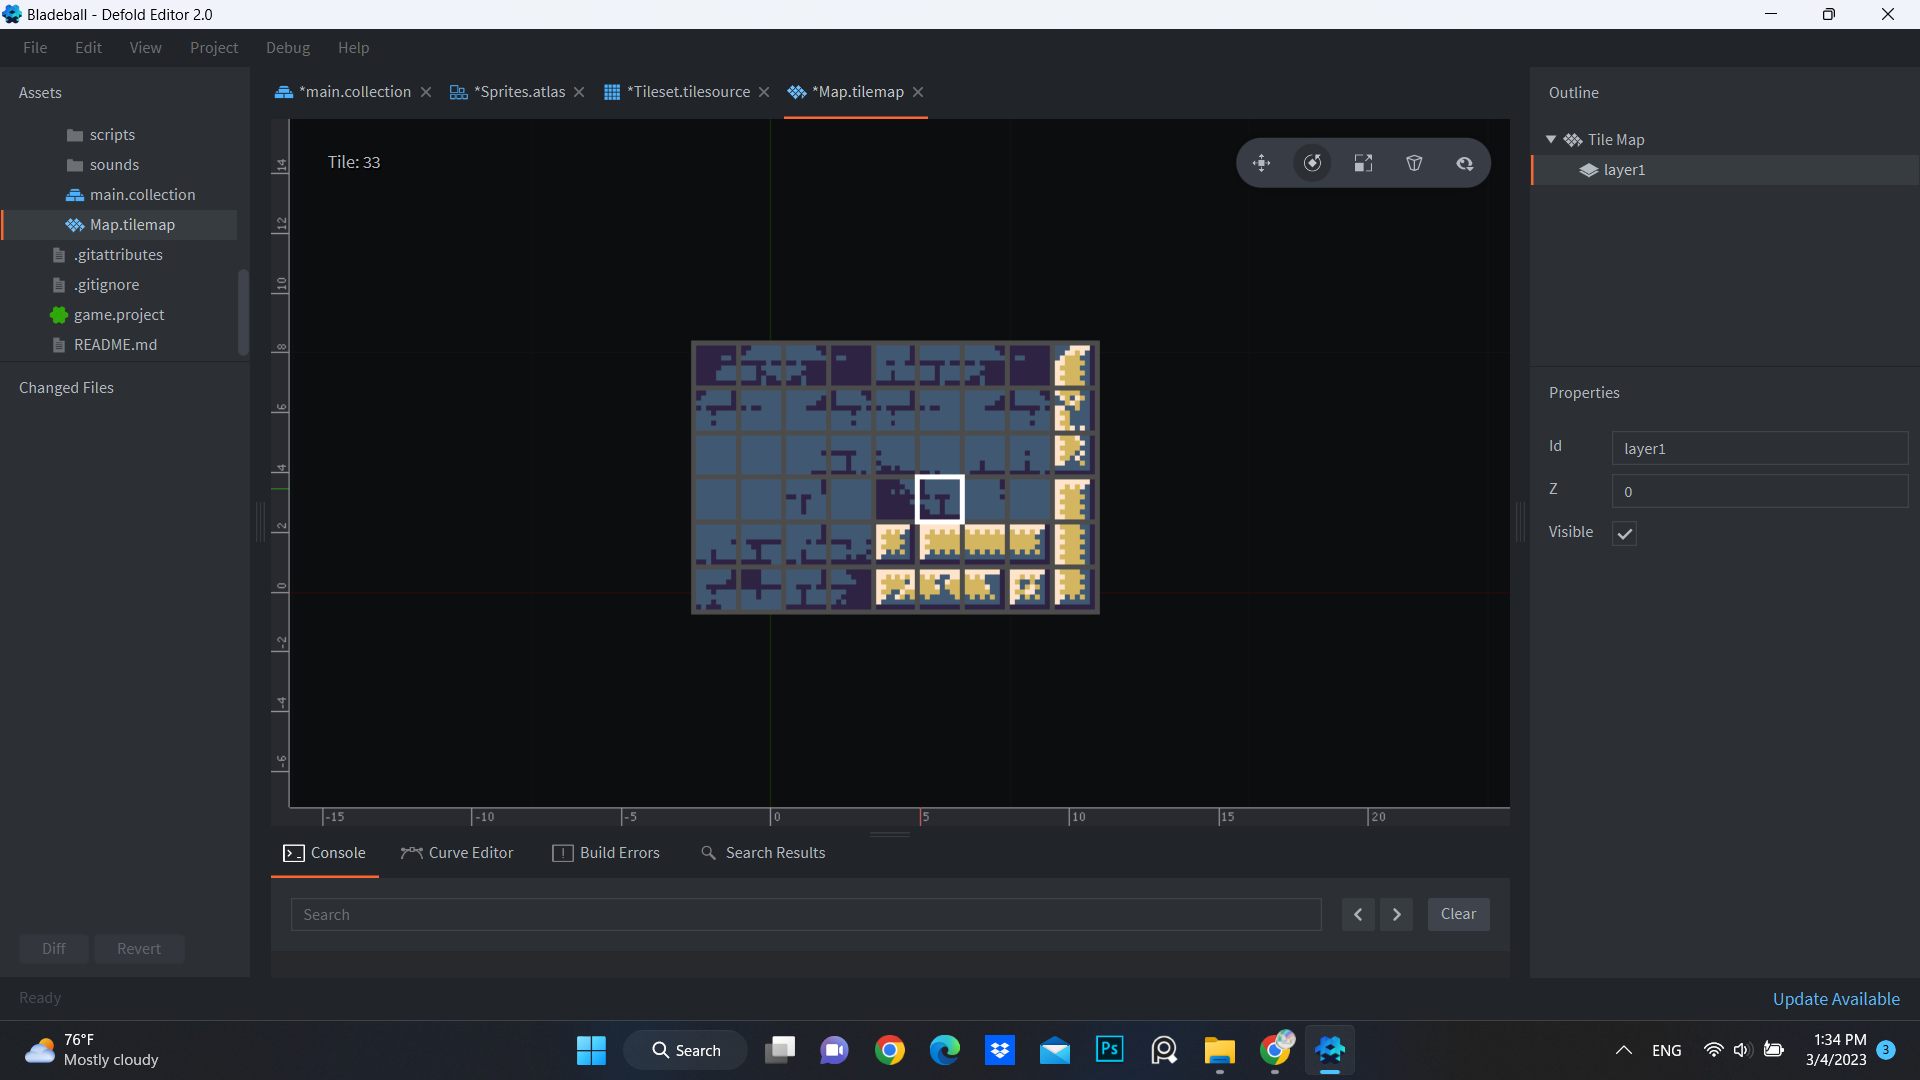
Then you do the same process to create Tile Map, you can put it anywhere, but I will put it in our main folder.

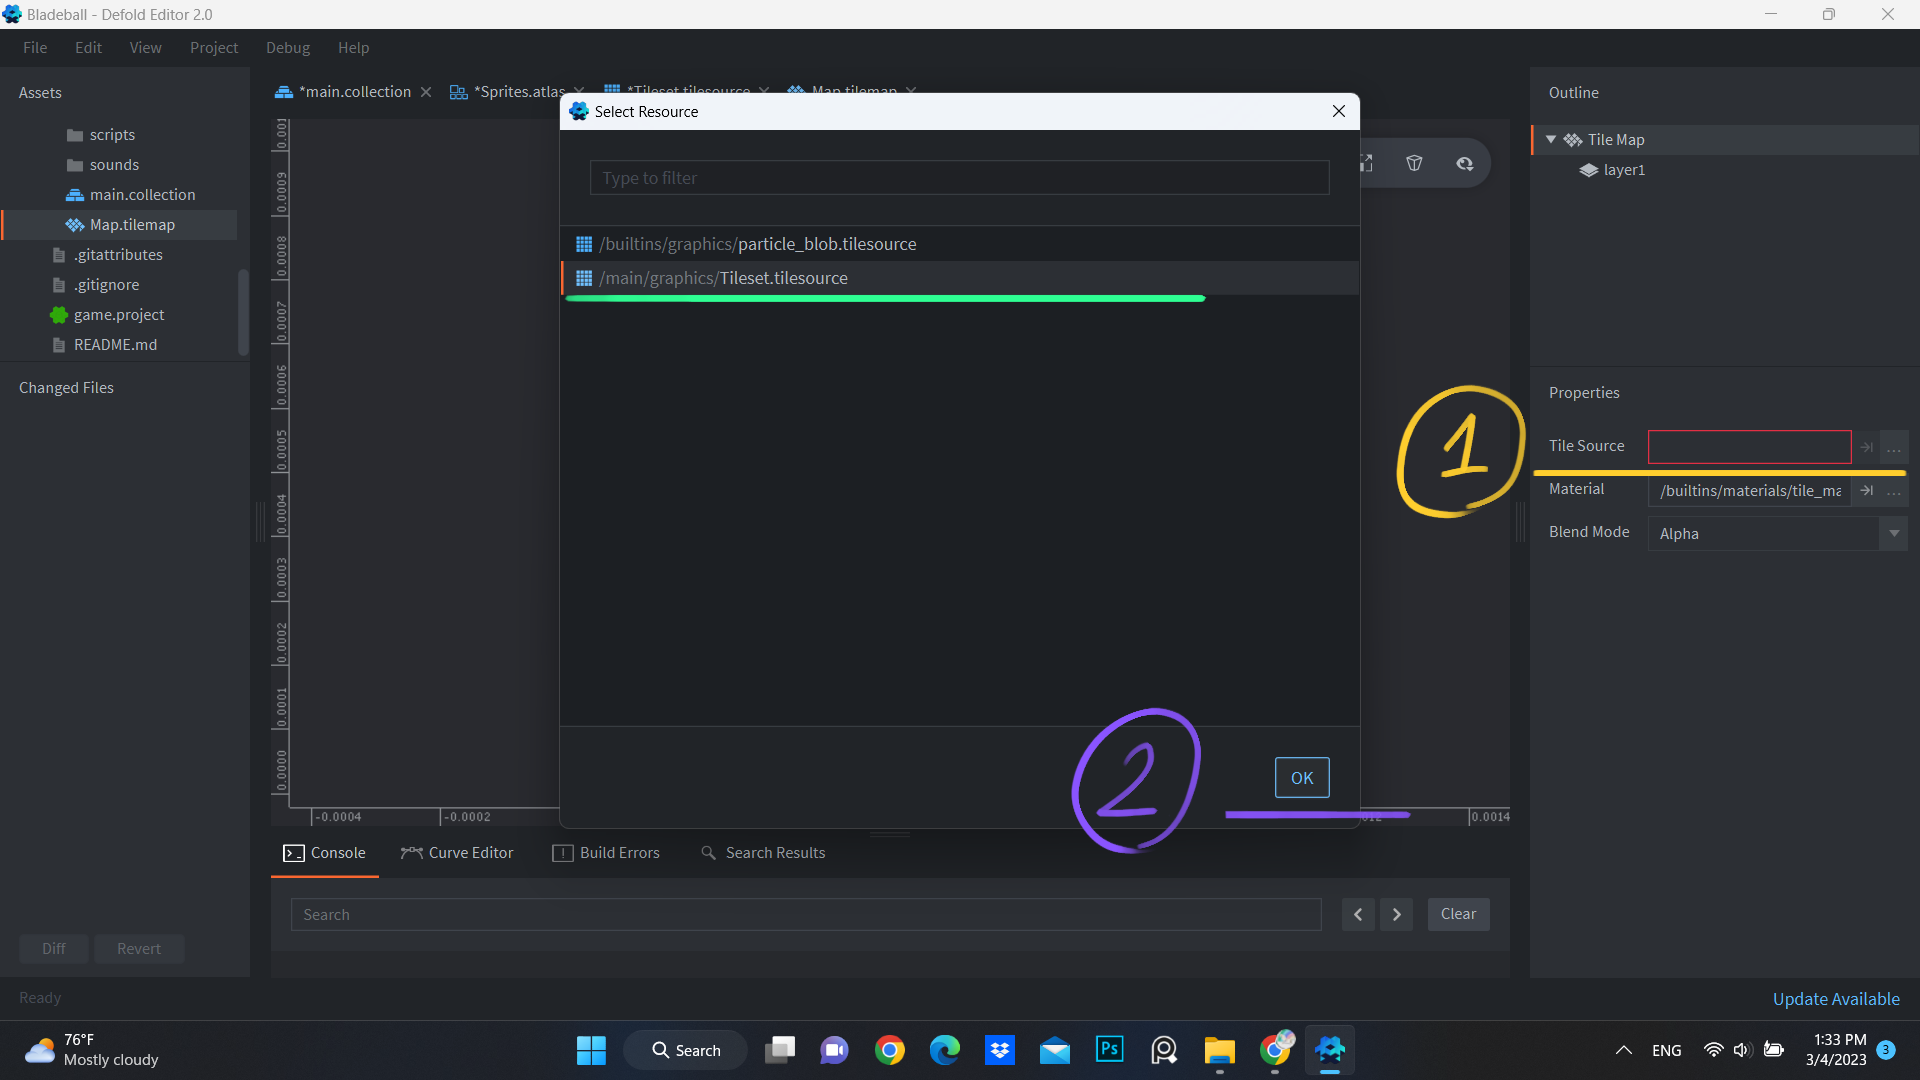
Pretty much the same as Tile Source, you click the three dots again and choose the Tile Source we just made.

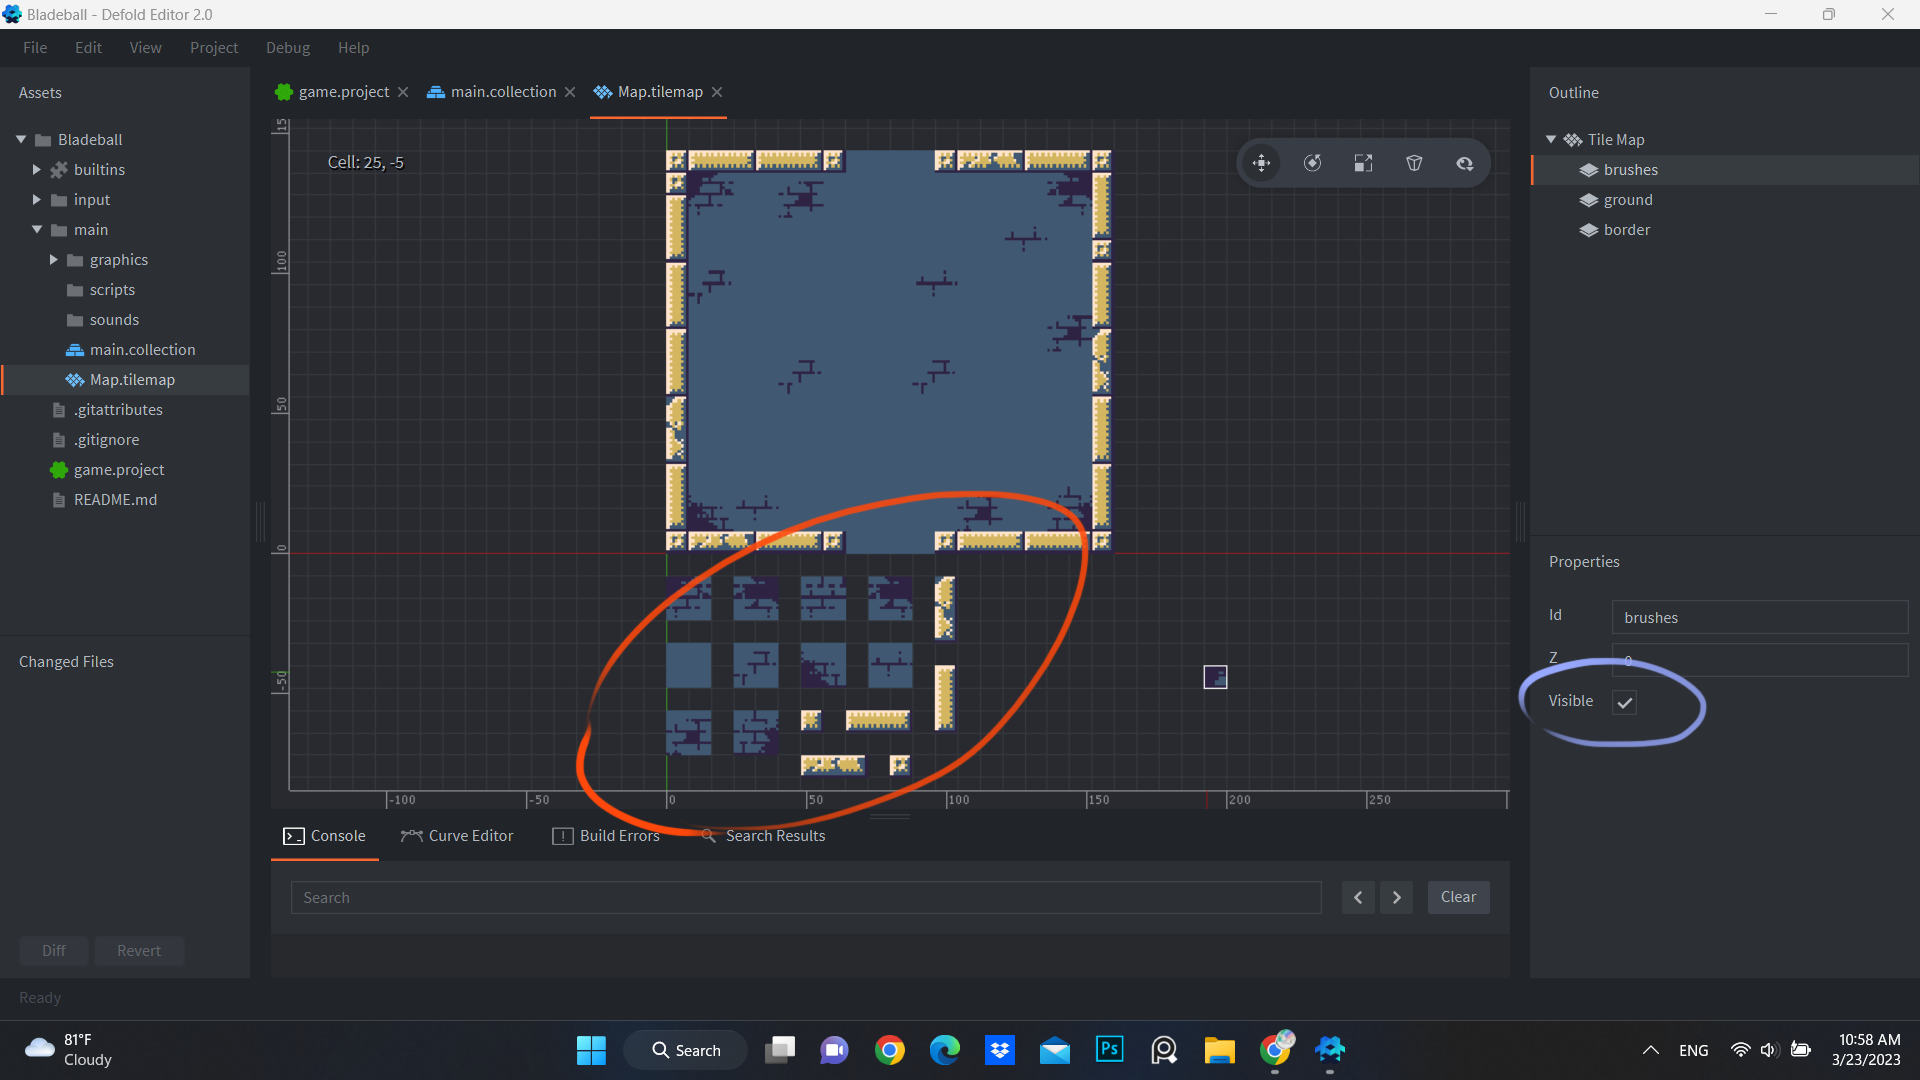
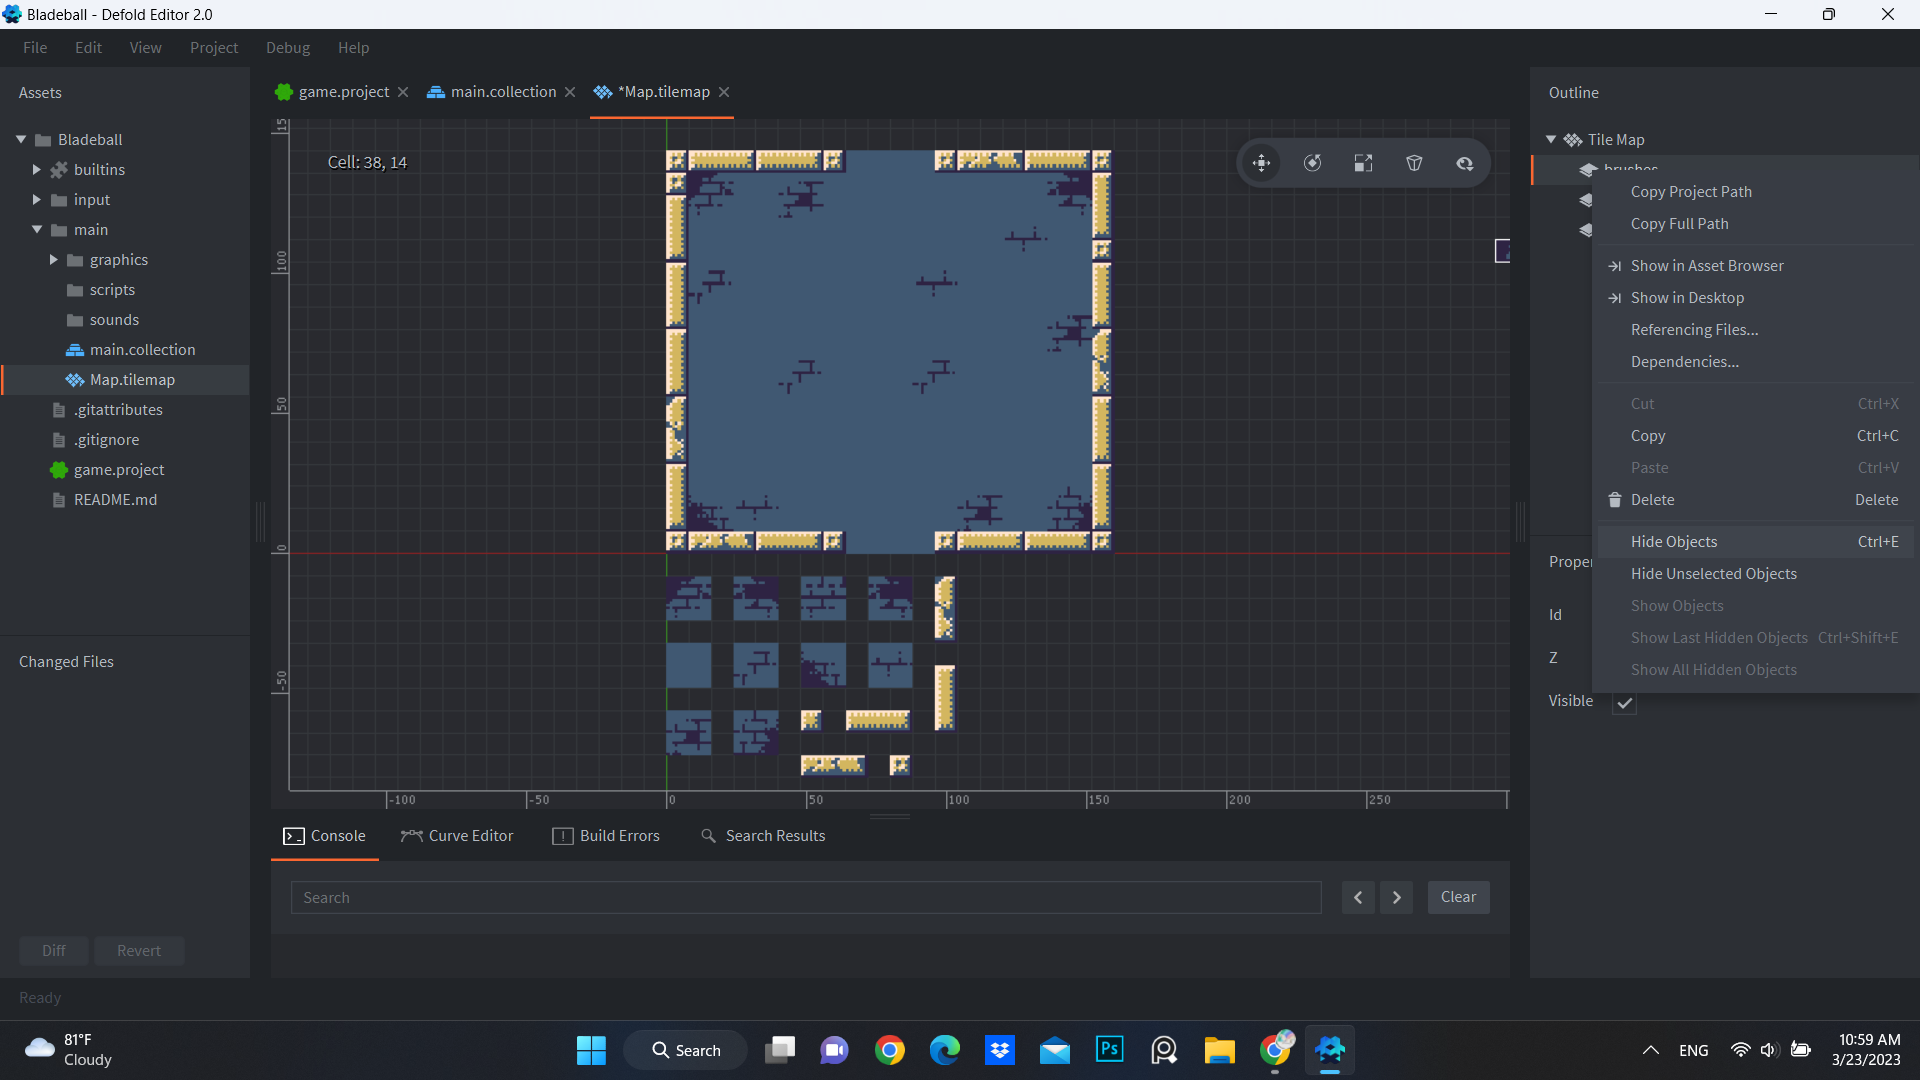
Now we need to press Space and start laying out our tiles. This process is a little annoying since you need to pick each tile. But the good news is that you only need to do this once.

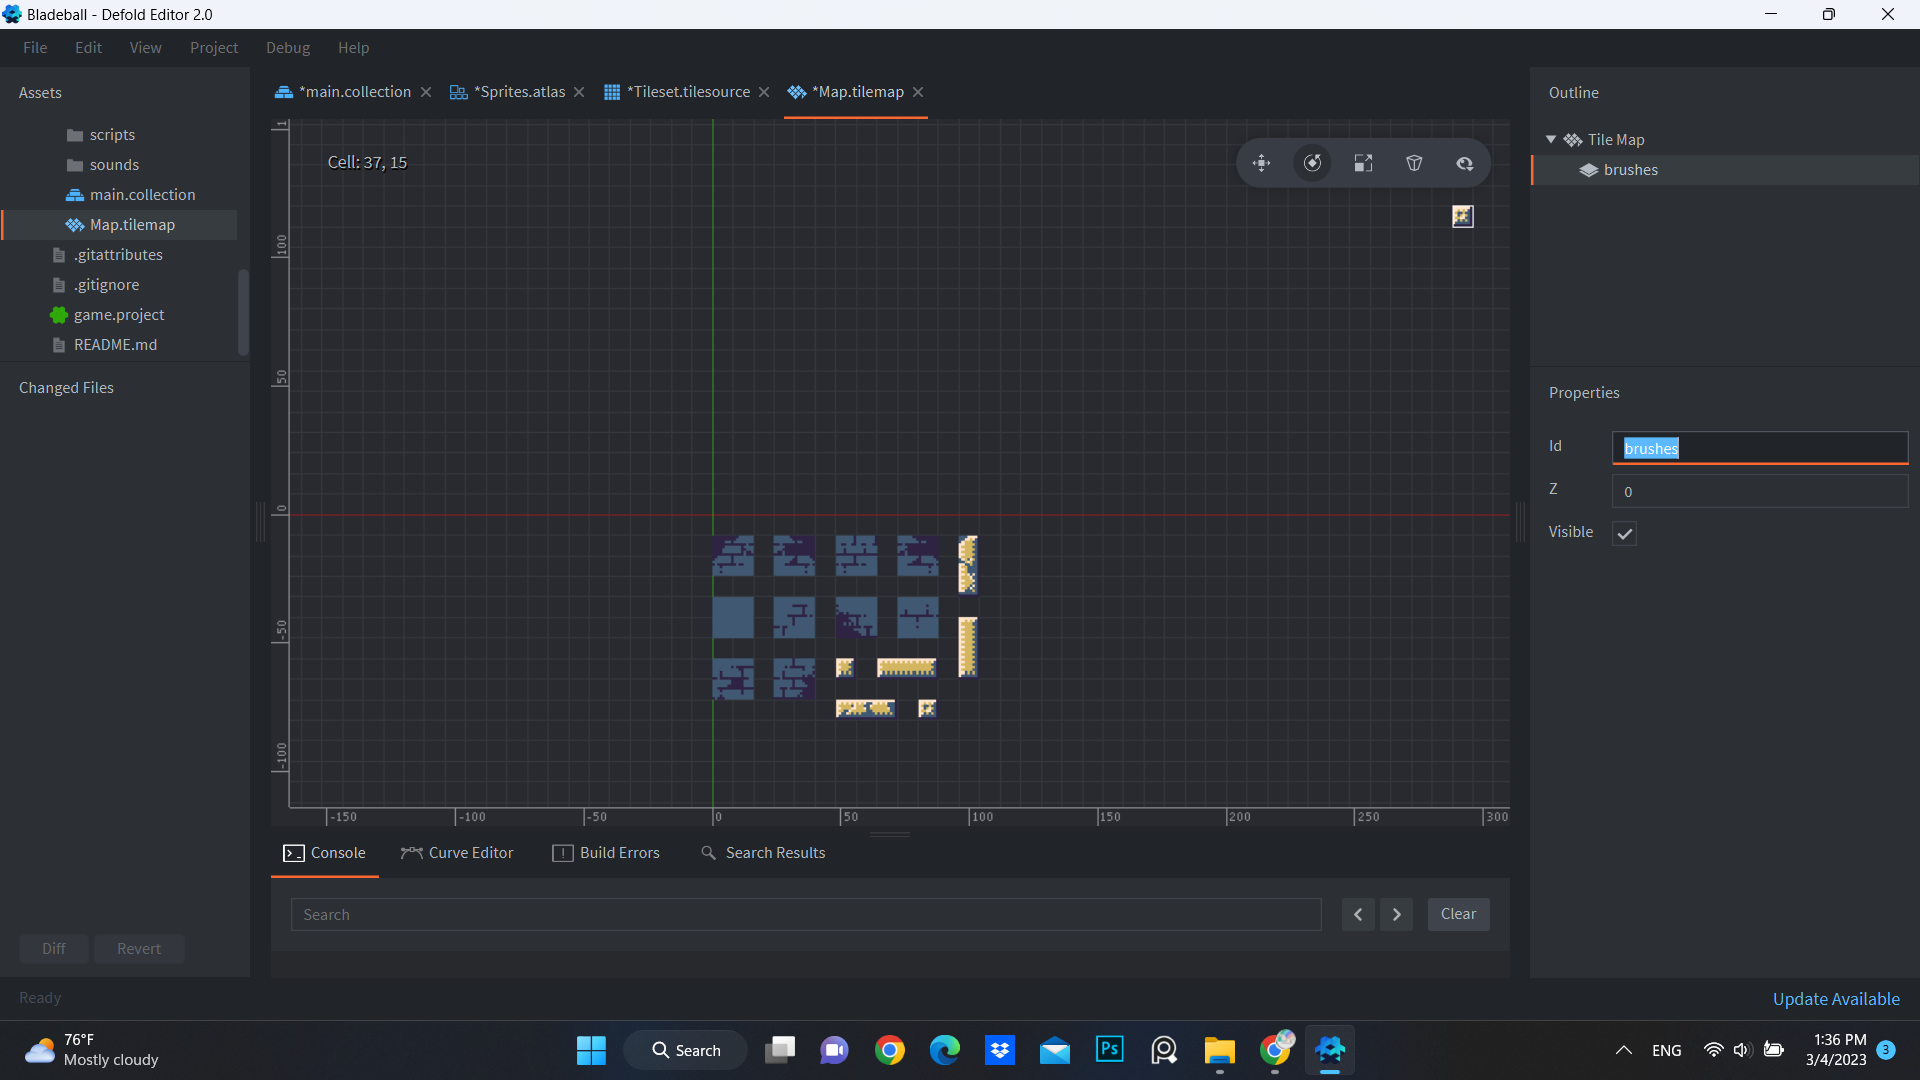
After you’ve laid out all the tiles, you can hold Shift and drag to choose multiple tiles and use them like brushes.

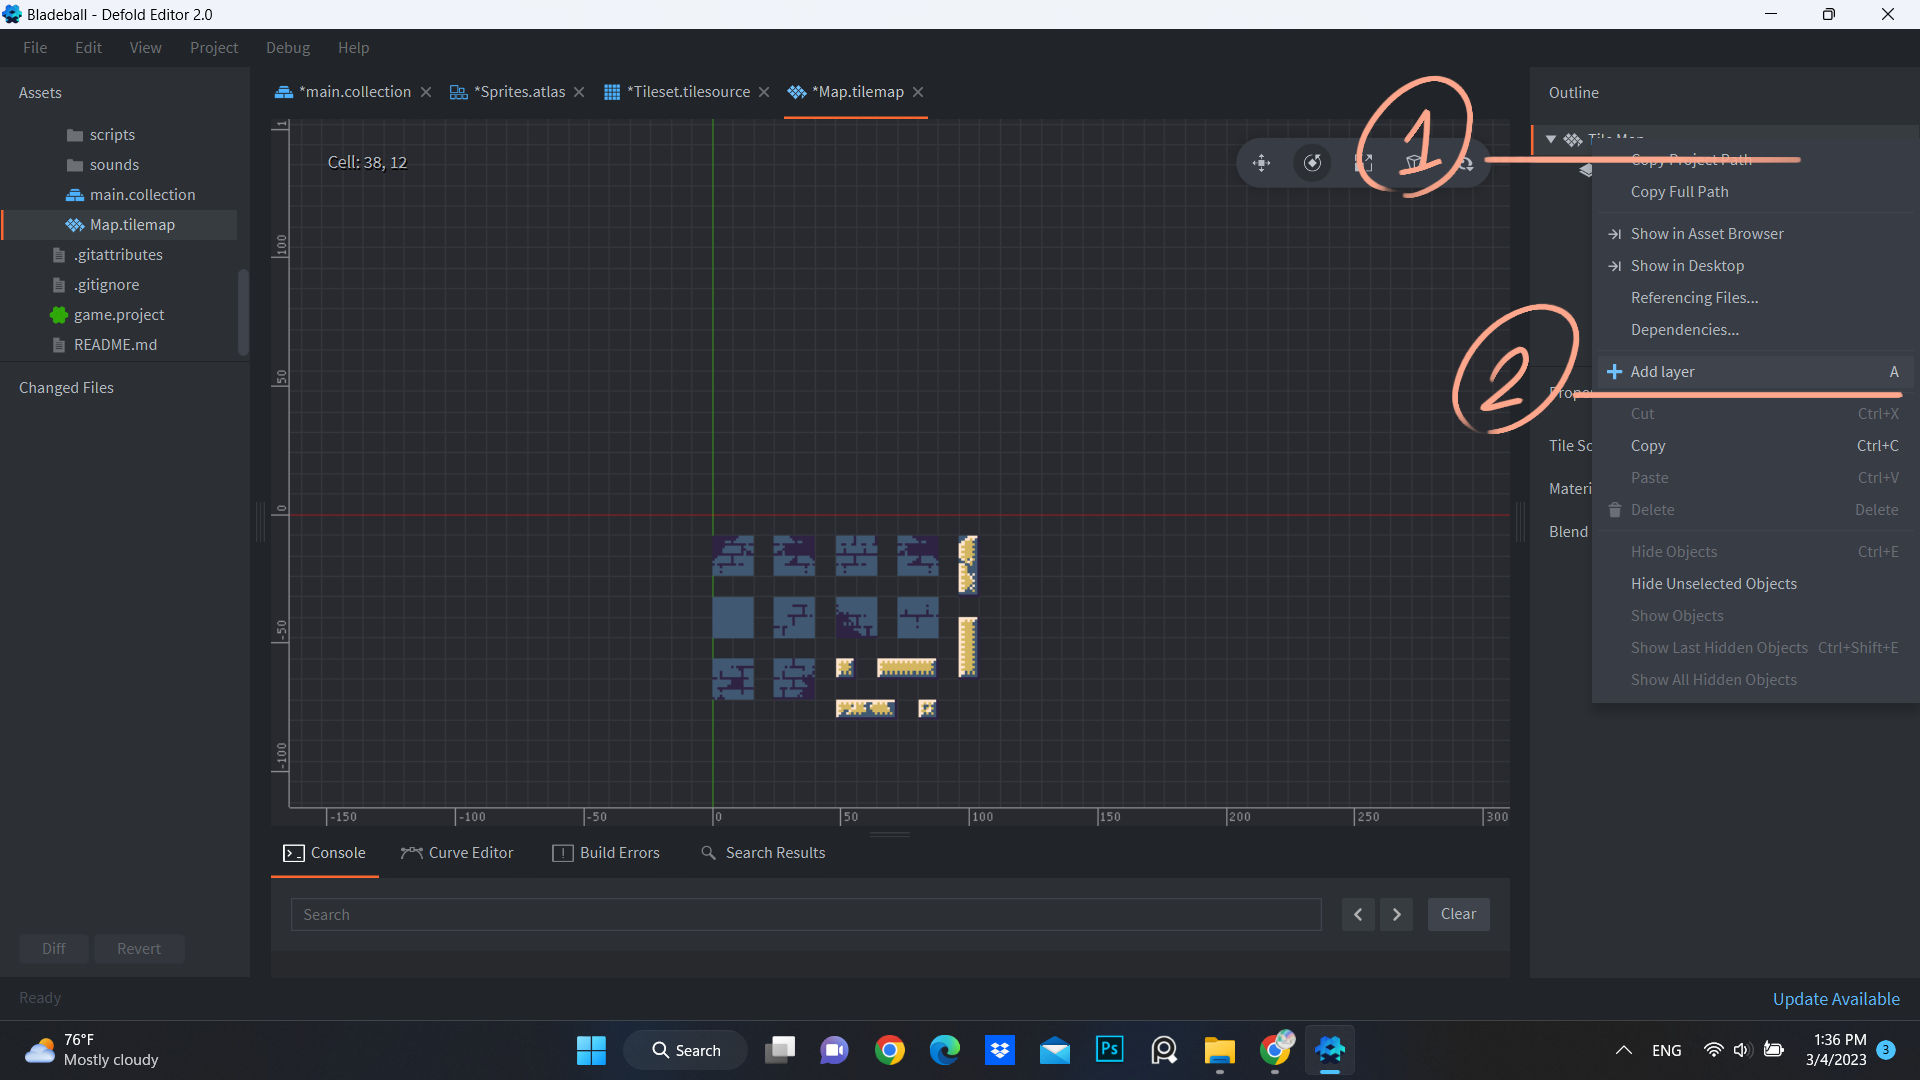
We’re going to create two more layers, called ground and border, to draw our arena.

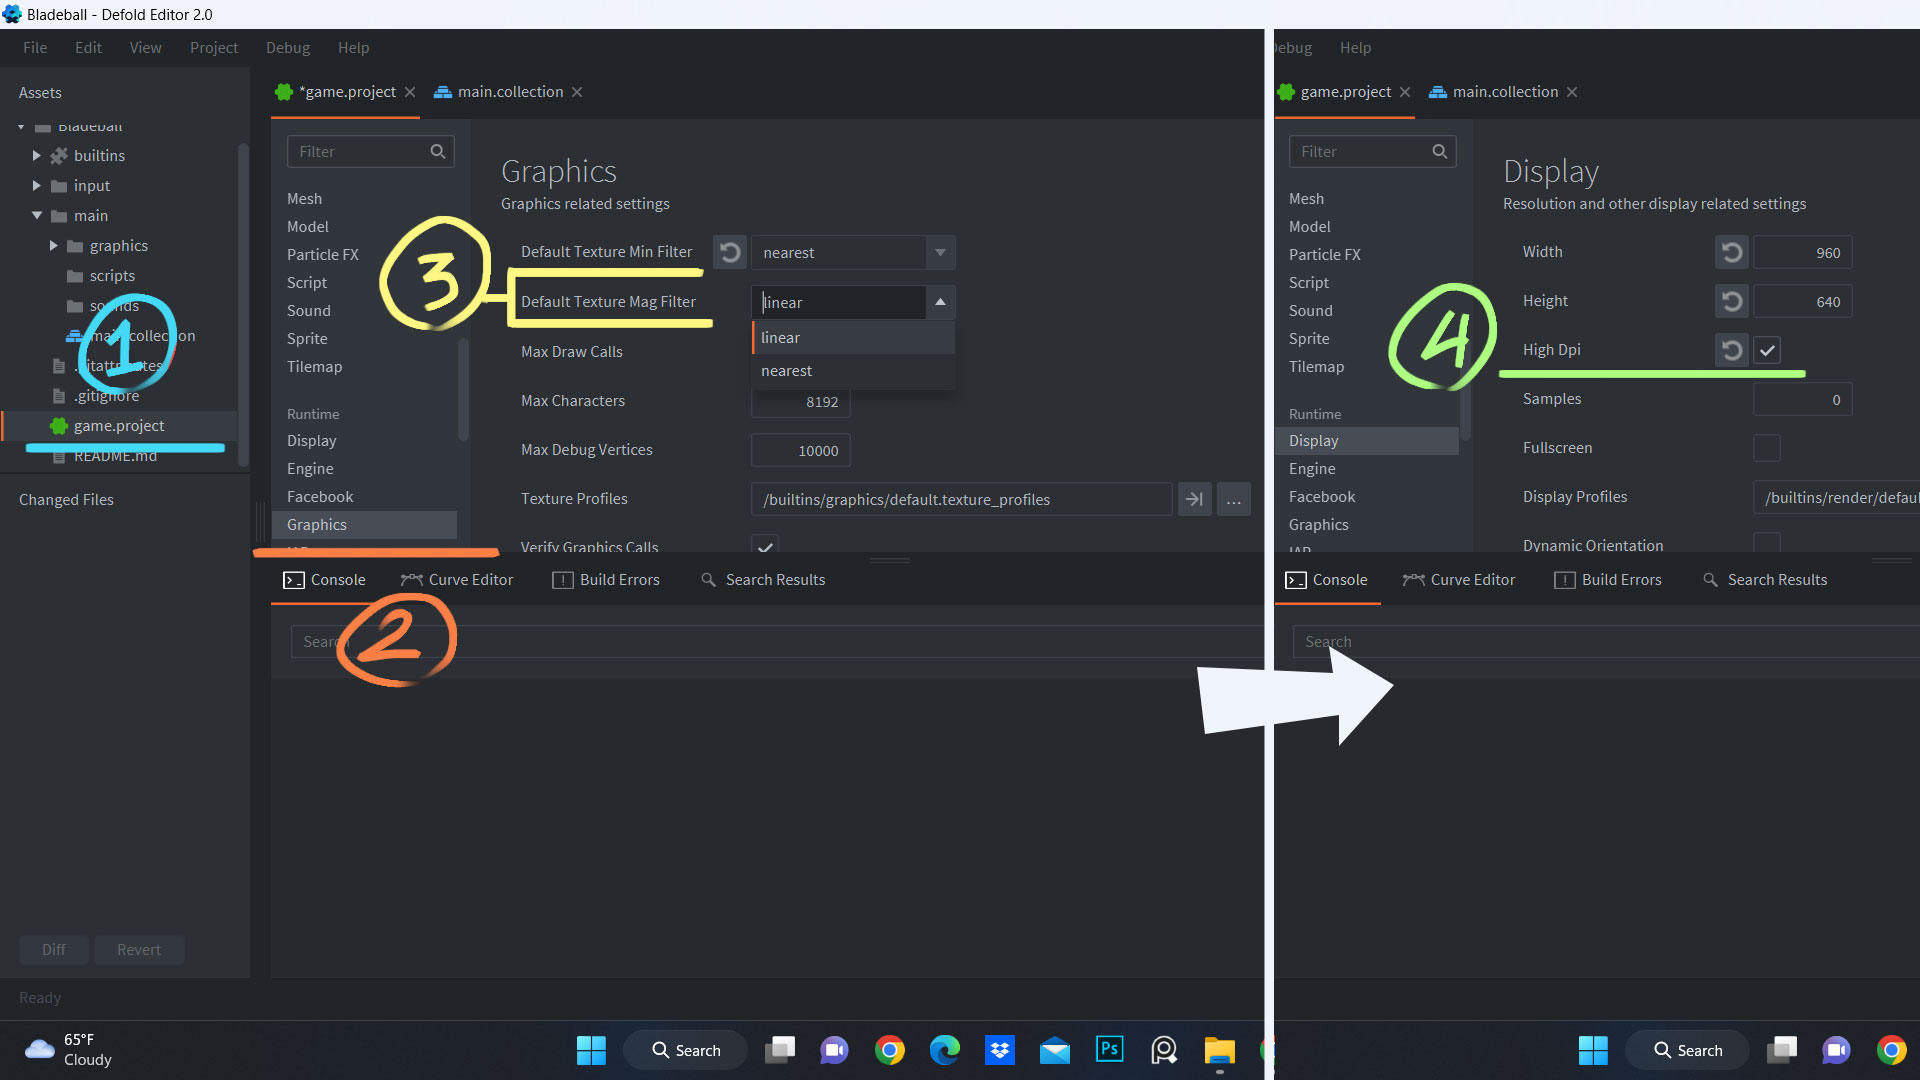
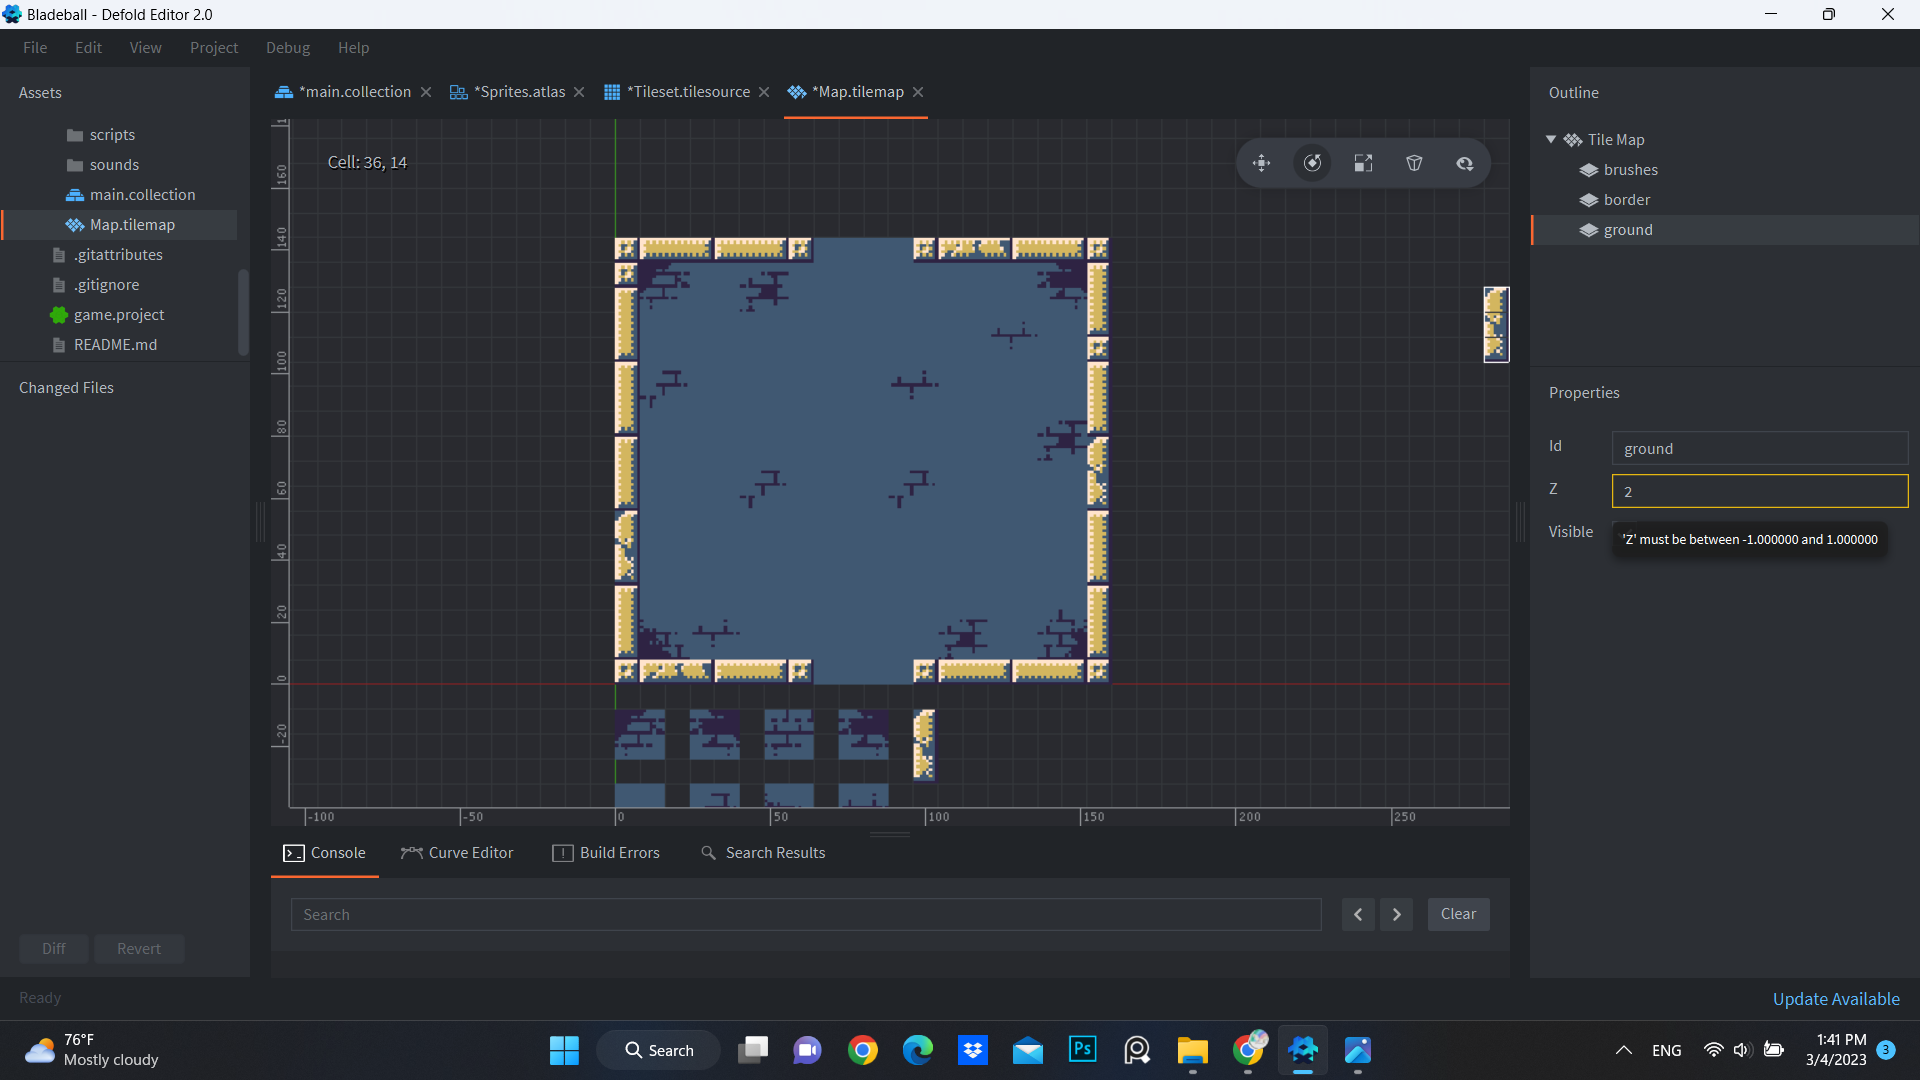
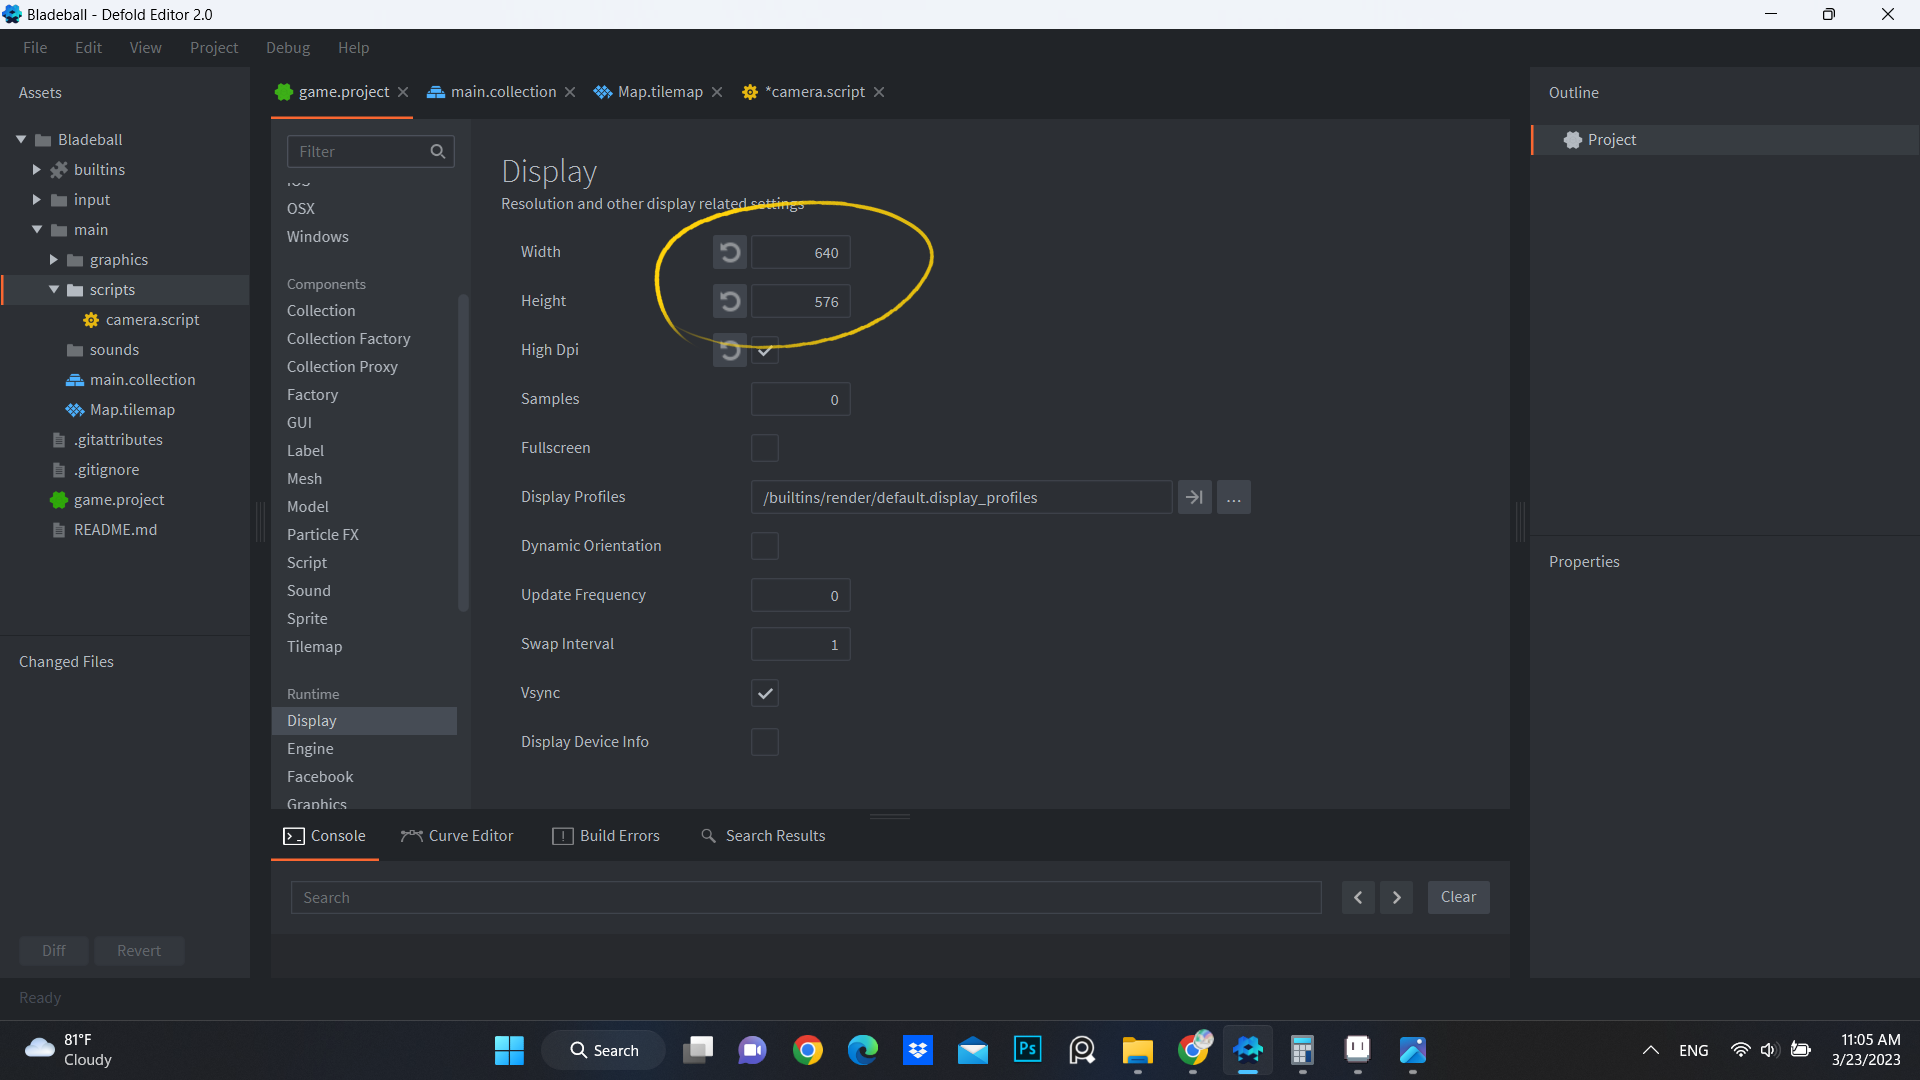
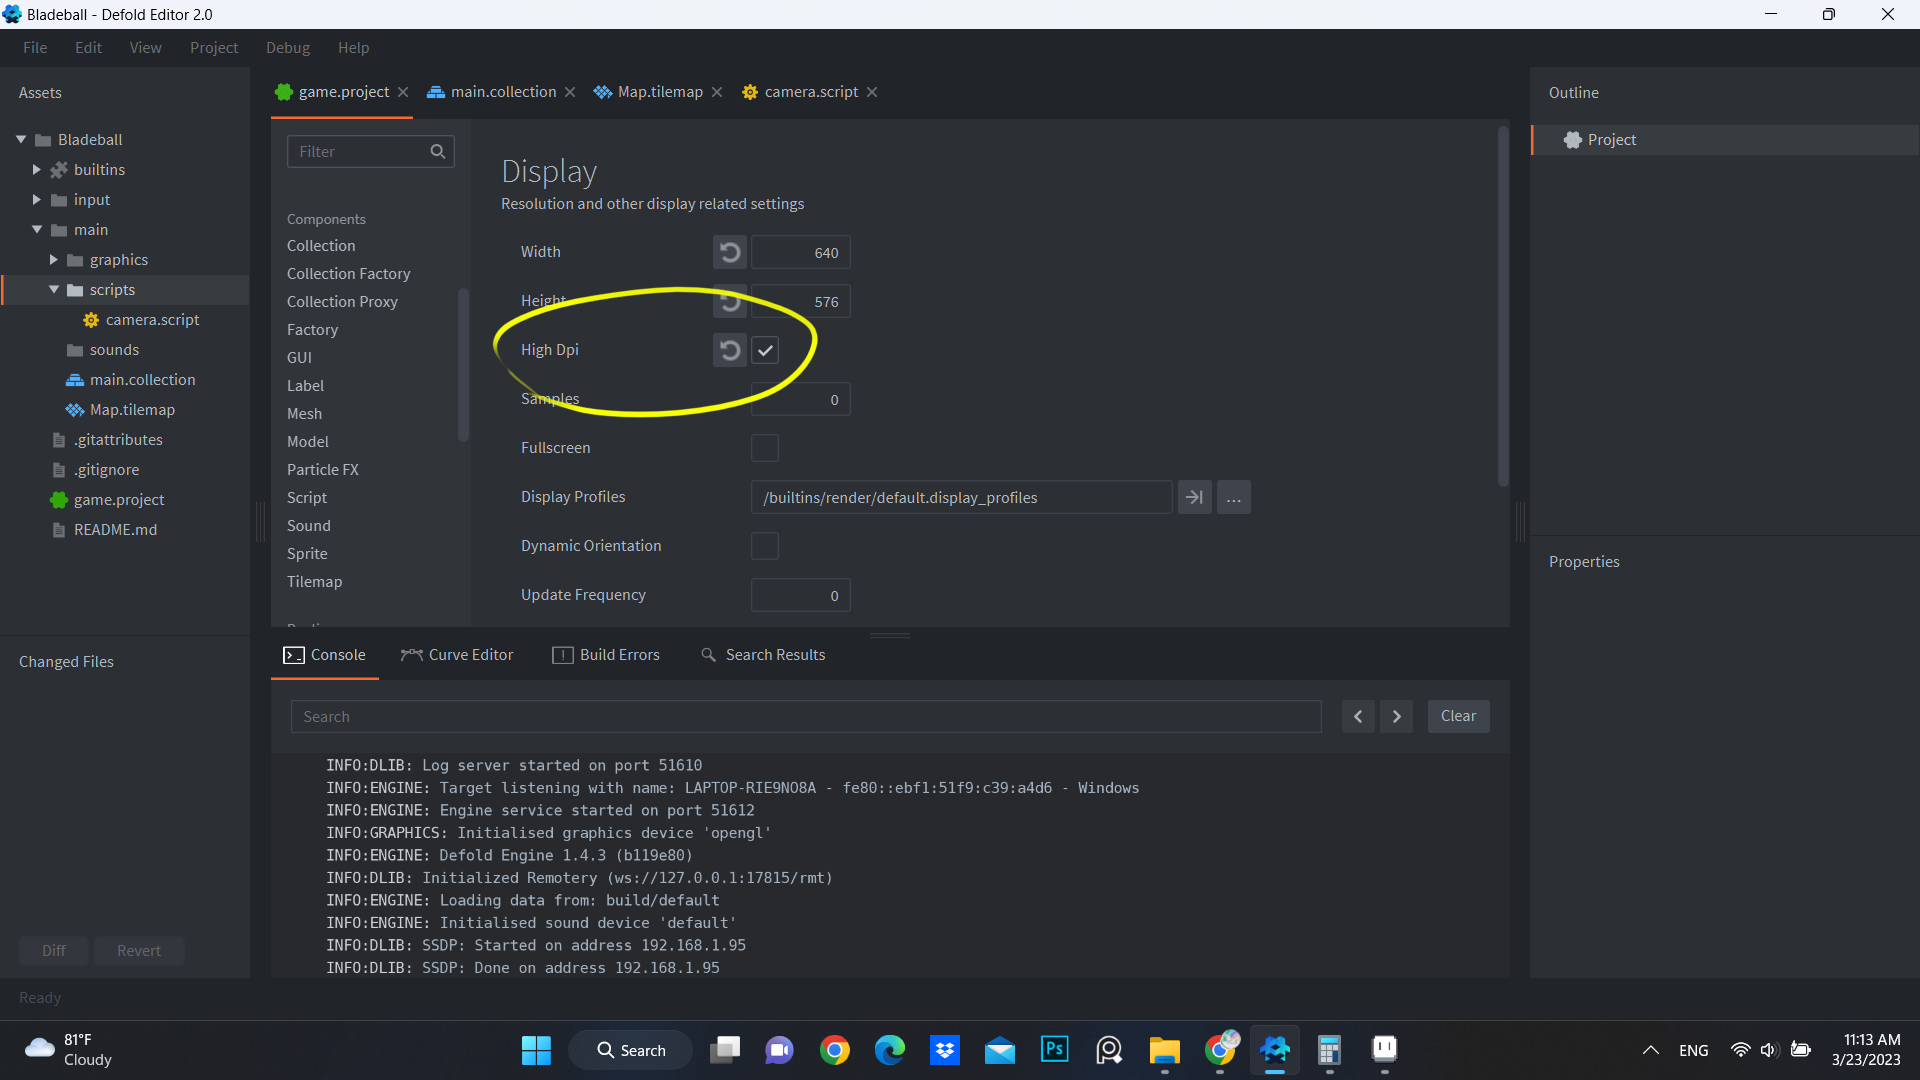
The arena size is 160 x 144 pixels, which is our new resolution since 128 x 128 is pretty small.


But you can choose a higher resolution if you want.

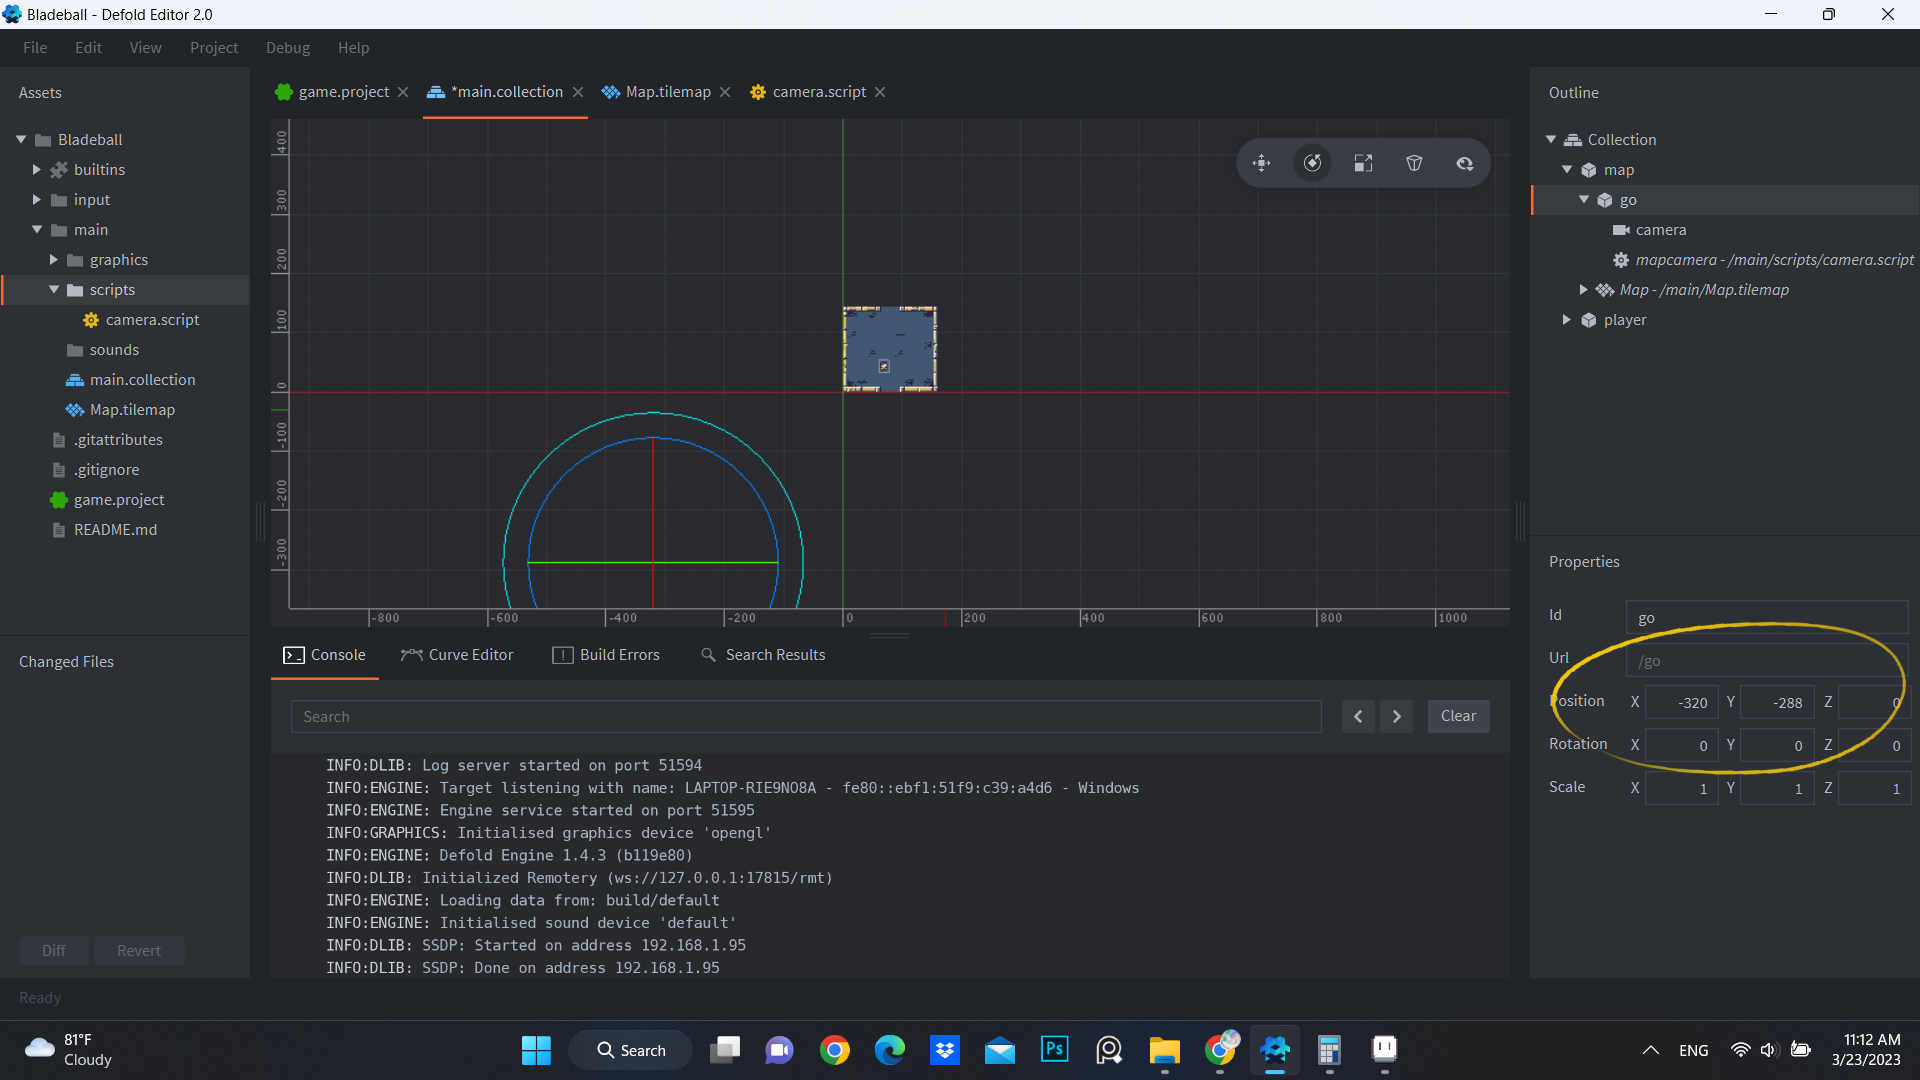
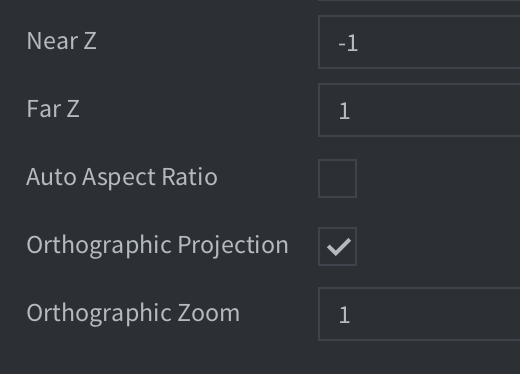
If you want to change the layer order, you will need to change its Z properties.

Since it can only be between -1 and 1, you can use something like -0.1, 0, 0.1, 0.2, etc. The one with higher number will be in the front.

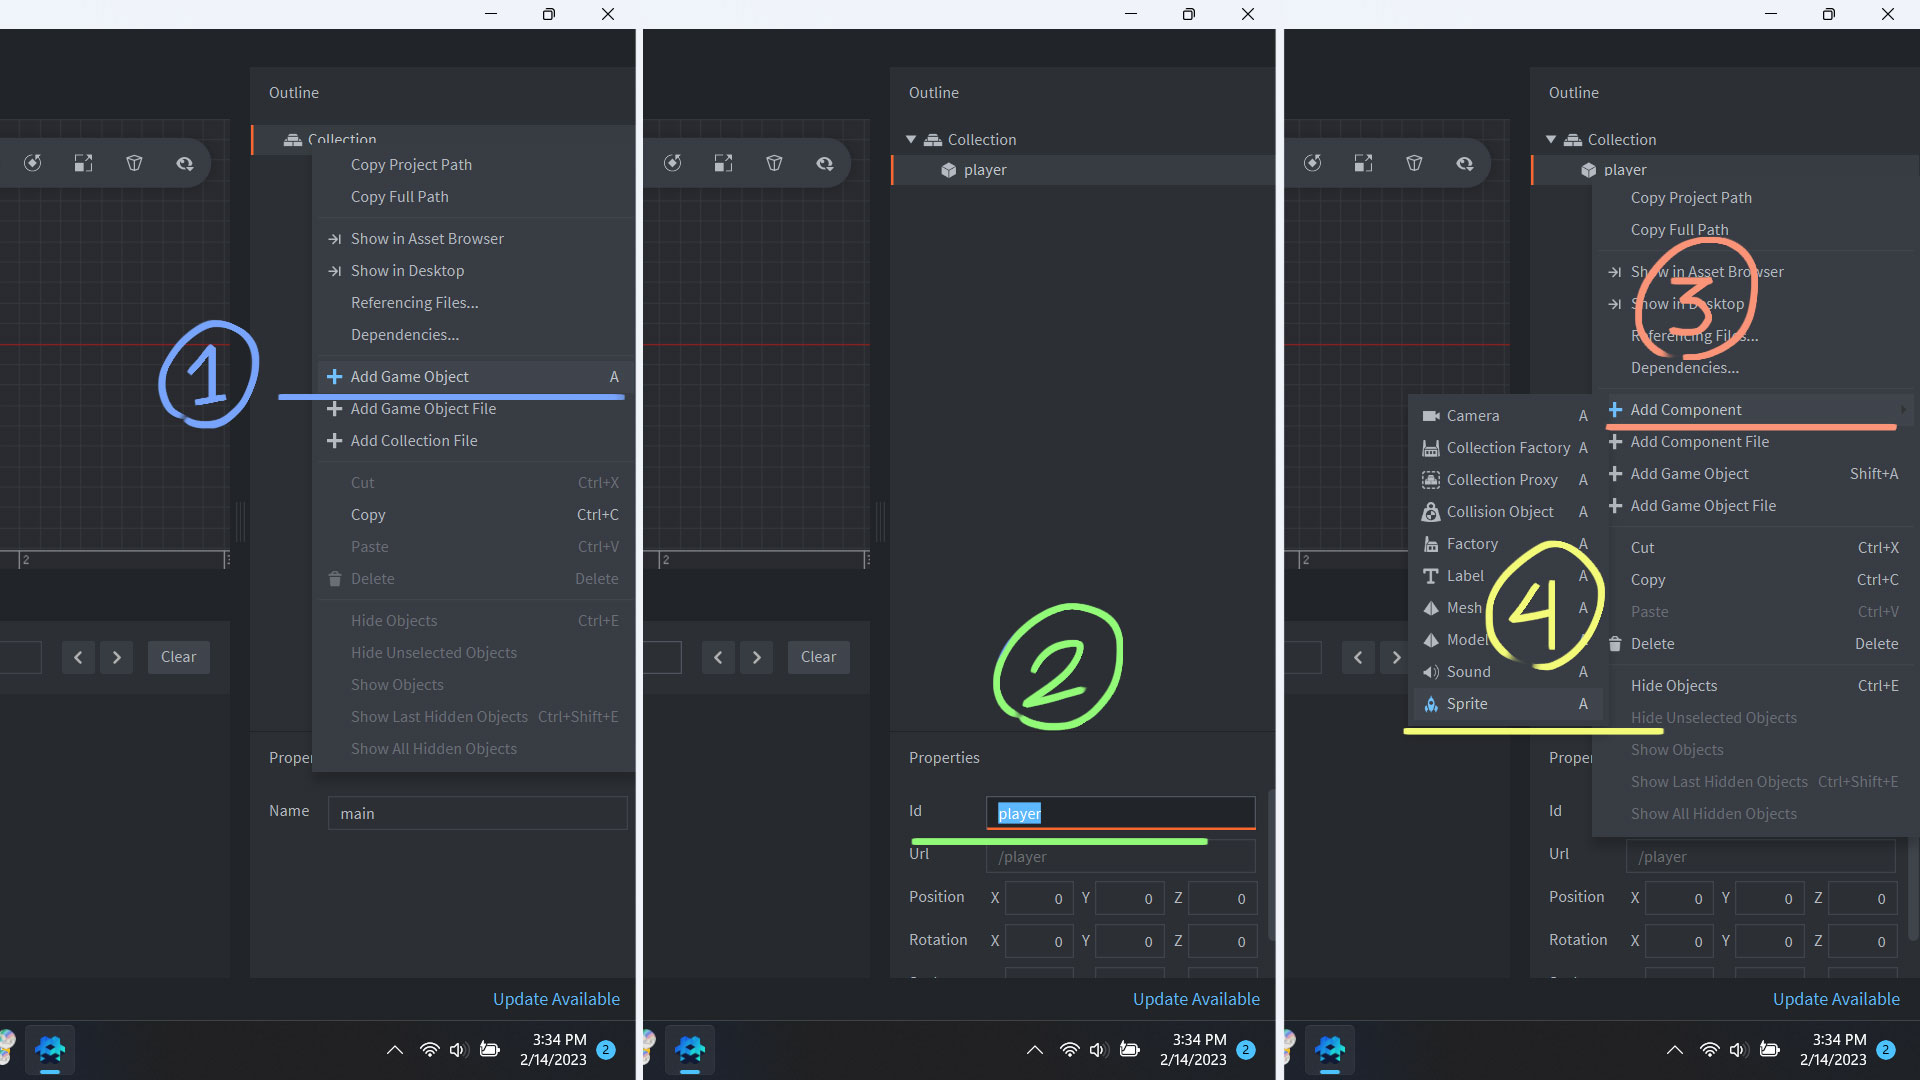
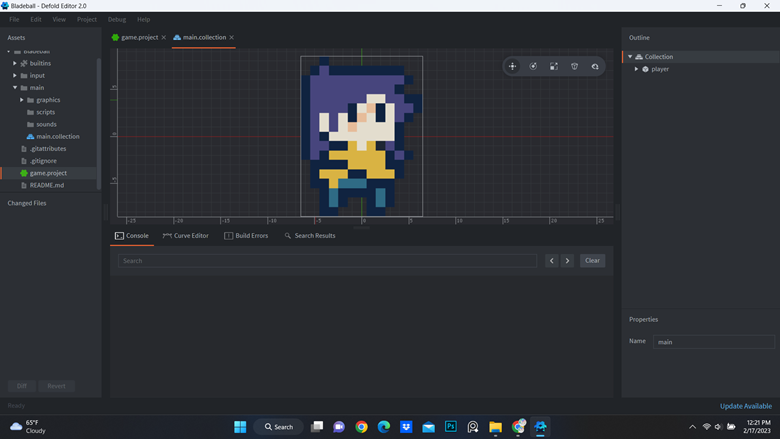
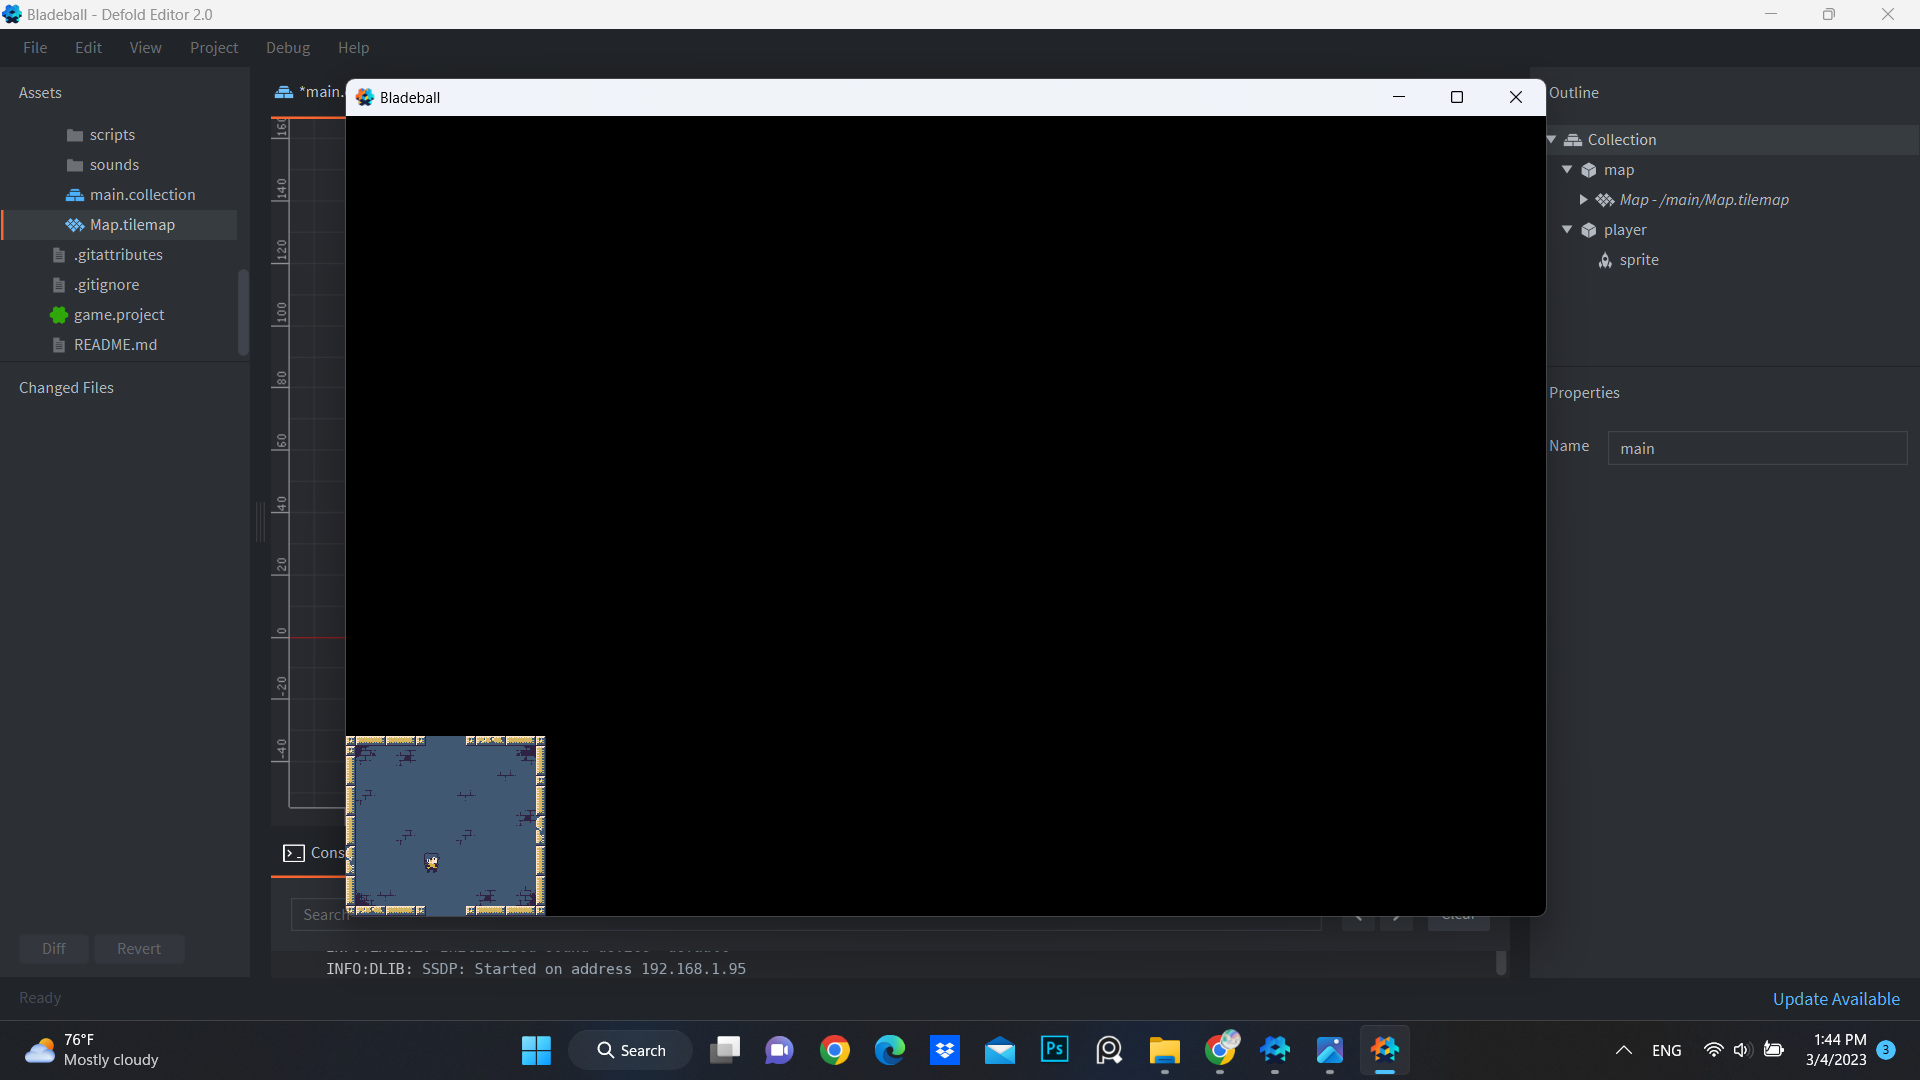
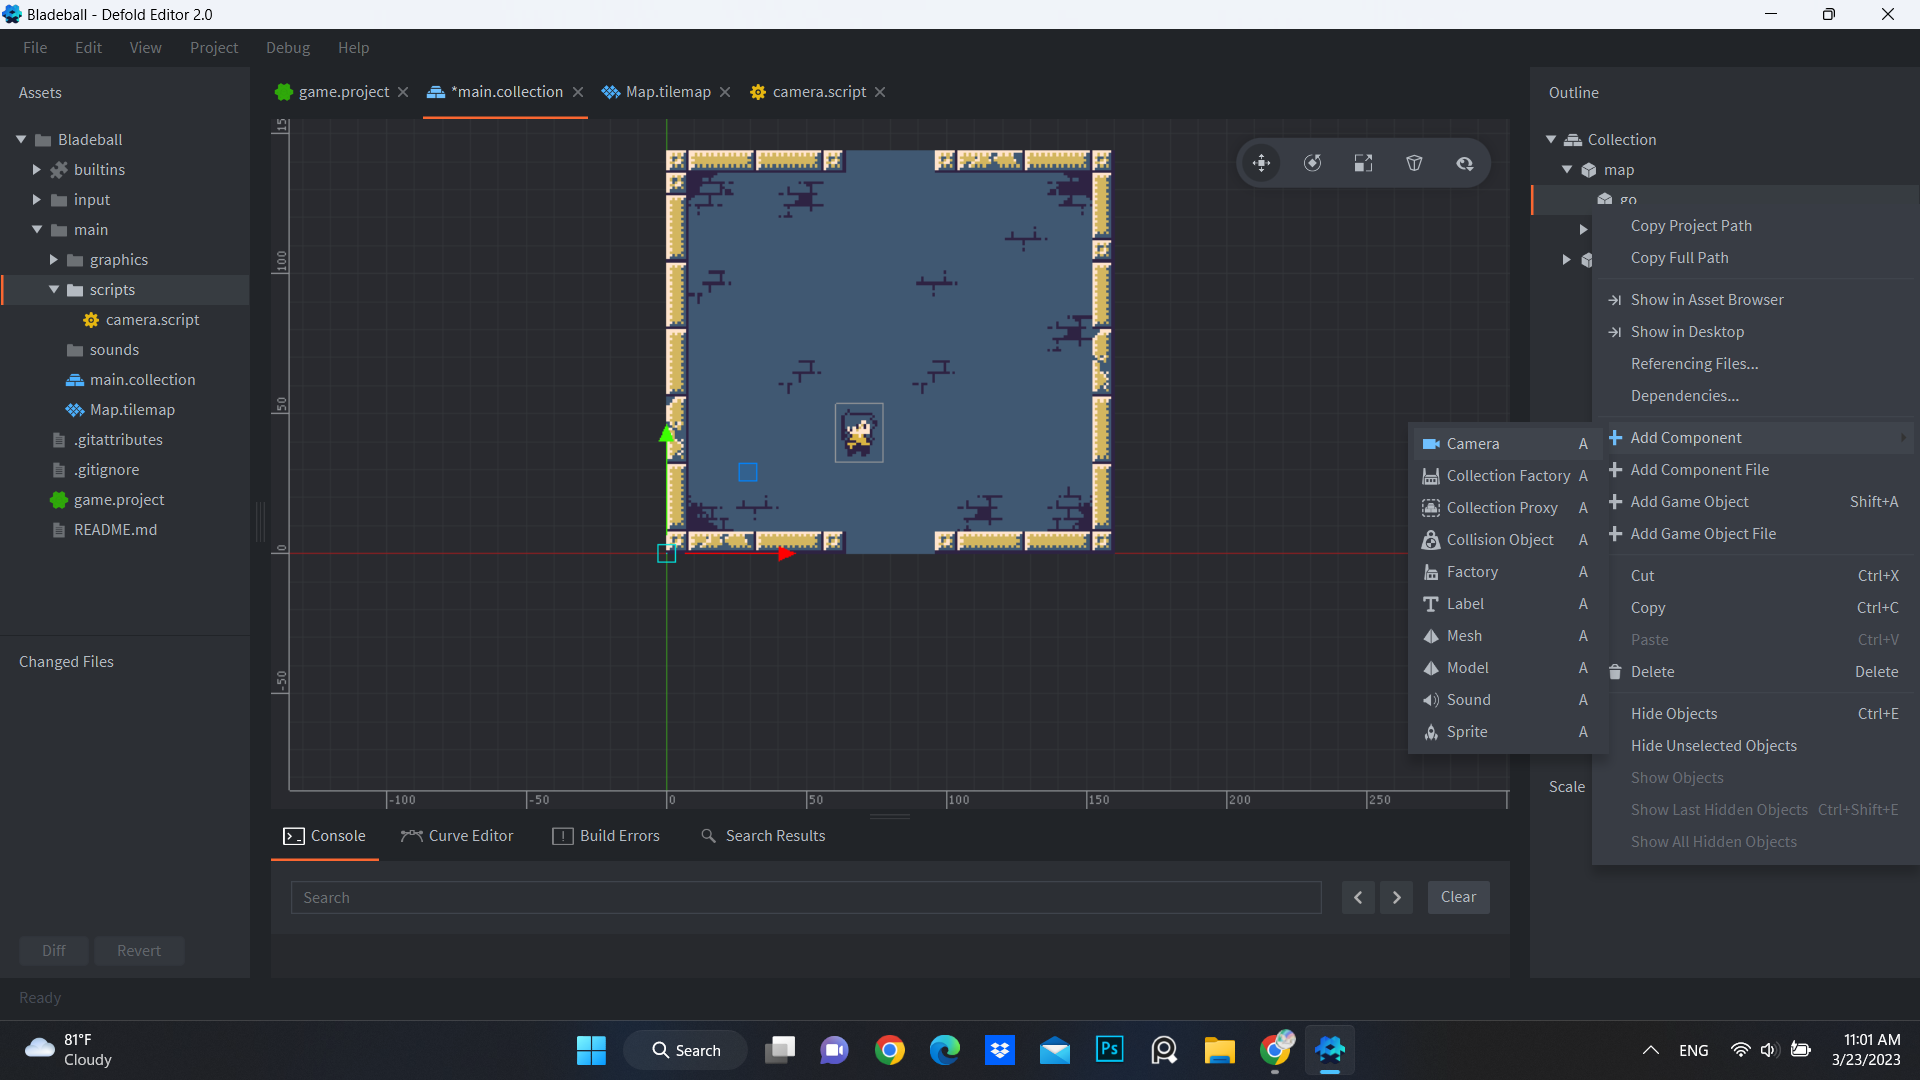
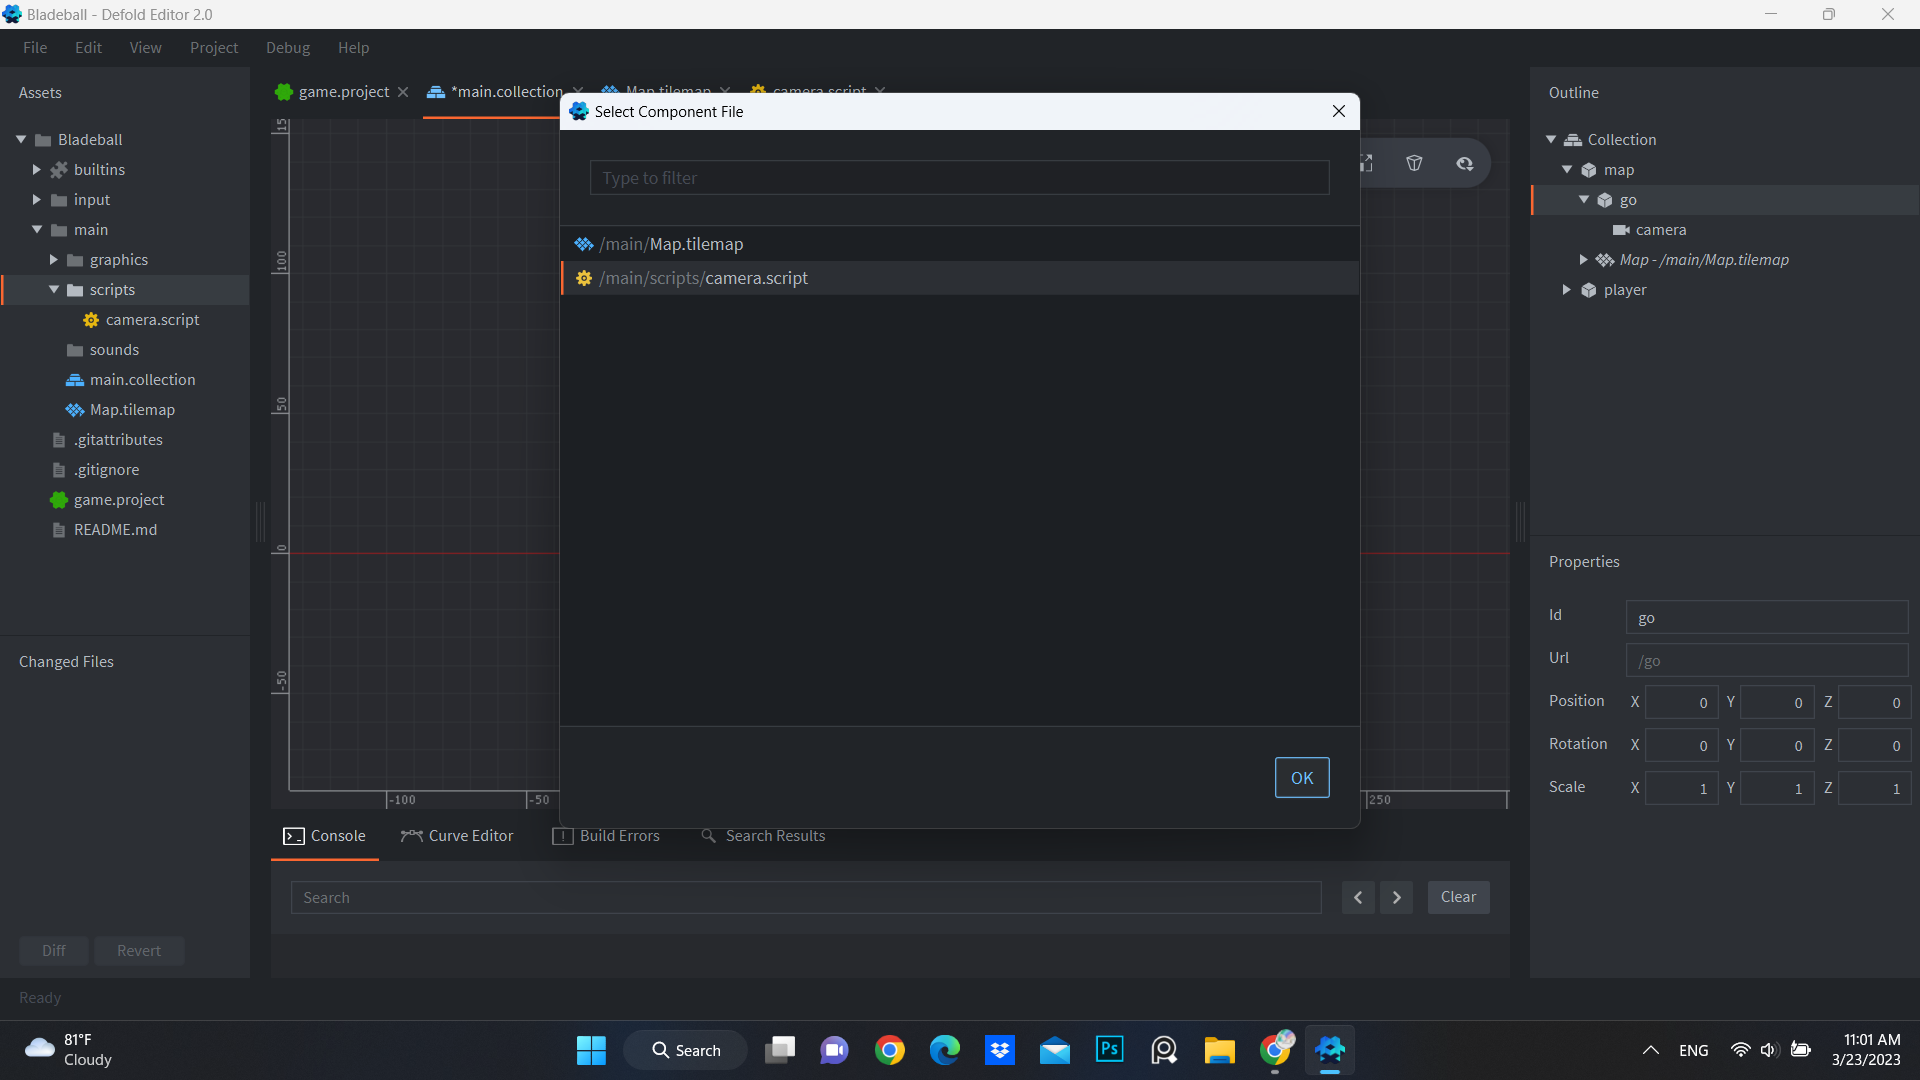
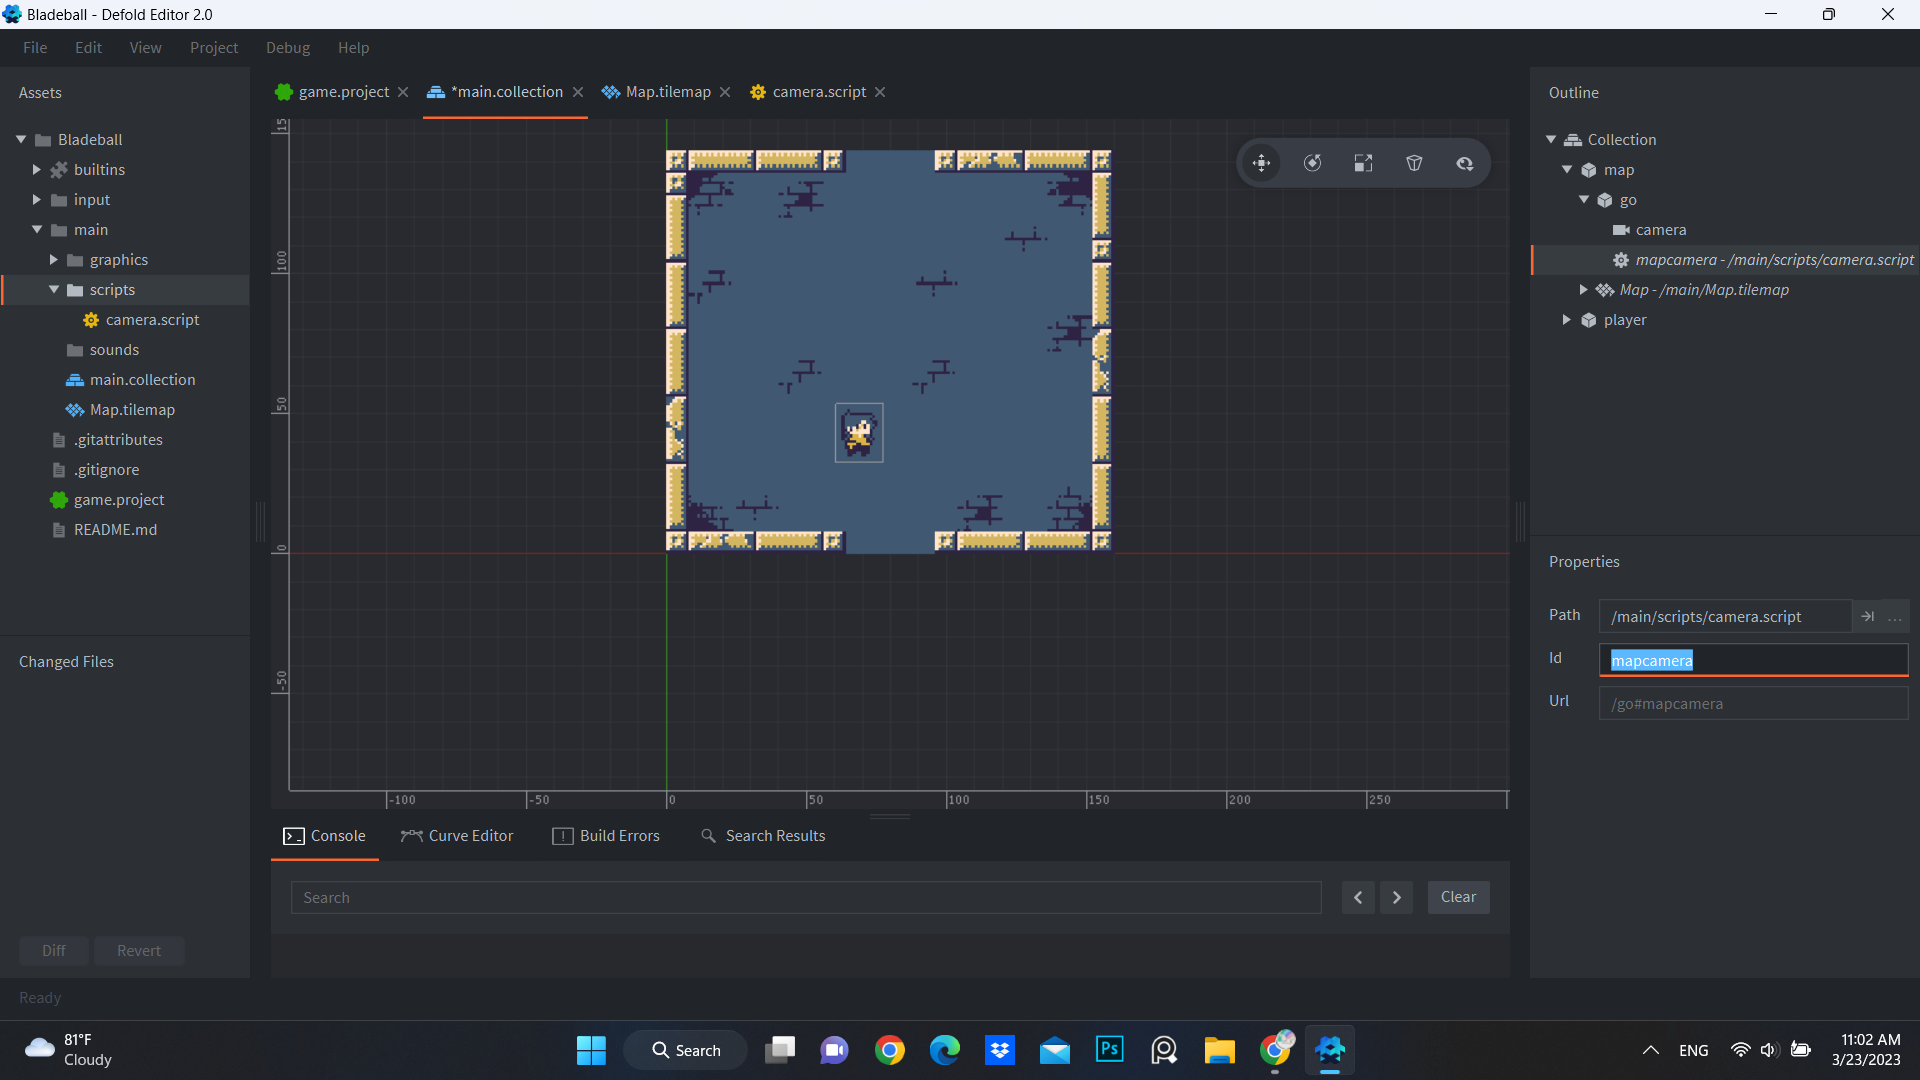
Now, back to our “main.collection”, we need to add a new game object. Then attach component files to it.

Also change the player Z order so our player can be on top of the map

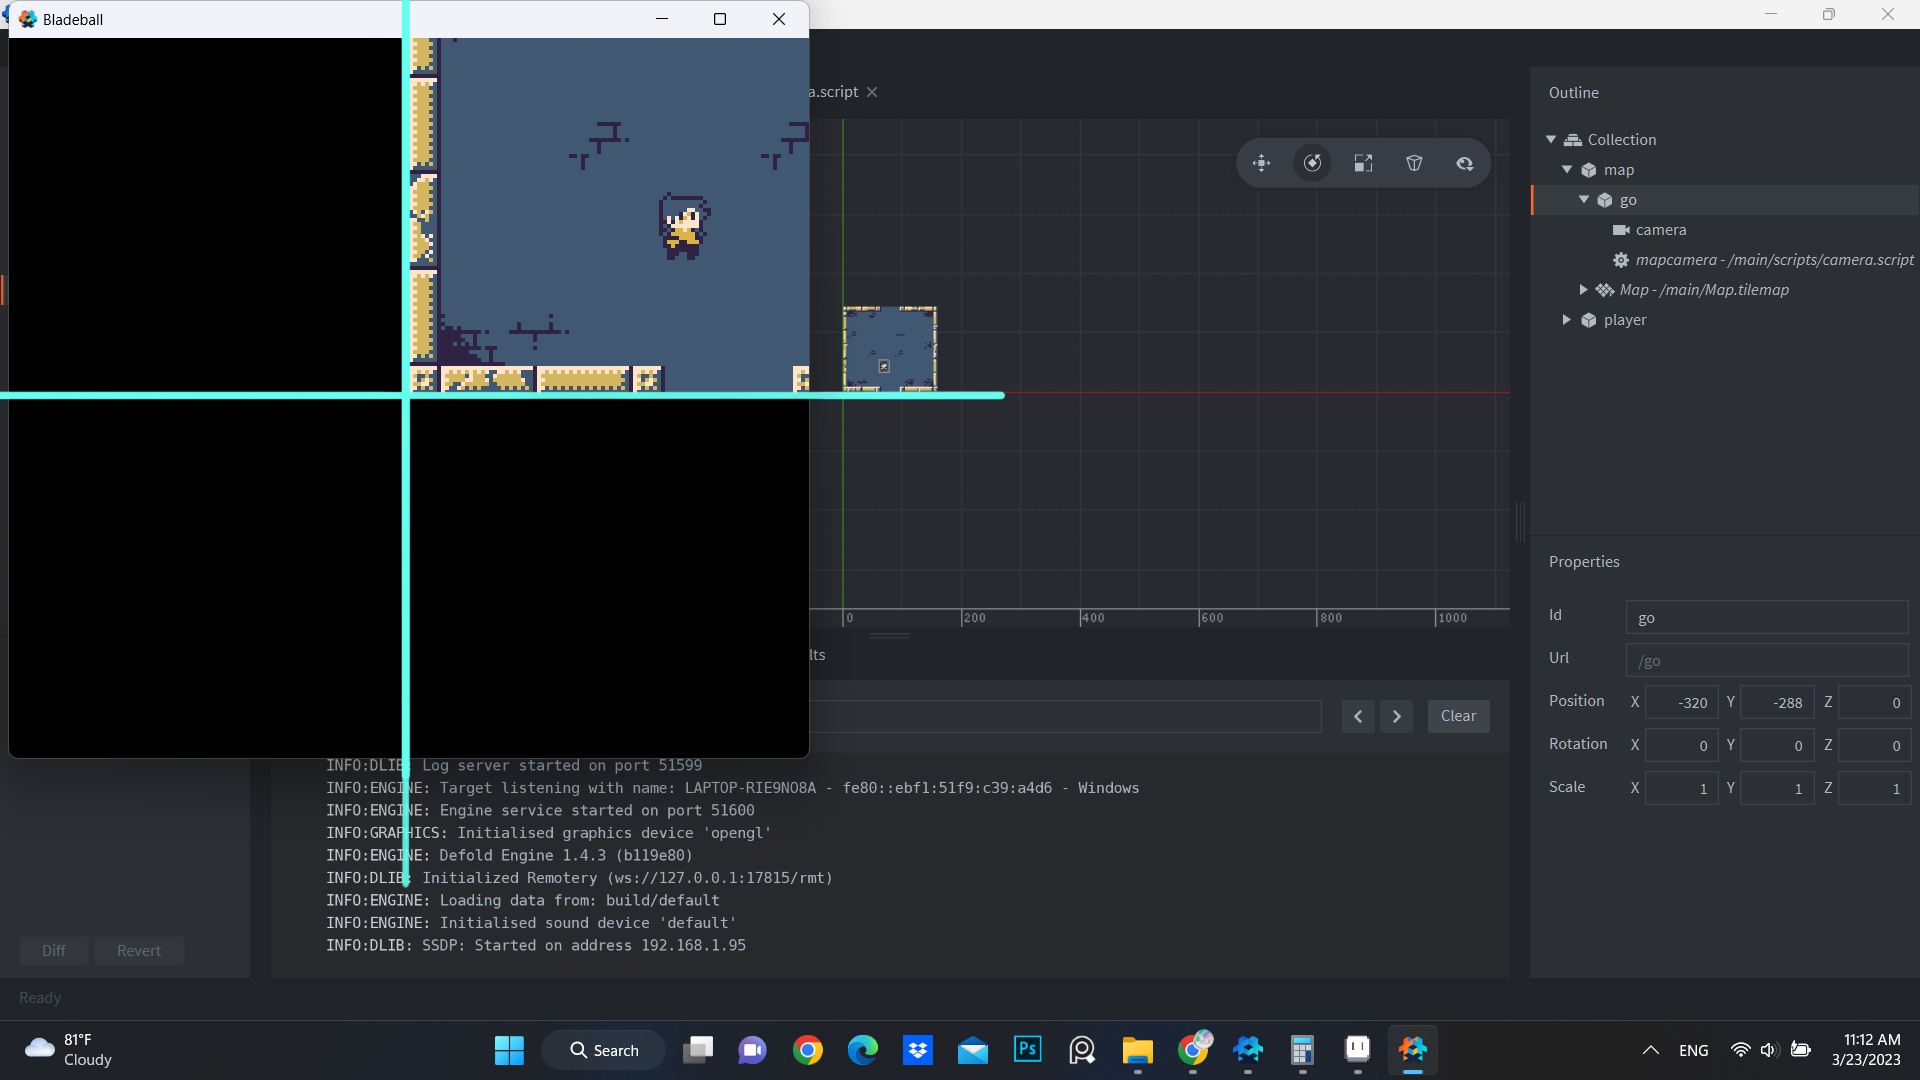
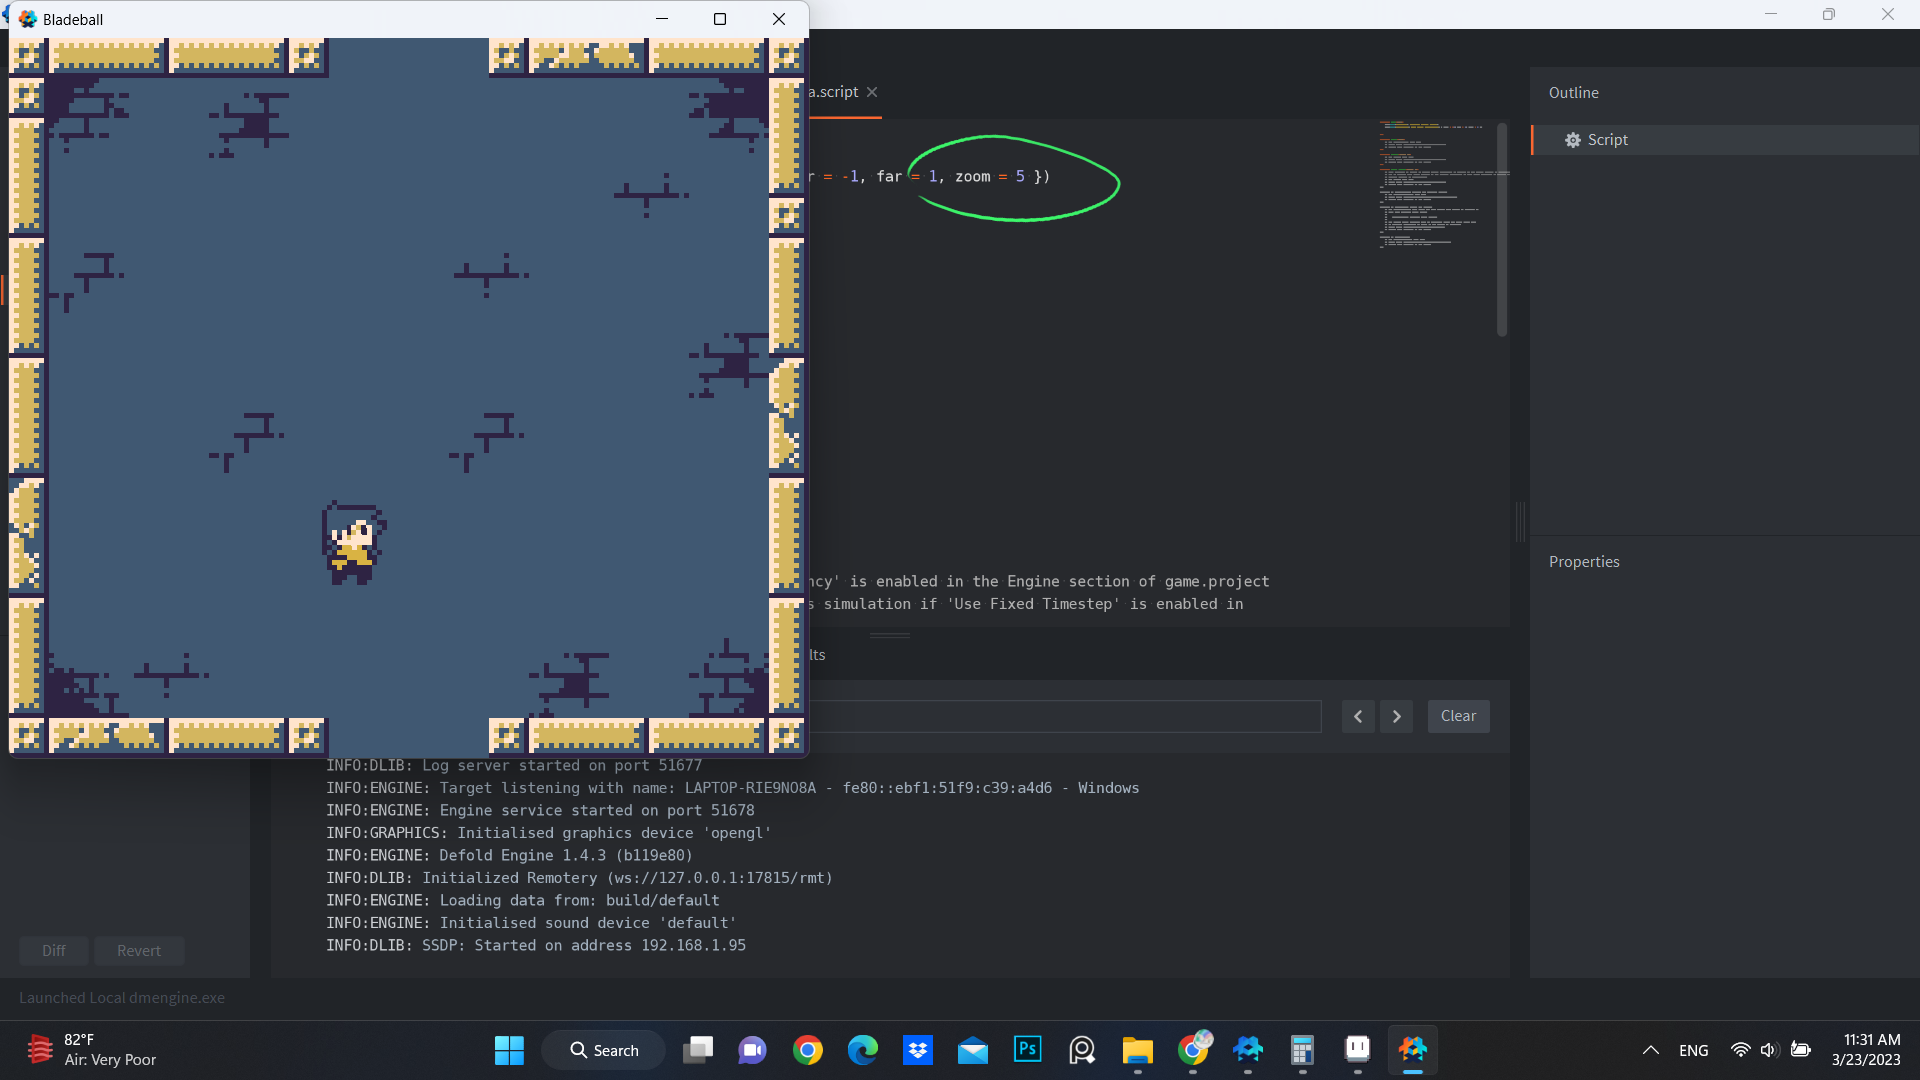
Press Ctrl + B, and this is our result.

10 Likes

I love your dev log! It’s great to follow your progress!

2 Likes

Exactly, great dev log! :heart_eyes:

Those are default near and far values, it can be changed :wink: If you are using a default render script, you can send message to it from any script and for example change the projection to fixed (so you will be able to zoom in to your level):

msg.post("@render:", "use_fixed_projection", { near = -1, far = 1, zoom = 2 })
2 Likes

Thank you, so that’s what it does. I have a lot to learn :grinning_face_with_smiling_eyes:

3 Likes

Hi veih! Thanks for this tutorial - I’m learning and this is a great tutorial to follow and learn from.

One question: where can I find the sprites to download? Are you going to share them?

1 Like

I forgot about this :grinning_face_with_smiling_eyes:
I planned on sharing the assets after I finish the tutorial. Because there will be a lot of changes to the sprites as I make the game. But you can find a lot of free top-down asset packs on Itch.
Here is the asset that is very close to the game we are going to make in this tutorial:

4 Likes

If you need to hide a tile map layer, you will want to uncheck the “Visible” option.

If you right-click and choose Hide object, the layer will only hide in the Tilemap tab.

You don’t actually need to use a camera for this game since we don’t need to track the player.

But we might want to add screen shake or some kinds of effects later so adding the camera should help things easier in the future

To use the camera, we will actually need a script.

You should be very familiar with these steps by now. We will add this to our script folder and name it “camera”.

Then, we create a new game object as a child of map, and add the Camera component to it.

Also the camera.script we just created. You should figure out how to do this easily.

I’ll just change the Id to mapcamera because camera1 is difficult to remember.

Our game resolution is 160x144, but that is very small. So we can change the window size in Display, I will make it 4 times bigger, so that will be 640x576.

So let’s go to our script and add these two lines.

msg.post("#camera", "acquire_camera_focus")
msg.post("@render:", "use_fixed_projection", { near = -1, far = 1, zoom = 4})

We want to prepare the camera before the game starts, so of course the code will go in init().

And press Ctrl+B to build, and now we have a kind of square black screen. This is because we did not center the map on screen, so the camera will just zoom in to the void.

At this point, you can just drag the map around until it appears on the screen. Or we can do some little calculations.

Our display is 640x576, so we divided it in half and got 320x288. Because position 0,0 matches the lower left corner of the camera view, we want negative numbers instead.

We can see the map now, but it is still not centered on the screen. Just subtracting (or adding, in this case) half the size of the map should fix this. The map size is 160x144, so half of it will be 80 and 72.

After changing the camera position to -240 and -216, we finally got it on screen correctly. You’ll notice that even though we zoomed in four times, the map didn’t fill the entire window.

This is because of the High-dpi option.

If you turn it off and build the game again, everything should be correct.

Alternatively, you can increase the zoom value by 25% (I arrived at this figure after some test).

So zoom 5 should work the same.

7 Likes

The last two weeks were pretty rough. I am close to graduating from college, so I will be very busy for at least the next two months. I will try my best to update the tutorial as soon as possible.

3 Likes

If you want the camera view to center on the position of the game object it is attached to you can check the Orthographic checkbox and tell the render script to use the view and projection from the camera:

Screenshot 2023-03-23 at 13.25.41

function init(self)
	msg.post("#camera", "acquire_camera_focus")
	msg.post("@render:", "use_camera_projection")
end
4 Likes