This is a short guide on how to use GitLab Pipeline and Pages to automatically build, bundle and host your HTML5 game.
I found parts of required info around the forum and docs, and want to share it in one place.
I will use pre-made Docker image with Defold engine.
Why GitLab Pages?
Long story short: GitLab allows you to use Pages with private repositories in free tier. Unlike GitHub, that allows you to use Pages only for public repositories in free tier (payed GitHub tiers has this option).
Preconditions.
-
We will use Bob the Builder CLI tool to bundle our project.
-
I assume, that you know about Git, Repository, and heard something about Pipelines and Pages functionality. And that you already have a GitLab repository with your project.
-
If you are new to the Pages functionality - it allows you to publish static websites directly from a repository.
-
If you are new to the Pipelines functionality - it allows you to run automated tasks after actions in you repository. For example: after you merge develop branch into production.
-
If you are new to the Repository and Git terms - well, welcome to the collaborative development. You may start with this tutorials: Tutorials: Find your way around GitLab | GitLab Docs and Tutorials: Learn Git | GitLab Docs.
Build, Bundle and Host
You can create pipeline for Pages in several ways. All of them mention at documentation GitLab Pages | GitLab Docs.
For this guide we will use GitLab UI step by step guide.
- Select your Project Repository
- Select Deploy > Pages on the left sidebar.
- For Step 1 enter the name of the image -
gmantaos/defold.
This is docker image by @Haath , that includebobtool anddmengine_headless.
This image will give you (at time when I’m writing) the latest 1.6.2 stable Defold engine version. If you need some specific version, you could find the list on Tags page.
For example: if you need Defold 1.5.0, you should usegmantaos/defold:1.5.0as image. - Select checkbox "The application files are in the
publicfolder " and click Next. - For Step 2 you can leave empty Installation Steps. Click Next.
- For Step 3 we will create several Build Steps:
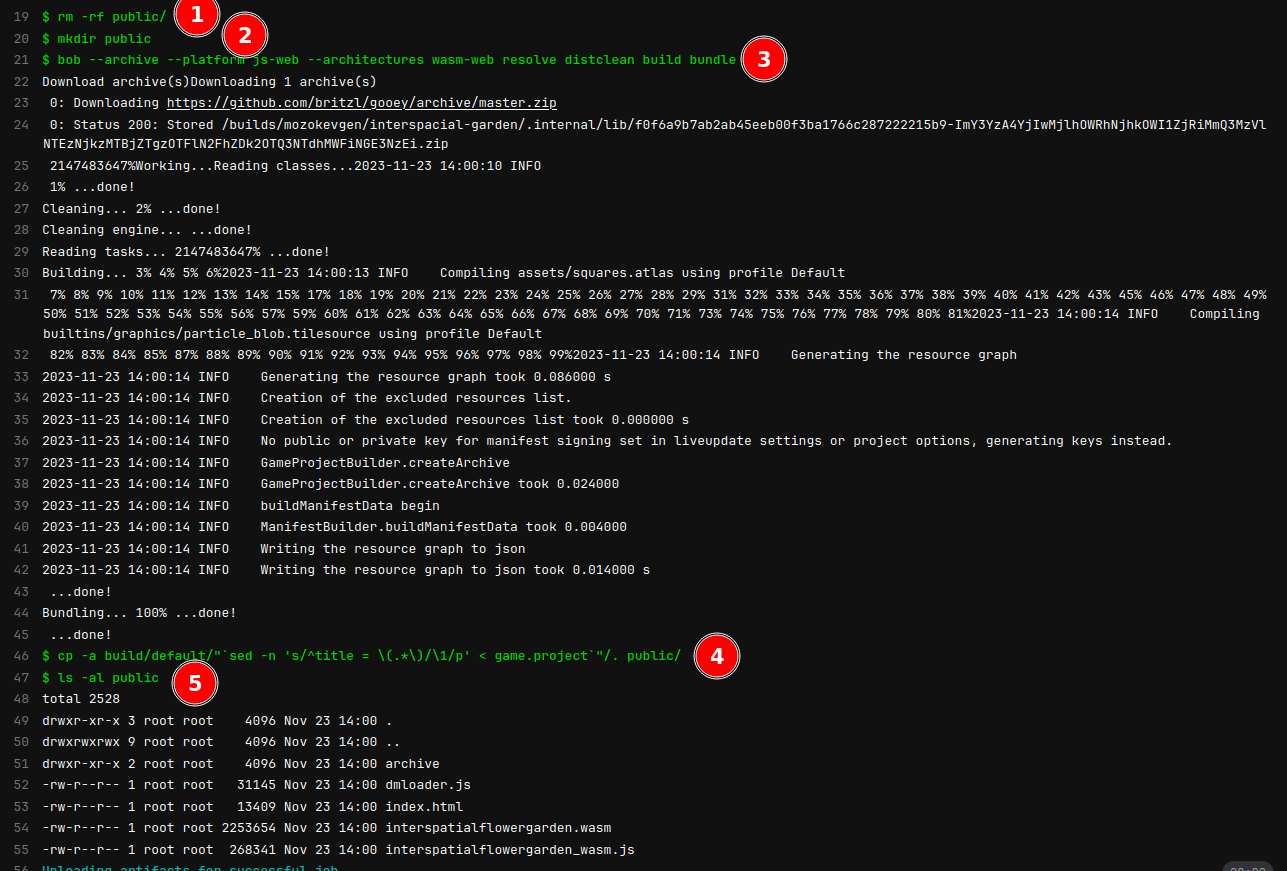
1. rm -rf public/*
2. bob --archive --platform js-web --architectures wasm-web resolve distclean build bundle
3. mkdir public
4. cp -a build/default/"`sed -n 's/^title = \(.*\)/\1/p' < game.project`"/. public/
5. ls -al public
[1] - Clean public directory, just in case. Warning this will delete public folder and all what’s inside, if you have one. This will not impact repository files, files are deleted only during the pipeline.
[2] - Use bob tool to build and bundle HTML5 project (--platform js-web option).
Do only wasm bundle (you can omit --architectures option if you also want asm.js bundle).
resolve - Resolve all external library dependencies.
distclean - Delete all files in the build directory. Default output directory build/default. The bundle is named according to the project name setting in game.project.
[3] - Create folder for our bundle. Pages will serve content from this folder.
[4] - This line is a little bit tricky.
We need to copy bundle from build/default/"My Project Title"/ folder, into the public/ folder.
sed command here search in game.project for the project title and add it to the catalog path.
If you are working on Windows, you might have additional symbols, like carriage return, in sed result. In this case you should use:
4. cp -a build/default/"`sed -n 's/^title = \(.*\)\r$/\1/p' < game.project`"/. public/
Of course, you could just type directly the name of the project into this command:
4. cp -a build/default/"My Defold Project"/. public/
[5] - This line is optional. Just to see in the Job log that all files are present at target folder.
Click Next.
- For Step 4 you need to enter commit message and select branch. You may leave it with default values. Click Commit.
.gitlab-ci.ymlfile will be created. In fact this file is what GitLab Pipelines is needed to run a jobs. And you can just create this file and fill it manually. Or copy from another project.
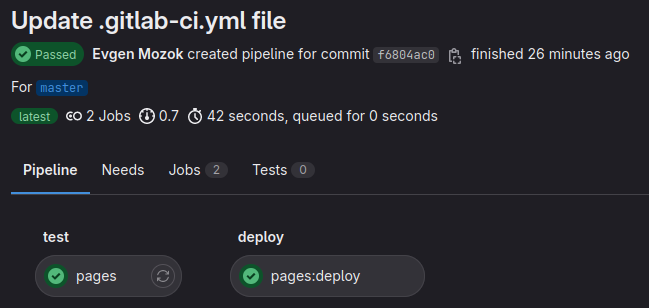
By default Pipeline is configured to run after merge intomainbranch. - As a result you should see created pipeline at Build > Pipelines on the left sidebar.
–
Inside a Pipeline you will se two Jobs:
–
And inside thepagesJob you could see execution log:
- You can find your build link and several configs at Deploy > Pages on the left sidebar.
- This Pipeline will run every time you merge MR into
mainbranch.

Resulted .gitlab-ci.yml pipeline configuration file content:
# The Docker image that will be used to build your app
image: gmantaos/defold
# Functions that should be executed before the build script is run
before_script: []
pages:
  script:
    - rm -rf public/
    - mkdir public
    - bob --archive --platform js-web --architectures wasm-web resolve distclean build bundle
    - cp -a build/default/"`sed -n 's/^title = \(.*\)/\1/p' < game.project`"/. public/
    - ls -al public
  artifacts:
    paths:
      # The folder that contains the files to be exposed at the Page URL
      - public
  rules:
    # This ensures that only pushes to the default branch will trigger
    # a pages deploy
    - if: $CI_COMMIT_REF_NAME == $CI_DEFAULT_BRANCH
PS:
- Steps 2 and 3 could be reworked to use
openjdk:17-jdk-bullseyeimage and build steps from deftest/.test/run.sh at master · britzl/deftest · GitHub. - If you know how to make pipeline better, or find a mistake, leave a comment.
- If you have some issues with pipeline, live a comment with screenshot or Job Log.