Map_select menu rebuilt.
Looks great. Can you give a brief description of how you coded the level selection grid? Do you have any transitions between pages?
Yes if you scroll up I have a description of my redneck transition and little video.
the menu is simple- each level number is button with layered sprites. if you click a button then it shows the enable sprite over the button sprite, and it toggles a variable that if true toggles the play button as active and sets play sprite from gray sprite to green sprite and sets the level to that button’s level. pressing play then does a proxy collection to the level chosen.
If instead you click the highlighted level button it erases the level variable, sets play toggle to false and hides the select sprite.
edit: a mini map pops up when you select a level before clicking play.
Are you near Des Moines?
Im about 1.5 hours from there is you ever would like to meet up and discuss your next blockbuster game.
I’m just outside of the Quad Cities, so a few more hours. Great to have a fellow midwesterner here! I grew up in Sioux Falls, SD, and moved here after college.
Great people up there- I think the winters mellow them out:) Im from Memphis originally. Did button answer make sense to you?
Yep, the buttons make sense. Was more curious about how you structured the grid they sit on? Are they placed automatically?
No when I create the back drop menu I draw the button locations. Then I just drag and drop buttons onto them. I am very hands on and like the laying out by hand. Though you could just use a for next loop and add them.
I decided that wood gui was not very Sci FI so I drew up a 1950’s pulp scifi gui.
I have not decided what ffx to do with it, save maybe electric arc between antenna
This is map selection screen. Art done in affinity designer. One difference I am implementing is when you select a level an animated map will fill the TV screen.
When I did this Godot originally with the wood I just had a popup minimap.
You could use a shader effect to add some subtle grain and/or glitches to the screen.
Thats a wonderful Idea! thanks
This one would probably work nicely. I’m using it in my current project so I have a version ready to be used in Defold (with a way to control its intensity) ready if you’re interested. It would have to wait until tomorrow, though.
I have never used shaders. But after seeing people’s use of it definitely is a good investment of my time!
It’s absolutely worth it, plus it will push you towards modifying the render script, which also allows some neat stuff.
Here’s the promised shader.
noise.zip (2.1 KB)
It uses a single constant called time_magnitude_resolution which does exactly that - animating the x value makes the glitch go and making the y value lower makes the glitch more subdued. You can set this in the material directly.
I think you’ll need to render the contents of the screen to a separate render target first and then apply the shader to that, otherwise each of the components would get glitched on its own. Let me know if you need help with that.
And hopefully someone else will chime in if anything I’m saying is wrong. I only got comfortable with shaders and render targets recently, so there might be mistakes, but hopefully not.
Sweet!
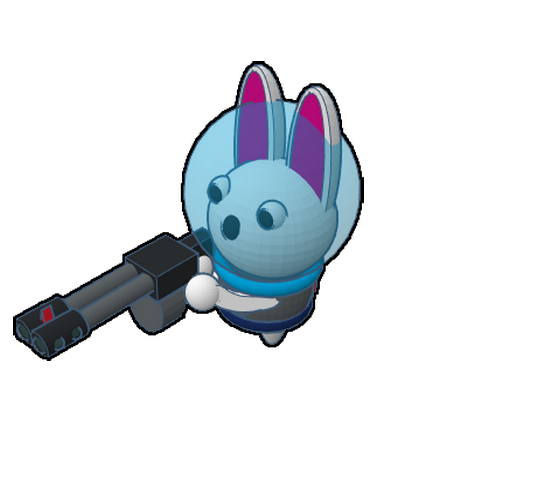
Todays update started converting towers to 3d. I originally thought 2d would be easier but when I realized I had to produce something like 96 drawings I decided making 3d models and exports the views would be easier.
SO I finished upgrade path a for the first rabbit. All rabbits have 3 upgrade paths.
!I also worked on coding on both ports of the godot and defold versions of the game.
Thanks to the NavGo path finding asset and working with Dr. Campbell (And he was first class to work with), I now have a functional path system in Defold for the game. This is an aspect that was a little more difficult to implement in Defold than Godot or Gamemaker as they both have this as standard functions. But I have it worked out. And I summarized it in redeck English best I could on the navgo post in this forum. But I will place it here as well for my reference.
Next step is creating my marble wave generator- which would be a factory producing marbles from an array. Which is what I did in Godot and it should work here.
Each map is designed to have 150 levels or waves of marbles increasing in difficulty. AFter wave 5 sentient marbles appear and destroy your towers if not killed first!
So to simplify this whole thread: REDO 2
A. install library for the project as a dependency
B. Then in the collection:
- in collection add go handler
- create a folder in main called: directionalCharacter
3.Add a game obejct called directionalCharacterGo - add a script called directionalCharacterSingleton
- Add this text in directionalCharacterSingleton script:
- Add this text in directionalCharacterSingleton script:
require("navGo_pathfinding.NavGO_Global")

go.property("Start_path_ID", -1)
go.property("End_path_ID", -1)
go.property("speed", 400)

local function distance(vec1, vec2)
	return math.ceil( math.sqrt( math.pow(vec1.x - vec2.x, 2) + math.pow(vec1.y - vec2.y, 2) ) )
end

local function moveCharacter(self)
	local path, found = NAVGO.GET_PATH_FROM_DIRECTIONAL_ID(self.Start_path_ID, self.End_path_ID)
	if not found then
		print("Directional - NO PATH FOUND")
	else
		print("Directional - PATH FOUND")
		local delay = 0
		local lastPos = go.get_position(go.get_id())

		for i=1, #path do
			local newPosition = vmath.vector3(path[i].x, path[i].y, 1)
			local time = distance(newPosition, lastPos) / self.speed -- move at a consistend speed
			go.animate(go.get_id(), "position", go.PLAYBACK_ONCE_FORWARD, newPosition, go.EASING_LINEAR, time, delay)
			lastPos = newPosition
			delay = delay + time
		end
		--timer.delay(delay, false, moveCharacter)
	end
end


------------------
--Core functions--
------------------

function init(self)
	timer.delay(1, false, moveCharacter)
end

function on_message(self, message_id, message, sender)
	if message_id == hash("contact_point_response") then
		if message.group == hash("wall") then
			local newpos = go.get_position() + message.normal * message.distance
			go.set_position(newpos)
		end
	end
end
- in outline click on the singleton script and set the start =1 and end = 100 or whatever node qty you might need
- add directional nodes (you can cut and paste as well)
- in direction node script update this node to current node number, and goto node as next node number. Start node: this=1, next= 2 , second node: this=2, next=3 … end this=100 , next=1 . End and start nodes must match script in handler script
- sprite must stay named sprite in the nodes
- From within the collection you have to initialize the NavGo handler by sending an init message. I recommend having the following code in your main script to handle it.
function init(self)
        local message = {}
        message.collisions = { hash("wall") }
    	message.debug = false
    	message.deleteNodeAfterGotten = true
    	message.nodeNeighborRange = 400
    	message.nodeNeighborRange = 400
    	msg.post("/NavGO_HandlerGO#NavGO_HandlerScript", hash("init"), message)
end

function on_message(self, message_id, message, sender)
       if message_id == hash("NavGO_Ready") then
                -- NavGo is ready to be used
                -- Add game start code
       end
end
Update got the basic script working for multiple marbles:
BORING UPDATE:
This week I focused on debugging code, setting up git hub. A lot of work for such a small comment. I finished chemo this week, should be the last treatment ever. Had my pump removed Wednesday. The brain fog and fatigue should start getting better the next few days and my development and design should increase.
On a side note my update posts on my project has built up interest in my webcoding stuff (ecommerce) its funny what people find attractive. Theres been some interest in gamifying online menus at restaurants. Maybe this engine is useful for that as well.


