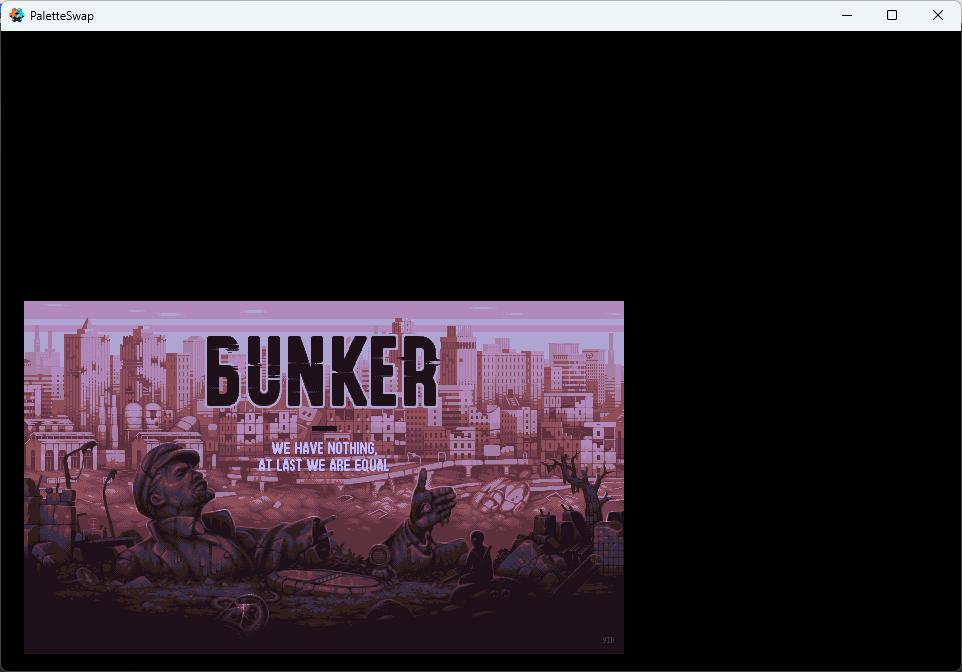
Pixel Art Palette Swapping

PaletteSwap.zip (548.6 KB)

This zip has some examples and helper scripts.

It’s based on this article

If you want to palette swap more efficiently you should do it in the render script. This is useful for swapping all colors on the screen for example.

Your sprite materials need a nearest texture_sampler set like in the example.

If you want to swap a specific sprite you can see how to do it in the zip. It also shows how to support multiple palettes. But this will add drawcalls for each sprite potentially?

This method should work on 3d models that use nearest texture_sampler too.

There are two helper scripts one is meant to generate the greyscale image as well as the palette image. You edit the palette image to add more rows. Then use the other helper script to generate uniforms from the modified palette image. Then you can use those uniforms to set the active palette for a sprite/model/render predicate.


18 Likes

I really appreciate this. I’m a huge fan of making retro-like games and utilising the GPU to re-create retro effects, so so we can avoid taxing the CPU and making our games run slower for an effect that actually was very efficient to do on the original hardware. I believe this is exactly the task the GPU is meant for in this case - pretending to be the graphics chip in the old video game systems.

I’m also a fan of that article you linked to, it seems like the most efficient way to recreate this effect.

And the fact you even included a python script to convert the images and create the palettes really makes this a complete “paletted workflow” for Defold.

Yes, but breaking draw call batching between identical sprites that use a different palette index is very much a worthwhile trade off of time and effort IMO.

I have once gone deeper into this (using Kha, and with the help of the friendly team there, especially it’s creator Rob), and went the whole way of making sure each quad can be batched even if it uses a different palette index, by including the palette index in the vertex data. You end up including this value in all 4 verts but it’s the most hardware friendly way to do it. But this requires you to go so low level that it circumvents the normal material workflow usually set up in game engines. Eg. in Unity you’d have to make your own vertex buffer format. Getting this deep into the weeds means you miss out out on using a built in feature of the game engine to save you time.

And I believe for not much benefit too - it would be nice to think that all sprites that use the same texture are being batched even if they have different palettes, but what kind of performance are we talking about saving here? It’s a 2D game, even if you have hundreds, or even thousands of sprites and only the ones with the same palette can be batched, that performance hit could not be anything of note, it will already have made many more draw calls than that just to draw all the different kinds of other things in the game.

With this shader technique, we have gone as far as we need to, we’ve saved ourselves and the computer practically all of the work that matters. We have used shaders to achieve the result, and avoided having to make some other cumbersome approach that would require making multiple copies of the same texture and then a system to manage them, and potentially become an actual RAM hog problem on something like the Nintendo Switch.

2 Likes

Continuing what seems to be my yearly post in this thread… :laughing:

So that I understand this correctly - the palette is uploaded as a uniform array to the GPU each time you change the palette?

The approach I was learning about used a 2nd texture of palettes (where each row is a different palette) supplied with the material, and the only uniform variable was which palette (y coordinate into the palette texture) to use, and so each sprite could use a different texture by adjusting this uniform variable to point to a different row.

I think the advantage of the uniform array method that you used is your palette can literally come from anywhere, even be constructed on the fly (eg. a combination of different smaller palettes in case the characters can customise skin colour, hair, shirt, pants etc. seperately) so it’s more flexible, at the expense of bandwidth each time you change the palette. Though theoretically it should be possible to edit the texture on the fly as well…

Something I’m wondering about: My characters appear in the HUD next to their score (they are small characters). When I implement palette swapping for my characters (they customise which colour they use by choosing from one of 8 palette variants), their representation in the GUI should match this. Is it still possible for individual GUI box elements to have their own palette?

1 Like

Yes, you can absolutely give individual GUI elements their own palette using the same shader-based workflow :wink:

You’re also right that changing the palette uniform between draws will break batching, just as it does on sprites. If you have many icons sharing the same palette, group them before switching to the next palette.

You can also use a 2D texture where each row is a palette, and pass in a single uniform identifying the palette per node. I think you can even combine both techniques - upload a small “module” palette texture for base sets, then tweak a few entries via uniforms to personalize accents for special characters or items and so on :wink:

1 Like

Thanks! Ok so in Pkeod’s example, the part that actually sends the palettes over to the GPU seems to be here, where it loops through and sends each value using “go.set” to set a custom property, so the same could be done for gui nodes?

local function set_constant(url, constant_name, constant_table)
	for k,v in ipairs(constant_table) do
		if k <= 32 then
			go.set(url, constant_name, v, {index=k})
		else
			print("Error! Trying to set value outside of 32 range.")
		end
	end
end

Also that’s great to know we can use the “palette texture” approach I’m more familiar with, and that you could even combine them. I’m curious, where would you specify the 2nd image for this material in a Defold workflow? In Unity, once you created the material settings, you’d have a new texture property to assign a texture to.

1 Like

Same here! :smiley:


For Sprites:

For sprites (or models) there are no obstacles (but if you would like sprites “in GUI”, over the game’s world, you would need to change slightly the render script so that those sprites are rendered when GUI is), here’s example of multiple samplers (textures used) for sprites:

For example, here I just add second texture’s color to the output:


Now for GUI:

Same fragment program DOES work for GUI node’s material (I guess it might use same texture for all samplers) - but you just can’t specify the second texture in GUI node’s properties:

Sprite’s properties (texture_sampler and texture_sampler 2) vs GUI node’s properties (Texture only):

So you will only see additional properties in the Editor for sprites and models now, not for GUI, and I didn’t find any related issues on github, so I added this, you can upvote it:

I think it might be resolved dynamically, but easy way (doing it in gui_script) failed for me, because gui script have no “properties” like regular script does, so I don’t know how could I possibly specify a texture resource that gui would be aware of.


Update: It should be possible to be set from script, there is an example:


Update 2:

Yeah, right, so I did a quick test and as I suspected, it looks like even though you can change the texture for GUI nodes dynamically in code - all samplers use the very same texture and looks like we can’t specify which sampler should use which texture:


Update 3:

I added a link to the Github issue regarding multi textures support for GUI

3 Likes

This is amazing, thank you - so the 2nd image shows up as an additional property on the details panel, just like Unity :slight_smile: I see this was added around 2023! Thanks for opening a feature request about this for GUI elements too.

I remember seeing your profile icon come up a bit when researching palette stuff on the Defold forums so thanks for being one of the ones to keep palette swapping effects alive!

As for palette swapping in the GUI - after being so used to the idea of a 2nd texture for palettes, I was finally coming around to the idea of using a uniform array as in Pkeod’s example, as I think it may make it easier to do more dynamic stuff, like combining sub-palettes into one actual palette, for customising different clothing, hair and skin colour on the sprite.

Do you think palette swapping would work on GUI elements if we used uniform array variables instead of a 2nd texture?

EDIT: My understanding is the GUI behaves like a single game object, so I think it still wouldn’t work per element, the whole GUI would use the one palette. I may construct the character scores HUD using sprites in the game camera…

1 Like

Palette swapping is in my game! Thanks @Pkeod !


(I was going to record a GIF of this in action, players joining and changing their colours, but Linux, specifically the KDE Plasma Desktop Environment, made an update which forces Wayland over X11 which means no screen recorders work and it’s times like this I wonder why I put up with Linux… anyway…)

I tried to replicate this in my GUI for the score bar (the palette coloured characters need to show up there) I thought it would work since I can specify the sprite material for the box node, and run the same function calls, but instead of getting coloured, the sprite just disappeared. Any ideas, anyone?

This is my GUI collection:

This sprite.material is the same one being used to render the palette swapped bunnies in the screenshot above, and same with the animal bunny.atlas They are both loaded into the GUI collection.

On this box GUI node in the same collection, I’ve specified that same atlas, and sprite material:

And here’s the relevant code in my gui.script - it’s the only script on the GUI because I know GUI’s can only have one script.

This code is identical to what’s in my palette script that’s successfully working in the screenshot, I’ve just changed the syntax to work with gui nodes instead of game objects:

local palettes = {
	{
		vmath.vector4(0.000000, 0.000000, 0.000000, 0.000000),
		vmath.vector4(1.000000, 0.435294, 0.396078, 1.000000),
		vmath.vector4(0.325490, 0.309804, 0.388235, 1.000000),
		vmath.vector4(0.482353, 0.474510, 0.611765, 1.000000),
		vmath.vector4(0.666667, 0.666667, 0.674510, 1.000000),
		vmath.vector4(0.831373, 0.831373, 0.831373, 1.000000),
		vmath.vector4(1.000000, 1.000000, 1.000000, 1.000000),
		vmath.vector4(0.070588, 0.070588, 0.070588, 1.000000),
		vmath.vector4(0.964706, 0.815686, 0.533333, 1.000000),
		vmath.vector4(0.866667, 0.584314, 0.133333, 1.000000),
		vmath.vector4(0.560784, 0.270588, 0.160784, 1.000000)
	},
	{
		vmath.vector4(0.000000, 0.000000, 0.000000, 0.000000),
		vmath.vector4(0.858824, 0.733333, 0.121569, 1.000000),
		vmath.vector4(0.388235, 0.160784, 0.070588, 1.000000),
		vmath.vector4(0.560784, 0.270588, 0.160784, 1.000000),
		vmath.vector4(0.690196, 0.419608, 0.250980, 1.000000),
		vmath.vector4(0.909804, 0.588235, 0.392157, 1.000000),
		vmath.vector4(1.000000, 1.000000, 1.000000, 1.000000),
		vmath.vector4(0.070588, 0.070588, 0.070588, 1.000000),
		vmath.vector4(0.964706, 0.815686, 0.533333, 1.000000),
		vmath.vector4(0.866667, 0.584314, 0.133333, 1.000000),
		vmath.vector4(0.560784, 0.270588, 0.160784, 1.000000)
	},
	{
		vmath.vector4(0.000000, 0.000000, 0.000000, 0.000000),
		vmath.vector4(1.000000, 0.435294, 0.396078, 1.000000),
		vmath.vector4(0.152941, 0.129412, 0.164706, 1.000000),
		vmath.vector4(0.235294, 0.192157, 0.274510, 1.000000),
		vmath.vector4(0.325490, 0.309804, 0.388235, 1.000000),
		vmath.vector4(0.474510, 0.466667, 0.572549, 1.000000),
		vmath.vector4(1.000000, 1.000000, 1.000000, 1.000000),
		vmath.vector4(0.070588, 0.070588, 0.070588, 1.000000),
		vmath.vector4(0.964706, 0.815686, 0.533333, 1.000000),
		vmath.vector4(0.866667, 0.584314, 0.133333, 1.000000),
		vmath.vector4(0.560784, 0.270588, 0.160784, 1.000000)
	},
	{
		vmath.vector4(0.000000, 0.000000, 0.000000, 0.000000),
		vmath.vector4(0.858824, 0.733333, 0.121569, 1.000000),
		vmath.vector4(0.423529, 0.047059, 0.172549, 1.000000),
		vmath.vector4(0.584314, 0.098039, 0.054902, 1.000000),
		vmath.vector4(0.839216, 0.235294, 0.196078, 1.000000),
		vmath.vector4(1.000000, 0.435294, 0.396078, 1.000000),
		vmath.vector4(1.000000, 1.000000, 1.000000, 1.000000),
		vmath.vector4(0.070588, 0.070588, 0.070588, 1.000000),
		vmath.vector4(0.964706, 0.815686, 0.533333, 1.000000),
		vmath.vector4(0.866667, 0.584314, 0.133333, 1.000000),
		vmath.vector4(0.560784, 0.270588, 0.160784, 1.000000)
	},
	{
		vmath.vector4(0.000000, 0.000000, 0.000000, 0.000000),
		vmath.vector4(1.000000, 0.435294, 0.396078, 1.000000),
		vmath.vector4(0.560784, 0.270588, 0.160784, 1.000000),
		vmath.vector4(0.713725, 0.380392, 0.086275, 1.000000),
		vmath.vector4(0.858824, 0.733333, 0.121569, 1.000000),
		vmath.vector4(0.917647, 0.894118, 0.400000, 1.000000),
		vmath.vector4(1.000000, 1.000000, 1.000000, 1.000000),
		vmath.vector4(0.070588, 0.070588, 0.070588, 1.000000),
		vmath.vector4(0.964706, 0.815686, 0.533333, 1.000000),
		vmath.vector4(0.866667, 0.584314, 0.133333, 1.000000),
		vmath.vector4(0.560784, 0.270588, 0.160784, 1.000000)
	},
	{
		vmath.vector4(0.000000, 0.000000, 0.000000, 0.000000),
		vmath.vector4(1.000000, 0.435294, 0.396078, 1.000000),
		vmath.vector4(0.360784, 0.015686, 0.545098, 1.000000),
		vmath.vector4(0.596078, 0.137255, 0.882353, 1.000000),
		vmath.vector4(0.776471, 0.325490, 0.925490, 1.000000),
		vmath.vector4(0.854902, 0.619608, 1.000000, 1.000000),
		vmath.vector4(1.000000, 1.000000, 1.000000, 1.000000),
		vmath.vector4(0.070588, 0.070588, 0.070588, 1.000000),
		vmath.vector4(0.964706, 0.815686, 0.533333, 1.000000),
		vmath.vector4(0.866667, 0.584314, 0.133333, 1.000000),
		vmath.vector4(0.560784, 0.270588, 0.160784, 1.000000)
	},
	{
		vmath.vector4(0.000000, 0.000000, 0.000000, 0.000000),
		vmath.vector4(1.000000, 0.435294, 0.396078, 1.000000),
		vmath.vector4(0.015686, 0.188235, 0.505882, 1.000000),
		vmath.vector4(0.062745, 0.305882, 0.698039, 1.000000),
		vmath.vector4(0.231373, 0.419608, 0.996078, 1.000000),
		vmath.vector4(0.325490, 0.580392, 1.000000, 1.000000),
		vmath.vector4(1.000000, 1.000000, 1.000000, 1.000000),
		vmath.vector4(0.070588, 0.070588, 0.070588, 1.000000),
		vmath.vector4(0.964706, 0.815686, 0.533333, 1.000000),
		vmath.vector4(0.866667, 0.584314, 0.133333, 1.000000),
		vmath.vector4(0.560784, 0.270588, 0.160784, 1.000000)
	},
	{
		vmath.vector4(0.000000, 0.000000, 0.000000, 0.000000),
		vmath.vector4(1.000000, 0.435294, 0.396078, 1.000000),
		vmath.vector4(0.066667, 0.274510, 0.258824, 1.000000),
		vmath.vector4(0.047059, 0.439216, 0.435294, 1.000000),
		vmath.vector4(0.156863, 0.760784, 0.458824, 1.000000),
		vmath.vector4(0.576471, 1.000000, 0.474510, 1.000000),
		vmath.vector4(1.000000, 1.000000, 1.000000, 1.000000),
		vmath.vector4(0.070588, 0.070588, 0.070588, 1.000000),
		vmath.vector4(0.964706, 0.815686, 0.533333, 1.000000),
		vmath.vector4(0.866667, 0.584314, 0.133333, 1.000000),
		vmath.vector4(0.560784, 0.270588, 0.160784, 1.000000)
	},
}

local function set_constant(url, constant_name, constant_table)
	local node = gui.get_node(url)
	for k,v in ipairs(constant_table) do
		if k <= 32 then
			gui.set(node, constant_name, v, {index=k})
		else
			print("Error! Trying to set value outside of 32 range.")
		end
	end
end

function init(self)
	-- Add initialization code here
	-- Learn more: https://defold.com/manuals/script/
	-- Remove this function if not needed

	menu.setup(msg.url())
	banner.setup(msg.url())
	
	self.cur_index = 1
	set_constant("box", "palette", palettes[self.cur_index])
end

The set_constant function runs without errors, but the “box” bunny just doesn’t show up, it’s invisible.

If I remove the sprite material, so it renders with the default material, I do get the greyscale version of the bunny (and the set_constant errors saying there’s no “palette” property), so that proves it should be showing up:

So the palette swapping shader code is just not working in the GUI for some reason.
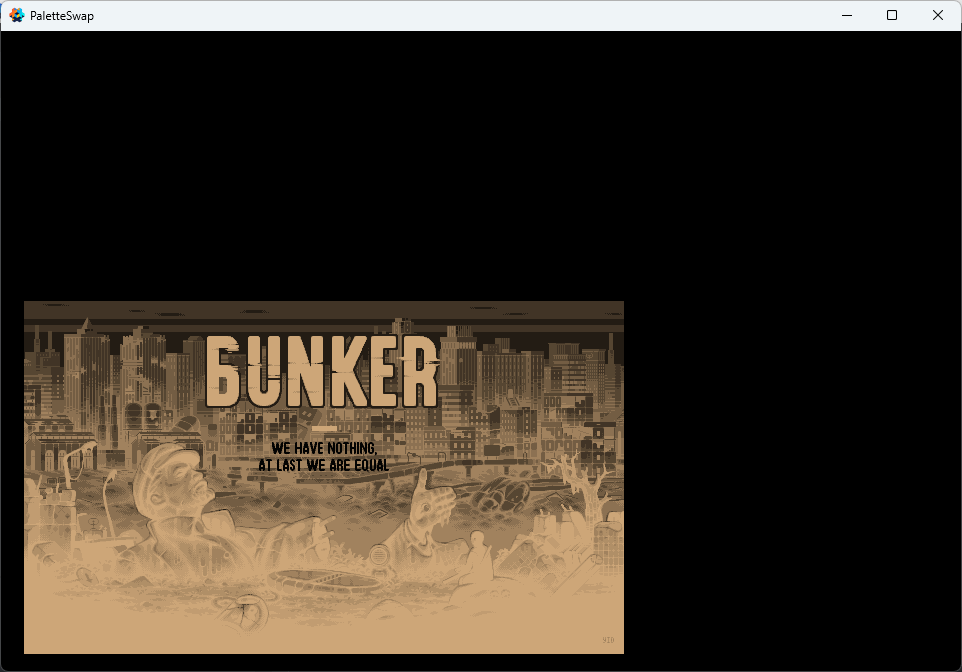
Oh and to contribute back to the community, here’s a python file that will look for reference_palette.png in the input folder, and apply it to every image in the folder to ensure they all have a consistent palette that can be swapped with other palettes. Which is what I needed for my game.
palettise.zip (1.5 KB)

1 Like

Ok I found the issue I think, it’s also a restriction of how the GUI system works, similar to the request to add a 2nd texture.

  • in go.set() “…or a material constant”
  • in gui.set() “…only these named properties identifiers are supported”

So it is impossible to set the “palette” material constant of the shader even if you can set the material on the box gui node.

Hopefully one of the devs could weigh in on which feature is easier to add - multi-textures or setting material constants?

I think I will just work around this for now by implementing my HUD in the game rendering using sprites.

Actually I’ll post this in Questions…

EDIT: For anyone reading in the future, the answer is no, use the GUI as is. In my case I just made an icon to represent the players and a colour variation on each, all in one atlas. The GUI can pick the right image from the atlas based on the colour index I was already using for the palette index.

2 Likes

Just thought I’d update this with what I ended up doing - since the GUI just needs 1 sprite to represent the player (and not all the animations) and since every colour of every character is 8x4 which is not too much, I just went the brute force method and made 8x4 sprites and programmatically select the right sprite from the atlas based on the colour index and character index.

It looks so colourful!

It would be nice to have, but I think for now I can almost always avoid needing palette swapping in the GUI one way or another, if I’m careful. Eg. If an element (eg. a health bar) needs to be coloured based on the player’s colour, it could be tinted. Or if I really need to, I could make my own GUI that uses regular sprites. Though mixing GUI text and regular sprites may get tricky.

3 Likes