Hello all,
I’ve spent the past few weeks playing around with Defold and one thing I wanted to learn how to do was draw a specific portion of the screen to a render target so that an effect could be apply to just that part of the screen.
This was a bit trickier than anticipated so I decided to make a lengthy blog post about it to share what I’ve learned:
Mastering Render Targets in Defold
There’s also companion code associated with each section on github.
The blog post contains web demos embedded in the page so I recommend checking it out if you have the time, but I will additionally post the bulk of the blog post here for posterity.
Mastering Render Targets in Defold
Part 1: Creating a render target
From a mostly default Defold desktop template we’re going to duplicate the builtin render script and renderer and call them both “pipeline” since this is going to act as our render pipeline.
Then we’re going to set the renderer to the pipeline.render in the Bootstrap section of the project settings.
For more detailed steps on this checkout the Defold manual on rendering.
Now we can create a new render target in the init function:
-- Create a new render target.
local color_params = {
    format = render.FORMAT_RGBA,
    width = render.get_width(),
    height = render.get_height()
}
local target_params = {[render.BUFFER_COLOR_BIT] = color_params }
self.target = render.render_target("target", target_params)
We set the width and height of the target to the resolution of the game and use standard settings for storing color data.
In the update function we add the code to draw something to the render target, in our case we’ll draw anything with the “tile” predicate.
We do this after all game objects are drawn, just before the GUI is drawn.
-- Set the render target to our target.
render.set_render_target(self.target)
-- Clear the render target with the game's clear color.
render.clear({
    [render.BUFFER_COLOR_BIT] = self.clear_color,
    [render.BUFFER_DEPTH_BIT] = 1,
    [render.BUFFER_STENCIL_BIT] = 0
})
-- Draw all objects with the "tile" tag in their material.
render.draw(self.tile_pred, {frustum = frustum})
-- Reset the render target.
render.set_render_target(render.RENDER_TARGET_DEFAULT)
Since we do this with the normal camera projection, everything visible by the camera will be drawn to our render target.
This is great! But now we need something to draw the target to.
Let’s create a new game object file, we’ll call it “window” since it will look like a little window on the screen.
Give it a model component and assign the built in quad.dae as the model.
We’ll also create a new material, called window.material and assign it to the model.
We’ll assign the builtin sprite.vp as the vertex program in the material, since we’re not going to modify it.
And we’ll create a new fragment program called window.fp.
The fragment shader will just draw the texture from the sampler directly:
varying mediump vec2 var_texcoord0;
uniform lowp sampler2D texture_sampler;
void main()
{
    gl_FragColor = texture2D(texture_sampler, var_texcoord0.xy);
}
We have to make sure we add a view_proj vertex constant.

We also need to add a texture sampler to set the render target to.
We call it texture_sampler because that is what is specified in the fragment shader:

Finally we add a tag to specify when this material will be drawn.
We don’t want to use “tile” because that will cause a loop. Let’s call it “window.”

Phew, that was a lot of setup just to create something to draw our target to but now we can do just that.
First we add a new render predicate to the init function of our render script using the “window” tag we specified in the material:
self.window_pred = render.predicate({"window"})
Finally in the update function of the render script we draw our quad.
We do this just after we draw to the render target:
-- Set the texture in slot 0 of the material to our render target.
render.enable_texture(0, self.target, render.BUFFER_COLOR_BIT)
-- Draw the window quad.
render.draw(self.window_pred)
-- Unset the texture slot.
render.disable_texture(0, self.target)
Now if we add the window.go game object to our main collection we can see it rendered on the screen.
The builtin quad.dae is 1 pixel by 1 pixel, so we can scale it up to something that can be seen and move it near the center of the screen.
It’s important that the quad have the same aspect ratio as the game otherwise the rendered texture will be squashed or stretched. We’ll change that fact later.
I’ll set this one to 320 by 180 to be a quarter the size of the 1280 by 720 game resolution.
And viola! We have a mini version of the game screen!
Part 2
For this part we’re going to change our fragment shader to do something more interesting than just display the sampled texture.
We’ll make the texture grayscale using a simple method of averaging all the colors in our window.fp script:
varying mediump vec2 var_texcoord0;
uniform lowp sampler2D texture_sampler;

void main()
{
    vec4 color = texture2D(texture_sampler, var_texcoord0.xy);
    float grayscale = (color.r + color.g + color.b) / 3.0;
    gl_FragColor = vec4(grayscale, grayscale, grayscale, color.a);
}
But if you do it like this people on the internet will get mad at you because it’s not true grayscale.
The proper formula is 0.299 * R + 0.587 * G + 0.114 * B, which is equivalent to the dot product of the color vector and the constants:
varying mediump vec2 var_texcoord0;
uniform lowp sampler2D texture_sampler;

void main()
{
    vec4 color = texture2D(texture_sampler, var_texcoord0.xy);
    float grayscale = dot(color.rgb, vec3(0.299, 0.587, 0.114));
    gl_FragColor = vec4(grayscale, grayscale, grayscale, color.a);
}
Now we have a tiny grayscale version of the game drawn on the screen!

Part 3
Ok, now it’s time to get fancy. Drawing the entire screen is useful, especially for full screen post processing effects, you can read more about this in the Defold manual.
But for this project we want to learn how to do partial screen effects.
To do this we have to change the camera projection so that we only draw the parts of the screen that we want, the parts behind our window quad.
This is actually pretty easy but we need to calculate the bounding rectangle of our quad first.
So we create a new script called window.script and add it to our window.go game object.
In the script we calculate the bounding box in the init function:
function init(self)
    local position = go.get_position()
    local scale = go.get_scale()
    self.left = position.x - scale.x / 2
    self.right = position.x + scale.x / 2
    self.bottom = position.y - scale.y / 2
    self.top = position.y + scale.y / 2

    msg.post('@render:', 'update_window_box', {
        left = self.left,
        right = self.right,
        bottom = self.bottom,
        top = self.top
    })
end
Since Defold game objects scale from the center we just need to add or subtract half the scale to find the edges.
We also have to tell the render script these parameters, we do this by sending a message just after the calculations.
In pipeline.render_script we need to receive the message in the on_message function.
We’ll tag on our new message id condition to the end:
elseif message_id == hash("update_window_box") then
    self.window_box = message
end
We should also initialize self.window_box in the init function, just underneath our target setup code:
self.window_box = { left = 0, right = 1, bottom = 0, top = 1 }
Now to change the projection to match our window!
Just before we enable the target texture and draw to it, we want to set the projection to be the same as our window.
This will only draw the things that are within this small window:
-- Set the projection to the window box.
local window_proj = vmath.matrix4_orthographic(self.window_box.left,
                                               self.window_box.right,
                                               self.window_box.bottom,
                                               self.window_box.top,
                                               self.near, self.far)
render.set_projection(window_proj)
It’s important that we reset the projection to the default camera projection after drawing to the render target, otherwise our window will be drawn with the wrong projection:
-- Reset the projection.
render.set_projection(proj)
We can reorganize the code in the render script a little bit so that we only set this projection once.
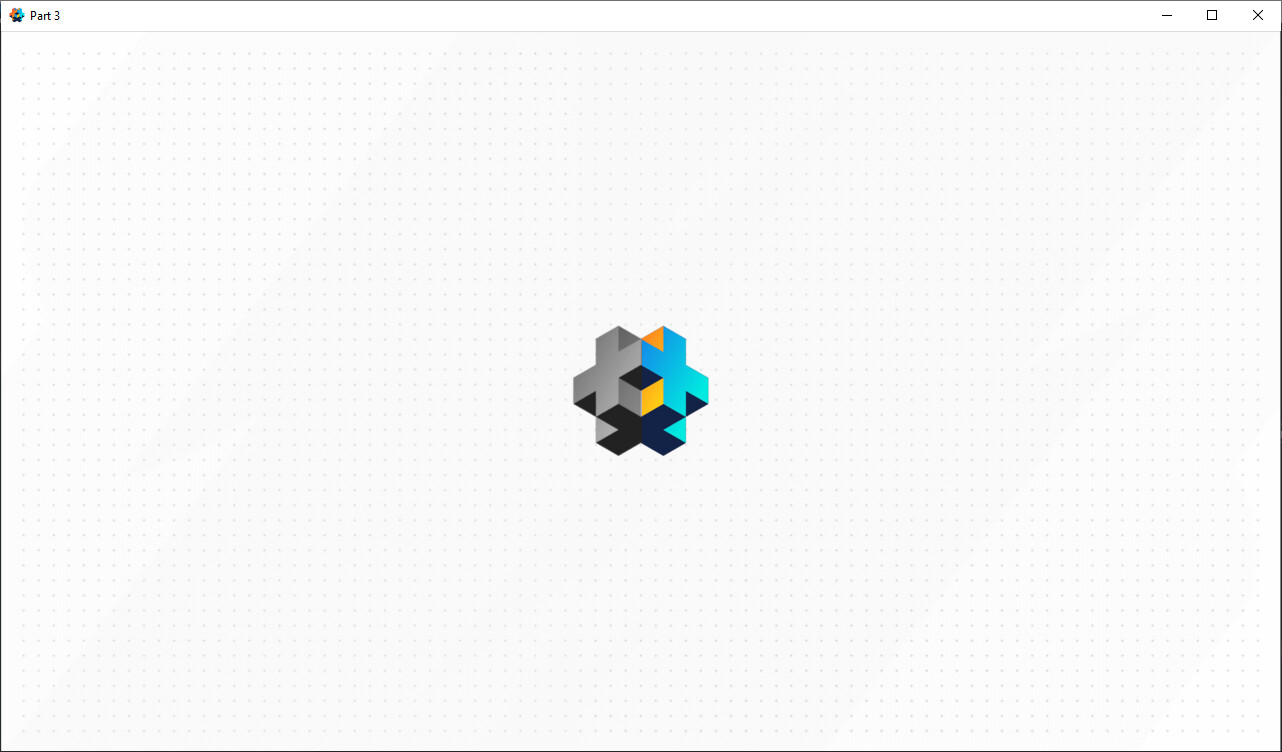
Now if we move the window game object in the main collection so that it’s slightly over the Defold logo, we should see that half of it is grayscale:
Alright, now this is pretty rad. Let’s add some interactivity so we can drag the window around.
First we’ll draw four lines on the borders of the window in the update function of window.script.
If we’re going to be updating the position we’ll need to recalculate and send the bounding box as well:
function update(self, dt)
    -- Calculate the bounding box.
    local position = go.get_position()
    local scale = go.get_scale()
    self.left = position.x - scale.x / 2
    self.right = position.x + scale.x / 2
    self.bottom = position.y - scale.y / 2
    self.top = position.y + scale.y / 2

    -- Send the parameters to the render script.
    msg.post('@render:', 'update_window_box', {
        left = self.left,
        right = self.right,
        bottom = self.bottom,
        top = self.top
    })

    -- Draw red lines around the window with a 1 pixel border.
    local red = vmath.vector4(1, 0, 0, 1)
    msg.post("@render:", "draw_line", {
        start_point = vmath.vector3(self.left - 1, self.bottom - 1, 0),
        end_point = vmath.vector3(self.left - 1, self.top + 1, 0),
        color = red })
    msg.post("@render:", "draw_line", {
        start_point = vmath.vector3(self.left - 1, self.top + 1, 0),
        end_point = vmath.vector3(self.right + 1, self.top + 1, 0),
        color = red })
    msg.post("@render:", "draw_line", {
        start_point = vmath.vector3(self.right + 1, self.top + 1, 0),
        end_point = vmath.vector3(self.right + 1, self.bottom - 1, 0),
        color = red })
    msg.post("@render:", "draw_line", {
        start_point = vmath.vector3(self.right + 1, self.bottom - 1, 0),
        end_point = vmath.vector3(self.left - 1, self.bottom - 1, 0),
        color = red })
end
In the input bindings in game.input_binding we’ll add a new mouse left button input called mouse_button_left:

Now we can acquire input focus in the init function of window.script:
-- Enable input.
msg.post(".", "acquire_input_focus")
In the on_input function we can see if the mouse is within the window when clicked and calculate the offset from the center of the game object:
function on_input(self, action_id, action)
    -- Check if we have clicked inside the window.
    if action_id == hash("mouse_button_left") then
        -- Save the mouse position as a vector.
        self.mouse_position = vmath.vector3(action.x, action.y, 0)
        if action.pressed then
            if action.x > self.left and action.x < self.right and action.y > self.bottom and action.y < self.top then
                -- If we are inside the window calculate the offset and set dragging.
                self.offset = self.mouse_position - go.get_position()
                self.dragging = true
            end
        elseif action.released then
            -- If we have released the mouse unset dragging.
            self.dragging = false
        end
    end
end
Read more about mouse input from the Defold docs.
Now in our update function we can move the game object if dragging is set:
-- Drag.
if self.dragging then
    go.set_position(self.mouse_position - self.offset)
end
We do this before re-calculating the bounding box positions.
We’ll also want to initialize self.dragging and self.mouse_position in the init function.
Now we can drag the window around and see the changes our grayscale shader applies to the world!
Part 4
Now we can change the shape of the window to be anything we want, but it’s kind of lame that the render texture has the same resolution of the game even though it takes up only a small portion of the screen.
But look what happens when we try to change the size of the render texture to the size of the window:
-- Update the width and the height of the target to match the window quad.
local color_params = { format = render.FORMAT_RGBA, width = 320, height = 180 }
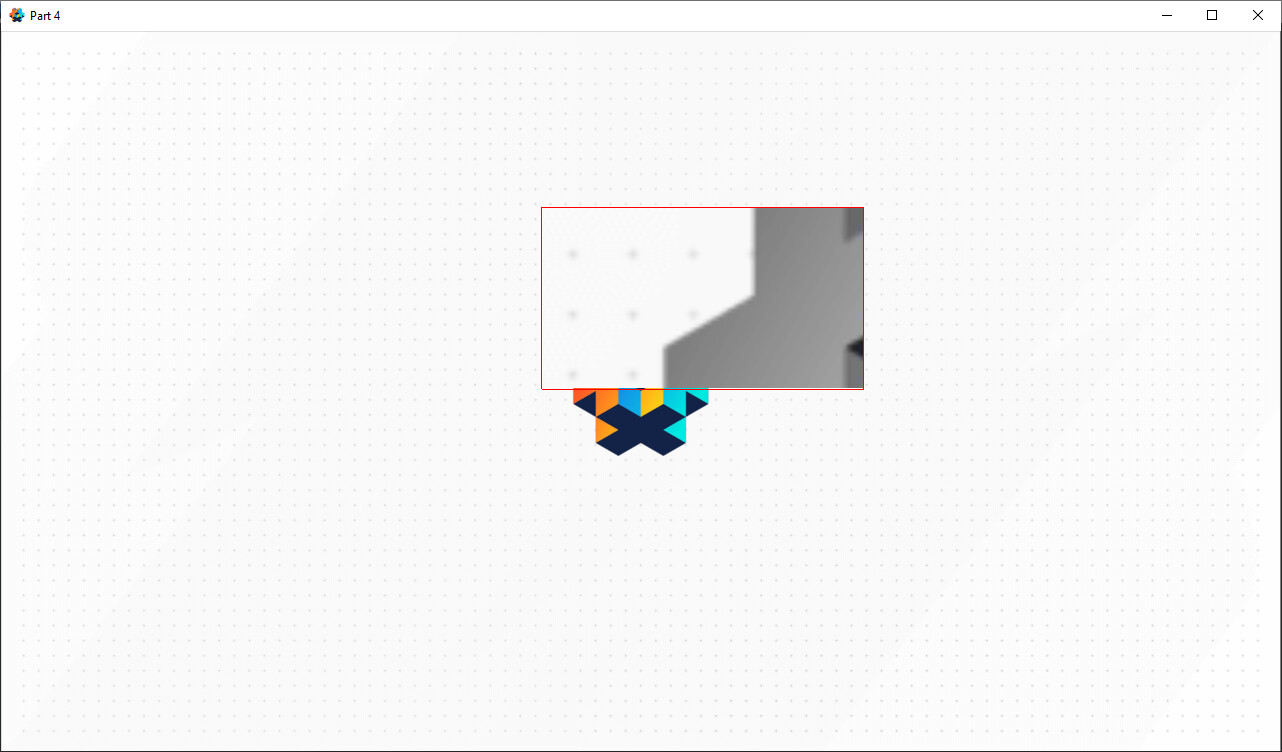
The mapping of the game coordinates no longer match the mapping to the render target coordinates and we get this weird zoomed in and offset view.
This might be a cool effect if we were trying to make a magnifying glass or something, but in this case we want it to look the same, just with a smaller texture.
To fix this, we have to update our projection code in the update function of pipeline.render_script to compensate for the different size of the render target:
-- Get the width and height of the window and the render target.
local box_width = self.window_box.right - self.window_box.left
local box_height = self.window_box.top - self.window_box.bottom
local render_target_width = render.get_render_target_width(self.target, render.BUFFER_COLOR_BIT)
local render_target_height = render.get_render_target_height(self.target, render.BUFFER_COLOR_BIT)

-- Calculate the zoom compensation for the window.
local zoom_x = render_target_width / box_width
local zoom_y = render_target_height / box_height
local projected_width = render.get_window_width() / zoom_x
local projected_height = render.get_window_height() / zoom_y
local zoomed_proj = vmath.matrix4_orthographic(self.window_box.left,
                                               self.window_box.left + projected_width,
                                               self.window_box.bottom,
                                               self.window_box.bottom + projected_height,
                                               self.near, self.far)

-- Set the projection.
render.set_projection(zoomed_proj)
By taking the ratio between the size of the render target and the size of the quad, we can calculate the compensation needed for the projection bounding box.
Now everything looks normal again. To really demonstrate this we’re going to add scaling to our controls for the window.
We update the on_input function of our window.script to look like this:
if action.x and action.y then
    -- Save the mouse position as a vector.
    self.mouse_position = vmath.vector3(action.x, action.y, 0)

    -- Check if we are close to the edges to select them for scaling.
    local scale_distance = 6
    self.can_scale_left = (math.abs(action.x - self.left) < scale_distance and
                            action.y > self.bottom - scale_distance and
                            action.y < self.top + scale_distance) or self.scaling_left
    self.can_scale_right = (math.abs(action.x - self.right) < scale_distance and
                            action.y > self.bottom - scale_distance and
                            action.y < self.top + scale_distance) or self.scaling_right
    self.can_scale_bottom = (math.abs(action.y - self.bottom) < scale_distance and
                                action.x > self.left - scale_distance and
                                action.x < self.right + scale_distance) or self.scaling_bottom
    self.can_scale_top = (math.abs(action.y - self.top) < scale_distance and
                            action.x > self.left - scale_distance and
                            action.x < self.right + scale_distance) or self.scaling_top

    -- Check if we have clicked.
    if action_id == hash("mouse_button_left") then
        if action.pressed then
            -- Set scaling if we are close to an edge.
            if self.can_scale_left then
                self.scaling_left = true
            elseif self.can_scale_right then
                self.scaling_right = true
            end
            if self.can_scale_bottom then
                self.scaling_bottom = true
            elseif self.can_scale_top then
                self.scaling_top = true
            end
            -- Set dragging if we are not scaling and we are inside the window.
            if not self.scaling_left and not self.scaling_right and not self.scaling_bottom and not self.scaling_top and
            (action.x > self.left and action.x < self.right and action.y > self.bottom and action.y < self.top) then
                -- If we are inside the window calculate the offset and set dragging.
                self.offset = self.mouse_position - go.get_position()
                self.dragging = true
            end
        elseif action.released then
            -- If we have released the mouse unset dragging and scaling.
            self.dragging = false
            self.scaling_left = false
            self.scaling_right = false
            self.scaling_bottom = false
            self.scaling_top = false
        end
    end
end
Here we add four sets of two new variables, can_scale and scaling.
We check if the mouse is close enough to each of the edges on that edge’s axis and that the mouse within the window on the other axis.
Then we set the scaling flag if we have clicked the mouse. We don’t want to enable dragging if we are scaling so we add a check for that too.
If we have released the mouse, all the flags are reset.
Don’t forget to initialize these variables in the init function.
Now we can use these flags to control the scale of the game object in the update function:
-- Scale.
local scale = go.get_scale()
if self.scaling_left then
    local scale_offset = self.mouse_position.x - self.left
    go.set_scale(vmath.vector3(math.max(1, scale.x - scale_offset), scale.y, 1))
elseif self.scaling_right then
    local scale_offset = self.mouse_position.x - self.right
    go.set_scale(vmath.vector3(math.max(1, scale.x + scale_offset), scale.y, 1))
end

scale = go.get_scale()
if self.scaling_bottom then
    local scale_offset = self.mouse_position.y - self.bottom
    go.set_scale(vmath.vector3(scale.x, math.max(1, scale.y - scale_offset), 1))
elseif self.scaling_top then
    local scale_offset = self.mouse_position.y - self.top
    go.set_scale(vmath.vector3(scale.x, math.max(1, scale.y + scale_offset), 1))
end
We set the scale of the game object based on where the mouse has dragged the edges.
We need to make sure the scale doesn’t get too small or become negative so we use a max with 1 on all the scale values.
Then we can update our line drawing code so that the lines change color if we are hovering over them:
-- Draw lines around the window with a 1 pixel border.
local red = vmath.vector4(1, 0, 0, 1)
local blue = vmath.vector4(0, 0, 1, 1)
local left_color = red
local right_color = red
local bottom_color = red
local top_color = red
if self.can_scale_left then left_color = blue end
if self.can_scale_right then right_color = blue end
if self.can_scale_bottom then bottom_color = blue end
if self.can_scale_top then top_color = blue end
msg.post("@render:", "draw_line", {
    start_point = vmath.vector3(self.left - 1, self.bottom - 1, 0),
    end_point = vmath.vector3(self.left - 1, self.top + 1, 0),
    color = left_color })
msg.post("@render:", "draw_line", {
    start_point = vmath.vector3(self.left - 1, self.top + 1, 0),
    end_point = vmath.vector3(self.right + 1, self.top + 1, 0),
    color = top_color })
msg.post("@render:", "draw_line", {
    start_point = vmath.vector3(self.right + 1, self.top + 1, 0),
    end_point = vmath.vector3(self.right + 1, self.bottom - 1, 0),
    color = right_color })
msg.post("@render:", "draw_line", {
    start_point = vmath.vector3(self.right + 1, self.bottom - 1, 0),
    end_point = vmath.vector3(self.left - 1, self.bottom - 1, 0),
    color = bottom_color })
Finally we want to resize the render target if the shape of the window has changed.
In pipeline.render_script we update the on_message function to check for changing window size and change the render target size:
elseif message_id == hash("update_window_box") then
    self.window_box = message

    -- Update the size of the render target if the size of the window changed.
    if render.get_render_target_width(self.target, render.BUFFER_COLOR_BIT) ~= self.window_box.right - self.window_box.left or
    render.get_render_target_height(self.target, render.BUFFER_COLOR_BIT) ~= self.window_box.top - self.window_box.bottom then
        render.set_render_target_size(self.target,
                                      self.window_box.right - self.window_box.left,
                                      self.window_box.top - self.window_box.bottom)
    end
end
Now even if the window game object changes size, the render target will have the same size and will therefore only use up as much memory as necessary.
Part 5
Now in an actual game it’s not wise to constantly resize your render targets, this puts a lot of stress on the memory allocation system.
To gain maximum performance we want to set our render target to a static size, probably the size that the quad takes up.
Although setting the size to the smallest resolution you can get away with is a good idea away with is a good way to save on memory.
In the extreme cases it can create neat pixelation effects as the render target is stretched out on a larger surface.
Conclusion
Using render targets and partial screen projection you can create numerous effects that use the screen as a canvas to manipulate.
In addition to the simple grayscale and pixelation examples shown you can blend multiple textures, scroll UVs, and adjust colors.


