We recently got our Defold based games on the Mac App Store!
There are many steps related to distributing your games on the Mac App Store. If you check another guide on general Mac App Store distribution you can find details on the more general steps.
- Need an active developer membership Sign In - Apple
- Create signing identities, create identifier for game Sign In - Apple
- Setup game based on its identifier https://appstoreconnect.apple.com/WebObjects/iTunesConnect.woa/ra/ng/app
- Open xcode and sync your credentials
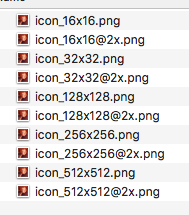
- Make sure you have a proper icon file setup. The most reliable way I have found to do it is to create a folder (in this case game.iconset) with the necessary image sizes in it and then generate the icon in terminal with
iconutil --convert icns game.iconsetif your icon is not proper your game upload will be rejected. - Make sure there are no extra files in your game’s .app folder structure. Otherwise your upload will be rejected.
- Make sure your final info.plist includes an app category. Depending on when you read this this may be an option in the game.project. If you open the info.plist in xcode you have a dropdown list to choose from.
- There are also other changes you may want to make to your info.plist, such as editing CFBundleName.
- Make sure your version number is in the style of 1.0 or 1.0.0 any other form will be rejected.
Example of .iconset folder files:
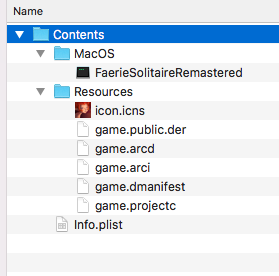
Example of .app folder structure before signing:
Example of the final FSR info.plist contents:
fsr_info.plist.txt (1.2 KB)
If you have questions about the steps related to the above you can ask and I or someone else will answer. Again you can find more complete guides elsewhere. Complete A-Z steps will eventually exist here.
The important unique parts:
You will need to make sure to exclude the unwind references in the final binary. Apple considers these private and will reject your game post upload if you try to submit it for review.
Use this or modify your appmanifest to be similar:
exclude_crash_macappstore_builds.appmanifest.txt (214 Bytes)
You will need this or a similar entitlements file, an important thing is that app sandboxing is enabled:
entitlements.plist.txt (445 Bytes)
Now you can bundled your macOS .app and are ready to sign/create installer/test. Once you have done so, place your entitlements.plist file next the game’s .app folder.
I recommend after you build your game and make any necessary changes to the internals of the .app you zip the .app so you have a clean copy in case you do following steps wrong.
Open keychain and make sure the following are there:
"3rd Party Mac Developer Application: YOUR DEVELOPER NAME (YOUR ID)"
"3rd Party Mac Developer Installer: YOUR DEVELOPER NAME (YOUR ID)"
If they are not there you need to do more to set them up on Apple’s developer site / make sure they are downloaded and on your keychain. Make a note of these, you can copy and paste their text when selected, you’ll need them later.
Open terminal and navigate to the folder your .app is in. You can do this by typing "cd " then dragging the parent folder into terminal. The following commands are also done in terminal. If your game name has spaces in it make sure you surround them with quotes, “Game.app” bellow is an example of this, it could have been “My Cool Game.app” the quotes are necessary so that the paths don’t get misunderstood.
These following steps in a txt:
steps.txt (397 Bytes)
First make sure anyone can run your game’s binary:
chmod +x "Game.app"/Contents/MacOS/Game
Now sign:
codesign --force --sign "3rd Party Mac Developer Application: YOUR DEVELOPER NAME (YOUR ID)" --options runtime --deep --timestamp --entitlements entitlements.plist "Game.app"
Now make the pkg installer, this is what you actually upload:
productbuild --component "Game.app" /Applications --sign "3rd Party Mac Developer Installer: YOUR DEVELOPER NAME (YOUR ID)" Game.pkg
If all went well you can now upload the generated pkg, but first we will test to ensure it did for sure work.
Install the game to your computer via the pkg, you’ll have to type your password for the sudo after entering the command:
sudo installer -store -pkg Game.pkg -target /
Your game should now appear in Applications, if you do this step multiple times you may need to manually uninstall older versions. Try running your game. It is very important that you login to a guest account and make sure your game can run there as well, if your game does not run in a guest account then something was done incorrectly.
Now you can upload your game with Application Loader. You can find this tool with xcode open: Xcode → Open Developer Tool → Application Loader. Select the game’s pkg and press next until it’s all uploaded.
If all went well then when you visit your App Store Connect page for your game the version you uploaded should be able to be selected for submission.
If you have any questions related to Mac App Store distribution please use this thread and I or others will answer them.
@ Defold Devs: Feel free to take any part of this post and use in the official docs for Mac App Store distribution. The official docs currently are missing some necessary steps / have some steps using the wrong signing name.
I’m also making this post a wiki so anyone trusted can edit it in the future if needed.