This is a general guide on how to export animated 3d models from blender for use in Defold.
( Below is a 3d example project that showcases use of multiple skinned animations in Defold and has a .blend file which can be used for testing if needed. )
Before starting some things to note :
- Blender setup should have a single model , uv unwrapped ,
material(material does not matter on export), texture map ready, single root bone , single action/animation per (.dae) export. - This guide goes over how to export your animation and does not go over how to animate in blender , there is lots of great online content for this.
Assuming you have an armature rigged model and animation ready to export for use in Defold , let’s get started.
Update: You do not need to bake animation
( this step can be skipped )
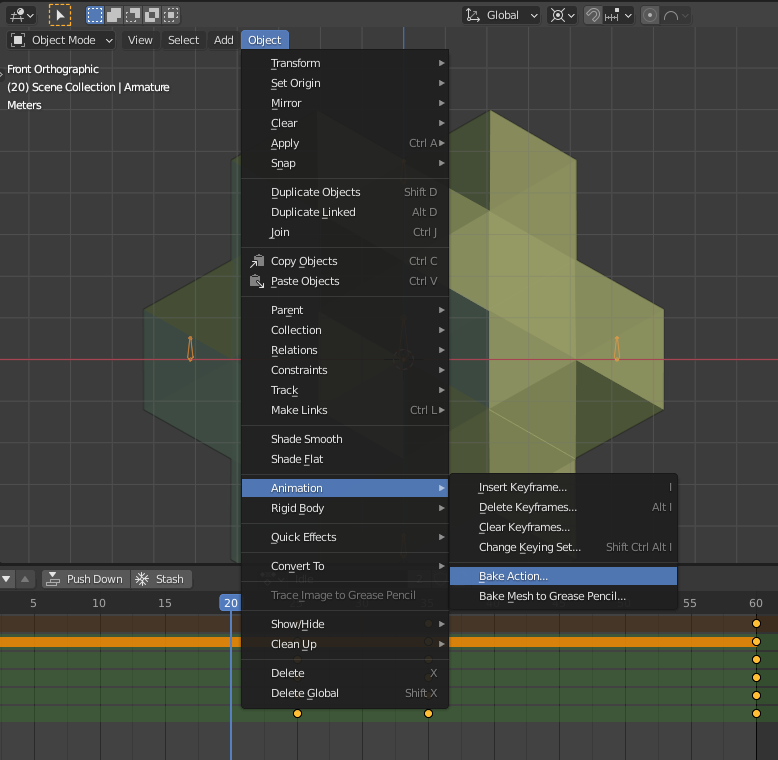
Step 1. Bake animation(action) to pose.
In blender there are 2 ways to bake animation one in object mode or in armature pose mode. Lets bake in object mode. Select your armature then select Object menu ( Object/Animation/Bake Action )
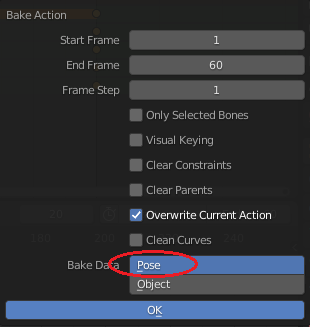
Next in the Bake Action Properties make sure your start frame and end frame are set to your needs. Untick “Only Selected Bones” I also like to tick “Overwrite Current Action” otherwise blender will create a new action for the bake. Then make sure under “Bake Data” choose “Pose” then press OK.
Now you should have a baked animation to pose and we are ready for export.
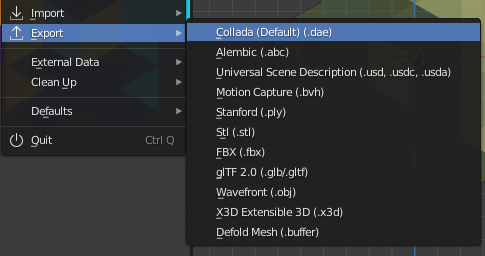
Step 2.Export .dae file
Select your armature and your model which you are exporting .
Then go to Menu ( File/Export/Collada(.dae) )
Next go over export settings to your specific needs, I like to keep settings slim and not export any data that is not needed. You may want different settings in your project so I suggest going over these settings. Here is the settings I like to use.
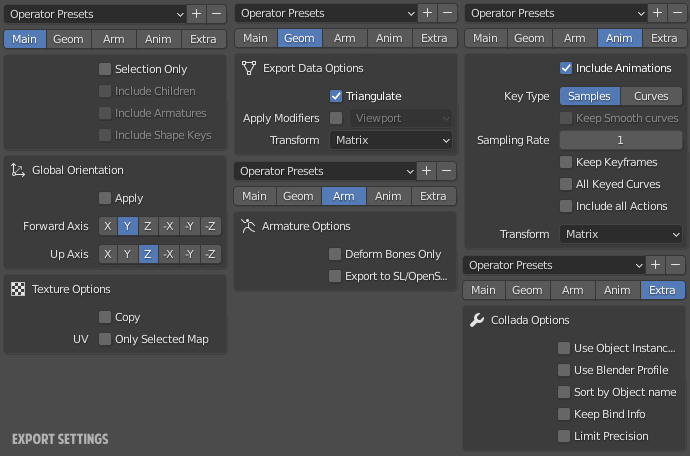
(note: I add my textures to Defold project manually and do not use the texture options on export. If exporting multiple animations exporting will generate a copy of the texture on every export.)
That’s it for the export all done. I won’t end here as it’s important to understand how to setup the animations in Defold. Lets do it!
Step 3. Defold 3d animation project setup.
(note: the file/folder & setup below can be done however you’d like in your project and is just an example. )
In Defold to make things simple I like to start out by creating a new project and use the Basic 3d template. It comes close to ready for our export and also has light properties in the shader. Now in the Assets panel Open up the assets folder then delete the 2 images in the image folder and delete the 3 models in the models folder.
If you right click on the assets folder and choose “Show in desktop” it should open up the file system and you can now easily add your models texture map to the image folder and your .dae export to the model folder. Back to Defold, Now we need a slightly custom material, so in the Assets panel if we open up “builtins/materials” then right click and copy the “model.material” and then paste it into the images folder. Then right click on the model folder in the Assets panel and choose “New../Model” then name your model appropriately.
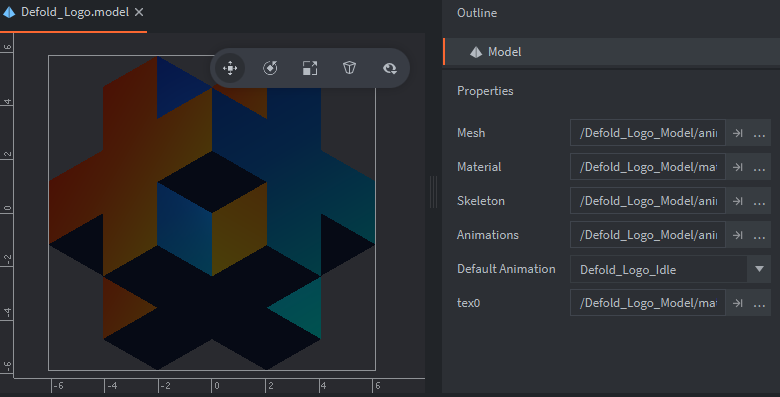
Ok now open up the model you’ve just created. In the Outline properties set the “Mesh” to the .dae you’ve exported from blender. Then set the “Material” property to the material you’ve copied over from builtins to the images folder. For “Skeleton” select your .dae and animation select your .dae as well (For multiple animations you can create an .animationset and set it in this property). Then in the “Default Animation” property you should be able to select your animation. Next for “tex0” select your texture map you’ve added to your image folder and done.
Ok not finished just yet, open up the main collection. Then in the “main” GO delete the 3 model components , right click on “main” GO and choose “add component file” and choose the .model you’ve created. Now you should have your model in the main collection. If you test build (Ctrl+B) to check it out you will get an error.
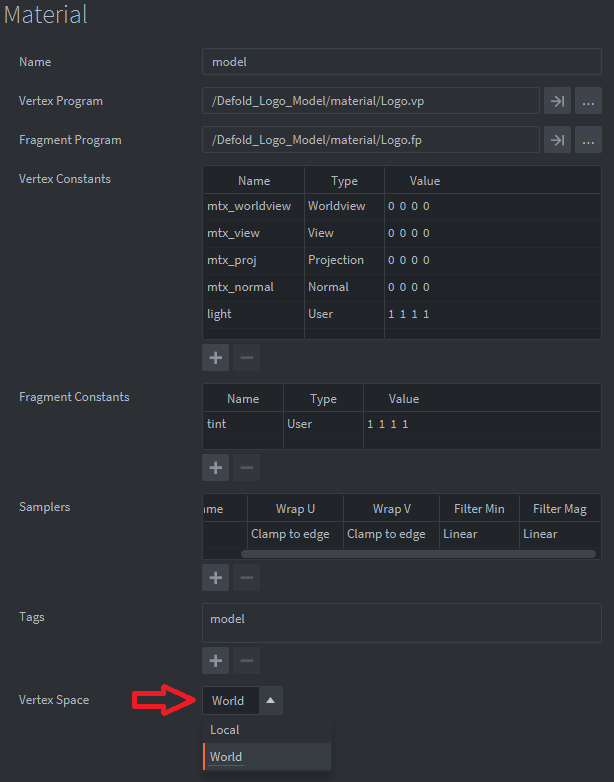
ERROR:GAMESYS: Failed to create Model component. Material vertex space option VERTEX_SPACE_LOCAL does not support skinning.
This error tells us we can’t use Local vertex space with our material. So Lets open up the material we put in the images folder. Navigate down to the bottom of the panel and you should see the “Vertex Space” property now change it from “Local” to “World” space.
Great should be ready to do a test build (ctrl+b) and now see your exported animation playing in defold! Nice!
BONUS: Creating multiple actions in Blender -
In Blender you can create multiple actions by stashing them in NLA track for later use. Otherwise if you simply create new animations actions save your file and reopen it you will have lost your animations that weren’t being used. Blender cleans up the file from unused data. To avoid that you stash them using the “Action Editor”

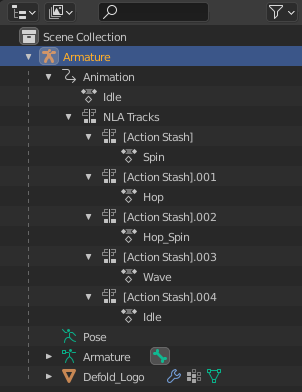
Then you can have all your animations for the model in a single .blend file , switch between them and export each of them separately to .dea files for use in your defold project. Excellent!
Defold Animated 3D Logo Example -
I’ve created a multiple skinned animation example project and put it on GitHub.
https://github.com/FlexYourBrain/Defold-Animated-3D-Example
Want to check out the example in the browser:
TRY IT OUT!
Big thanks to ( yeqwep ) for the 3d animation example which helped me figure out some issues I was having. Also thanks to the awesome folks on the Defold discord server!
You can find yeqwep’s example here:
https://github.com/yeqwep/Toufu-3D-project
Hope this Guide is useful and process is clear. Enjoy and Happy Defolding!