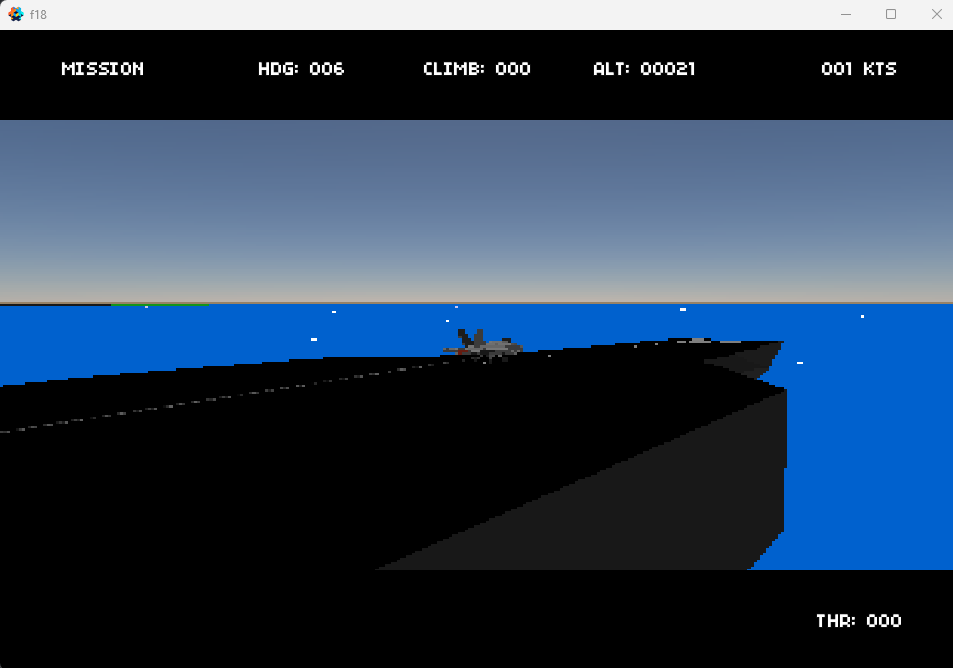
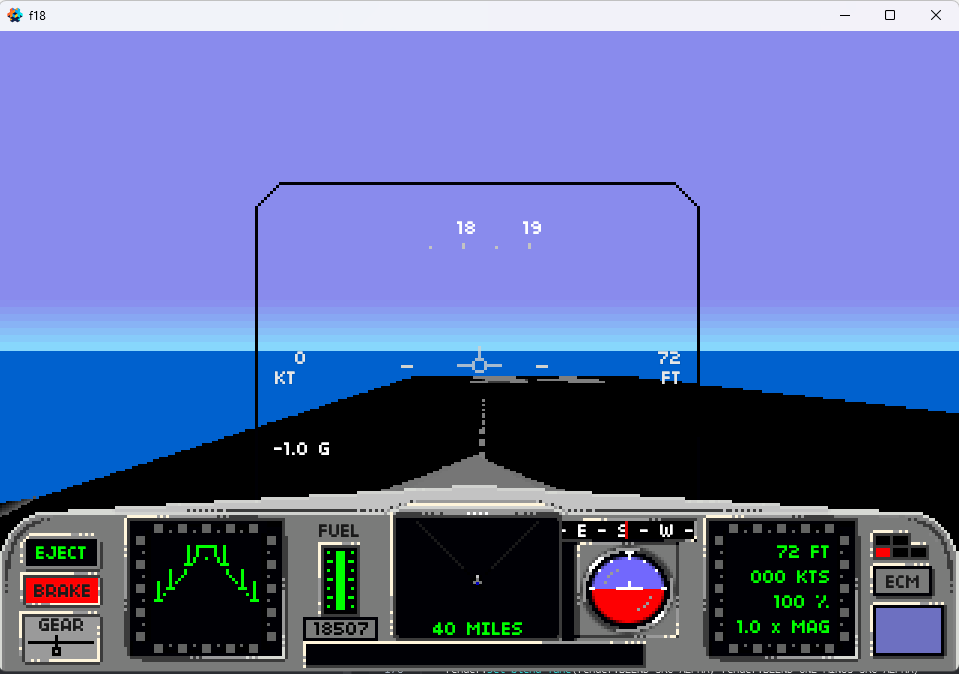
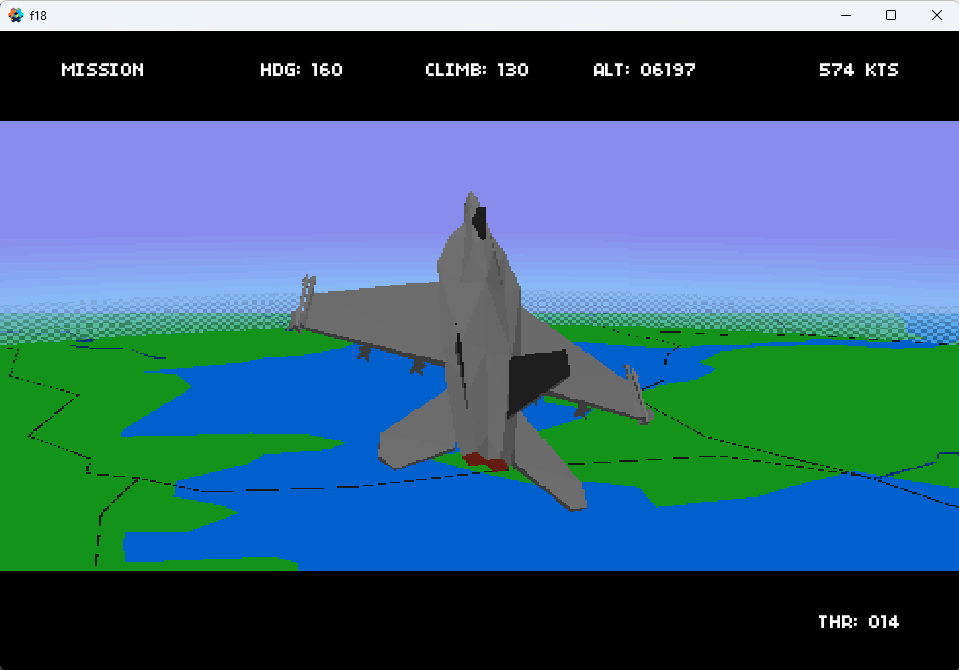
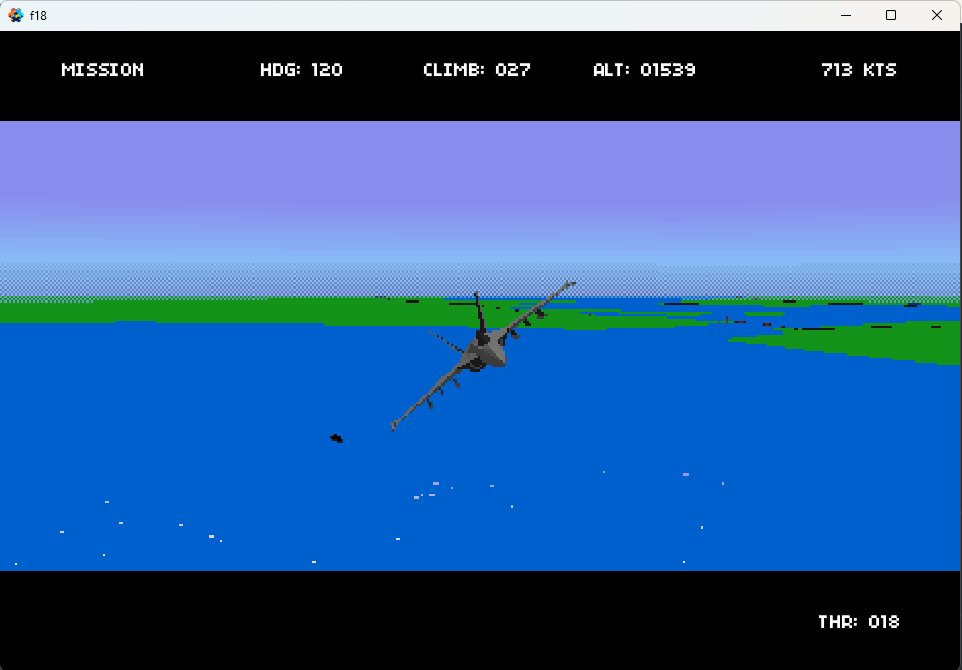
How did it go with the sky shader? 
The Mie effect is nice. Raleigh, I decided is an awfully expensive (and potentially complex) way to make the sky blue. But you have plenty of performance savings to work with, in the Amiga style. 
Well Ive got a nice cloud one, and I simplified that to just do sky. But its not pixelized yet - too smooth!
I’ll post the shader once Im happy with it. The much more complex one is here:
https://github.com/dlannan/defold-3d-samples
Oh yes, that’s right, you are the author of the sky shader example I’d seen. 
Yeah thats derived from an old shadertoy shader with clouds and a bunch of other other things I dont need 
This one is only really related in a couple of the calcs (which really, Raleigh Mie is pretty std  … but there are derivations all over). Its also about 1/3rd the side and complexity. I was thinking of just using a plain gradient texture - probably more sensible
A gradient can be sampled from a pair of dynamic colors, without marching each individual pixel through a simulation of the atmosphere. The pair of colors can be similar to Raleigh scattering, for lower cost.  That’s the hybrid approach I’ve settled on.
varying highp vec4 var_position;
varying mediump vec3 var_normal;
varying mediump vec2 var_texcoord0;
varying mediump vec4 var_light;

uniform mediump vec4 params;

const vec4 peakColor = vec4(0.5372549, 0.545098039, 0.929411764, 1.0);
const vec4 horizonColor = vec4(0.52941176, 0.843137254, 0.98823529, 1.0);

highp float pi = 3.141592653589793;
lowp vec4 c1 = vec4(0.0,0.0,0.0, 1.0); //black  -> 0.5
mediump float colorBand = 1.0 / 128.0;

void main()
{
    highp float f = floor(var_texcoord0.y / colorBand) * colorBand;
    if(f < 0.5) {
        gl_FragColor = c1;
    }
    else if(f >= 0.5 && f < 0.55) {
        gl_FragColor = mix(horizonColor, peakColor, (f-0.5)/0.05);
    }
    else if(f >= 0.55){
        gl_FragColor = peakColor;
    }
}
Very very simple ![]()
But I think I like it
Its using the previous colors from the old Amiga game (for sky color) and a ‘light’ horizon. Might play with the colors a bit, and I need to add rotation and pitch (thats whats in the params constant) but its a fair bit simpler. And kinda leans more into that 80s look rather than realistic.
< update > sorry didnt realize windows did something weird with the copy paste. There were some invisible chars in the script that were doing bad things. Weird. I seems it came from Calc (when copy the numbers in, it adds huge invisible chars - very odd).
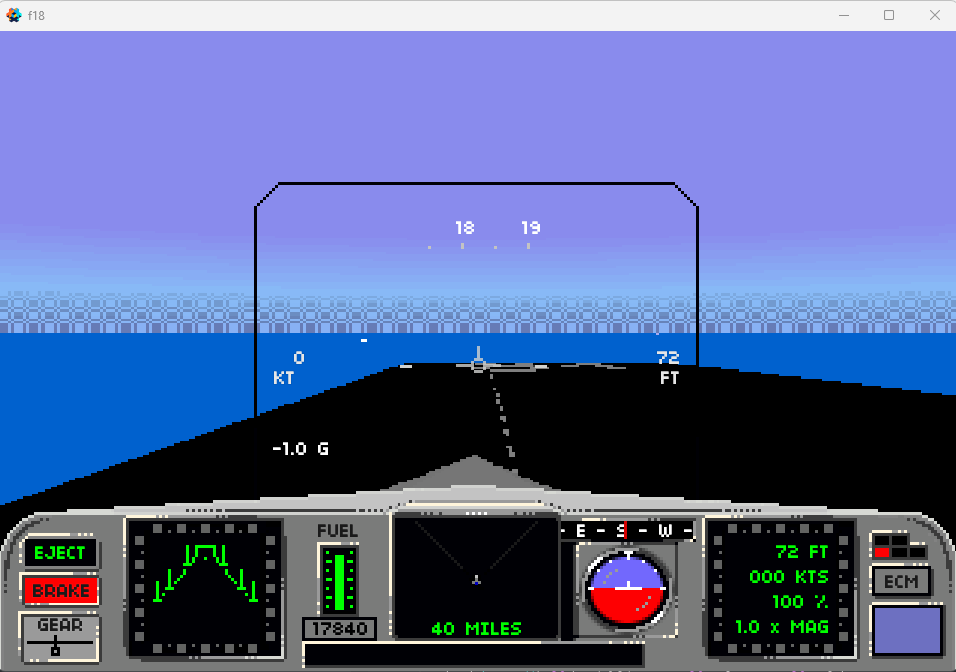
Added a weird stippling. Its kinda funny how hard this is to look like the “old” way. On the Amiga you ran a blitter co routine (yes they had one of the first gpus) and it was kinda trivial to ‘step over’ a pixel when rendering ![]()
Something to be said for pixel buffers imho.
Heres the shader as well. There are some specific constants in there for my game, read the comments ![]()
varying highp vec4 var_position;
varying mediump vec3 var_normal;
varying mediump vec2 var_texcoord0;
varying mediump vec4 var_light;

// Notes:
//  This is mapped onto a 3DD cylinder made in Blender. It is 2.0 high and the texture is unwrapped so
//   that the uv mapping is vertical for the height of the cylinder. The cylinder also has had its faces
//   flipped becase you will be inside it :)
//  The var_position is the only weird one here. In the vp I use:
//    var_position = (mtx_proj * p).xyz;
//    otherwise the vp is pretty std model vp.

// This is setup from the render_script with:
// x = resolution width (in my case its a RT width, but you can normally use screen/window)
// y = resolution height
// z = aspect (just divide the x by the y) I dont use it here, but I do for others :)
// w = altitude of the camera. This is needed because the plane can move up almost as far as the farplane which is 50km.
uniform mediump vec4 params;

// Colors for the top and middle of the atmospehere. Below horizonColor black is drawn
const vec4 peakColor = vec4(0.5372549, 0.545098039, 0.929411764, 1.0);
const vec4 horizonColor = vec4(0.52941176, 0.843137254, 0.98823529, 1.0);
const vec4 black = vec4(0.0,0.0,0.0, 1.0);

highp float pi = 3.141592653589793;

// These are used in pixel calcs. Because my render texture resolution can change this means
// these need to be dynamic.
mediump float pixelBandX = 1.0 / params.x;
mediump float pixelBandY = 1.0 / params.y;

// How wide to apply a blend for the hiorizon
mediump float colorBand = 1.0 / 256.0;
// How wide to apply the dithering band on the horizon
mediump float colorBandLow = (1.0 / 256.0) * 5;

// Fudge factor to get it looking ok.
const highp float factor = 0.75;

// These are 'steppers' so that the position of the pixel can be stepped. This isnt overly
// accurate because we are doing this in projected screen coords. Theres probably a better way I suspect.
highp float RESX = (params.x * factor);
highp float RESY = (params.y * factor);
highp float RESHX = (RESX * 0.5);
highp float RESHY = (RESY * 0.5);

// This creates the horizon stipple effect
vec4 stipple( vec4 color, vec2 uv, float level )
{
    float xcoord = uv.x;

    float valy = mod(uv.y, RESY);
    if(valy > RESHY)
        xcoord += RESHX;

    float valx = mod(xcoord, RESX);
    if(valx > RESHX)
        return color * level;
    else
        return vec4(color.xyz, level);
}

void main()
{
    // Yes horrible. Divide by our maximum alt * 2 - because this is mapped onto a cylinder
    float alt = params.w / 90000;

    // Work out where the horizon is using uv coord
    highp float f = floor( (var_texcoord0.y + alt) / colorBand) * colorBand;
    if(f < 0.5) {
        gl_FragColor = black;
    }
    else if(f >= 0.5 && f <= 0.5 + colorBandLow) {
        float level = ((f-0.5)/colorBandLow ) * 0.5 + 0.5;
        gl_FragColor = stipple( mix(horizonColor, peakColor, (f-0.5)/0.05), var_position.xy, level);
    }
    else if(f > 0.5 + colorBandLow && f < 0.55) {
        gl_FragColor = mix(horizonColor, peakColor, (f-0.5)/0.05);
    }
    else if(f >= 0.55){
        gl_FragColor = peakColor;
    }
}
I read from gl_FragCoord to get the pixel in a fragment program. You can still do row- and/or column-based effects.
bool checkerboard = (int(gl_FragCoord.x) % 2 == int(gl_FragCoord.y) % 2);
This is only true for full screen quads with 1:1 screen mapping of the texture. Otherwise the uv’s are calculated relative to the vertex shader which is more complex when using a skydome, or in my case a sky cylinder (because of how high the f18 can go - roughly 50,000 ft.
@Wolfe2x7 sorry just re-read, gl_FragCoord may work. I was referring to uv. Not sure if that will work on vulkan etc? dunno.
Did quick check on PC. Looks like that is still valid - thanks! @Wolfe2x7
Will check on linux and html (these are usually ones that do odd things ![]() ).
).
Interesting pattern (values prob out)
Oh. Another potential prob is that the shader is rendered into an RT. Which also has quantization for the low res effect. This when coupled with the stippling can result in lovely patterns like above. Thanks again, will post to see if this is something ok to use across platforms.
Yeah, I wasn’t sure how it could fit into your particular setup, so I just suggested the boolean. 
In my project, shaders that count pixels are drawn to a limited-resolution render target, which is then stretched over the screen, so gl_FragCoord is the right resolution for the corresponding assets already.
Yep. The one I have all render into a RT that is scaled with nearest sample to the res needed for the output. Its the ‘cheapest’ way to do this, so its similar in design. I tried manually sampling like the bool example and that produces the above as well. I think its related to the model and the default UV mapping coords. Need to dig into it tonight sometime.
Thanks again.
@Wolfe2x7 - I would like to both apologize and greatly thank you. Its been two years since I looked at this f18 rendering code and I think your comment helped me find a pretty serious bug in my RT rendering system. The scaling for it seems to be quite busted, which is what I was having such weird artefacts (even with the method you suggested).
After debugging that shader some more (since it is very simple) I started to see that the values coming in were not what I was expecting. And now I need to rework my scaling  This is a good thing, thanks again!
Massive improvement. Cant thank you enough @Wolfe2x7 !!! ![]()
And heres the code:
varying highp vec4 var_position;
varying mediump vec3 var_normal;
varying mediump vec2 var_texcoord0;
varying mediump vec4 var_light;

uniform mediump sampler2D tex0;

// Notes:
//  This is mapped onto a 3DD cylinder made in Blender. It is 2.0 high and the texture is unwrapped so
//   that the uv mapping is vertical for the height of the cylinder. The cylinder also has had its faces
//   flipped becase you will be inside it :)
// Thanks to Wolfe2x7 changed to glFragCoord after finding serious bugs in RT generation and scaling.

// This is setup from the render_script with (only use alt now):
// x = resolution width (in my case its a RT width, but you can normally use screen/window)
// y = resolution height
// z = horizontal fov
// w = altitude of the camera. This is needed because the plane can move up almost as far as the farplane which is 50km.
uniform vec4 params;

// Colors for the top and middle of the atmospehere. Below horizonColor black is drawn
const vec4 peakColor = vec4(0.5372549, 0.545098039, 0.929411764, 1.0);
const vec4 horizonColor = vec4(0.52941176, 0.843137254, 0.98823529, 1.0);
const vec4 black = vec4(0.0,0.0,0.0, 1.0);

const float pi = 3.141592653589793;

// How wide to apply a blend for the horizon
float colorBand = 1.0 / 256.0;
// How wide to apply the dithering band on the horizon
float colorBandLow = (1.0 / 256.0) * 5;

// This creates the horizon stipple effect
vec4 stipple( vec4 color, vec2 uv, float level )
{
    bool checkerboard = (int(uv.x) % 2 == int(uv.y) % 2);
    if(checkerboard == true)
        return color * level;
    else
        return vec4(color.xyz, level);
}

void main()
{
    // Yes horrible. Divide by our maximum alt * 2 - because this is mapped onto a cylinder
    float alt = params.w / 90000;
    vec4 col = texture2D( tex0, var_texcoord0.xy );

    // Work out where the horizon is using uv coord
    highp float f = floor( (var_texcoord0.y + alt) / colorBand) * colorBand;
    if(f < 0.5) {
        gl_FragColor = black;
    }
    else if(f >= 0.5 && f <= 0.5 + colorBandLow) {
        float level = ((f-0.5)/colorBandLow ) * 0.5 + 0.5;
        gl_FragColor = stipple( mix(horizonColor, peakColor, (f-0.5)/0.05), gl_FragCoord.xy, level);
    }
    else if(f > 0.5 + colorBandLow && f < 0.55) {
        gl_FragColor = mix(horizonColor, peakColor, (f-0.5)/0.05);
    }
    else if(f >= 0.55){
        gl_FragColor = peakColor;
    }
}
from someone who spent too many hours as a kid with f16 falcon and bomber, this is the perfect shading for the horizon to be drawn ![]()
Yeah. F18 Interceptor and F15 Strike Eagle II… many many many hours… ![]()
I hope to do a F15 SEII as well once this gets to a more complete stage. Profiles are almost done:
Doing some graphics and properties settings, then training mission data linking… Its actually getting quite fun to build this.
