Yes, hashing action_ids and message_ids is a good idea.
3 Likes
I can try to find some that would be possible to make work.
https://en.wikibooks.org/wiki/Category:GLSL_Programming
Many are listed here, and have examples.
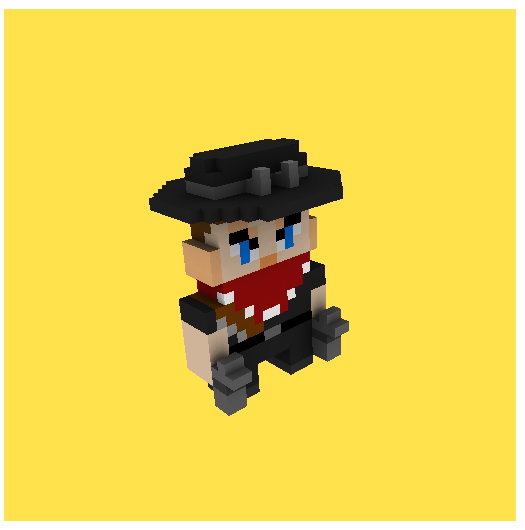
This is still mostly new territory for me though, but I can do some tests and see what will work. The reason I want FXAA and SMAA or some AA for post processing that’s fast enough for mobile is because of removing jagged edges from rendering 3d models.
Although FXAA may not work for this specific case.
FXAA Off
FXAA On

MSAA might be better. Thoughts? …I don’t know what would look good and be efficient.
3 Likes
Humus (an old colleague) is quite obsessed with AA and his site could be a source of inspiration.
3 Likes
They do seem to be appropriate for what I need. Thank you! I’ll give it a shot getting it to work with Defold.
Been doing some tests and while it does work in some of the model very well the pixel art sections are just textures, so they are not detected in the same way as the geometry edges.
Going to more things next.
2 Likes
Posting code blocks.
I keep forgetting to not use quotes and to use pre-formatted text when posting code blocks. If the code you post doesn’t look right this is probably what’s wrong. Paste the text first, select it, then apply the Preformatted text option from the menu.
But want to know something even better?

Blockquote
function on_message(self, message_id, message, sender)
if message_id == hash(“start_level”) then
– some script tells us to start loading the level
msg.post(“#proxy”, “async_load”)
– store sender for later notification
self.loader = sender
elseif message_id == hash(“proxy_loaded”) then
– enable the collection and let the loader know
msg.post(sender, “enable”)
msg.post(self.loader, message_id)
end
end
Preformatted text / Codeblock
function on_message(self, message_id, message, sender)
    if message_id == hash("start_level") then
        -- some script tells us to start loading the level
        msg.post("#proxy", "async_load")
        -- store sender for later notification
        self.loader = sender
    elseif message_id == hash("proxy_loaded") then
        -- enable the collection and let the loader know
        msg.post(sender, "enable")
        msg.post(self.loader, message_id)
    end
end
But want to know something even better? You can turn on a bit of syntax highlighting too and have nice code blocks without needing to indent. Here is how:
```lua
function on_message(self, message_id, message, sender)
```
function on_message(self, message_id, message, sender)
    if message_id == hash("start_level") then
        -- some script tells us to start loading the level
        msg.post("#proxy", "async_load")
        -- store sender for later notification
        self.loader = sender
    elseif message_id == hash("proxy_loaded") then
        -- enable the collection and let the loader know
        msg.post(sender, "enable")
        msg.post(self.loader, message_id)
    end
end
4 Likes
Beta builds of Defold
There are publicly available beta builds of Defold.
New stable builds are released every two weeks.
Unless you have a good reason you probably shouldn’t download the betas, especially if you are trying to be productive with a project as it might have serious issues that would stop you! They may be unstable, they may crash more often than stable builds would. Don’t use the unstable alpha / beta builds unless you have a good reason to such as being asked to for testing purposes.
Beta builds for Defold can be download directly here:
(Plus Alpha although I just checked and it says it’s two version behind Stable, but also has the HTML5 system_name fix so maybe bleeding edge but not version number updated? I don’t know)
Current stable builds of Defold, as well as past stable builds, (useful if you build a project in a version that for some reason won’t work in later version..) are here:
Using the auto update feature is the best way to download new versions of Defold, but there may be cases where you need to download again cleanly.
1 Like
Using a custom Android manifest.
In your game.project file there is ability to define a custom manifest file for Android. You may find you need to change some things in the default manifest to fit your project.
If you do need to make changes you must still start with the one shipped with Defold as it is a kind of template.
You can a copy in your Defold folder. Look for it in:
plugins\com.dynamo.cr.bob_1.0.0.[version]\com\dynamo\bob\bundle\resources\android\AndroidManifest.xml
Copy and paste this into your project folder, define it in game.project (found in Android section), and then make any changes you need to.
Keep in mind when you do download updates for Defold you may need to update you Android Manifest file! So pay attention to that and check with a diff compare tool and then pull over any changes into your custom one.
1 Like
iOS has a kind of “manifest” too. It’s called Info.plist
If you want to customize your Info.plist file it’s a good idea to open it with Xcode and edit it there. If you look in your game.project file you’ll see there is a section for iOS. You can define icons, your app’s bundle identifier (com.company.app), and your custom Info.plist file.
Defold-win32.win32.x86\plugins\com.dynamo.cr.bob_1.0.0.[version]\com\dynamo\bob\bundle\resources\ios
You can copy and paste the template Info.plist file into your Defold project directory. You can manually edit it, or edit with Xcode.
As you prepare your game for launch on iOS you may find you need to customize this file.
Mac builds have an Info.plist file too, and you may need to make a custom version of it as well.
Defold-win32.win32.x86\plugins\com.dynamo.cr.bob_1.0.0.[version]\com\dynamo\bob\bundle\resources\osx
Like with Android manifests, pay attention to new Defold versions if you use customized versions of these files as they may have changes made to them that are required for new Defold features.
2 Likes
Activating native keyboards for iOS and Android, and getting user input since most mobile devices don’t have built in keyboards you will need to activate the native keyboard to allow users to enter text into your game.
To show the native keyboard use
gui.show_keyboard()
To hide use
gui.hide_keyboard()
More info: API reference (GUI)
NOTE: You don’t need the virtual keyboard open to detect keys on other platforms. Use the below when you want to enter text into selected text boxes / inputs.
To detect and record text, you need to add a text trigger to your Input Binding game.input_binding file. Its default name is TEXT. Leave at as this
Now when you detect input with on_input() use action.text you can get inputted text.
function on_input(self, action_id, action)
	if action.text then
		input_text = input_text .. action.text
	end
end
Then you’ll display the text wherever and or store it. Keep in mind user focus and putting text in one place at a time, and checking if you should be looking for text at all.
You will still need to detect actions such as backspace to delete characters (I have yet to test this on mobile so am not 100% sure normal backpsace detection works from virtual keyboard). If you want the user to be able to put their virtual cursor somewhere in the text (like most text editors allow) this is possible but takes a little extra work - a way to do it is to store an offset, and change offset when users touch/click a position in the text (with a visual indicator such as a blinking “|”), and then insert the next character there based on offset.
Read this doc for more info Device input in Defold
Super Important! Some Asian language inputs are done in parts to form complete characters. In the case of these, instead of just action.text you will want to use action.marked_text too, and create a text trigger for it too (use drop down on “input”)
There is no manual or documentation on MARKED_TEXT yet so it may need experimentation. Is gui.reset_keyboard related to it?
Based on this, how I assume you use it is that as the user types, you displayed the temporary characters that are in the marked text space, and then when the user finishes typing the final character replaces any of the fragments? So you would need to detect the next action.text and when that happens then clear the action.marked_text temp you added?
Or - you check action.marked_text and if it is true (meaning user entered full character from partials) then you can grab the next character with action.text?
I’ll test this out later to confirm.
This service is good for tests like this Mobile and Web Application Testing – AWS Device Farm – AWS
There’s also MAX_TEXT_COUNT but I don’t have a clue what it’s for.
In game.project in the Android category there is an input_method field. The options for it are (default) KeyEvent and HiddenInputField. KeyEvent exists as an older method, and you should probably switch it to HiddenInputField, which has better support for 3rd party keyboard apps that are popular.
Can input.text be used to make custom key bindings? Not really. It can detect textual input, but it can’t detect characters like (afaik) shift, control, alt, or any of the function keys. It also can’t detect state. input.text also can’t detect alt codes.
What we really need is more arbitrary key input detection.
Input.GetChar() (with support for unprintable keys such as CHAR_TAB, CHAR_BACKSPACE, CHAR_ENTER, CHAR_ESCAPE, CHAR_PAGEUP, CHAR_PAGEDOWN, CHAR_END, CHAR_HOME, CHAR_LEFT, CHAR_UP, CHAR_RIGHT, CHAR_DOWN, CHAR_INSERT, CHAR_DELETE)
Input.PeekChar too maybe?
For gamepads:
(JOY_A, JOY_B, JOY_X, JOY_Y, JOY_LB, JOY_RB, JOY_BACK, JOY_START, JOY_LEFT, JOY_UP, JOY_RIGHT, JOY_DOWN, JOY_LSB, JOY_RSB, JOY_MENU)
Input.JoyDown( button, gamepad)
Input.JoyHit(button, gamepad)
Input.JoyX
Input.JoyY
Input.JoyZ
Input.KeyDown
Input.KeyHit
3 Likes
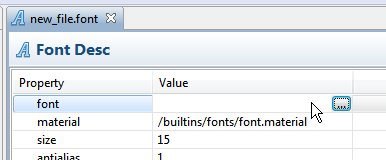
Don’t create .font files until you’re ready to define a font inside of it.
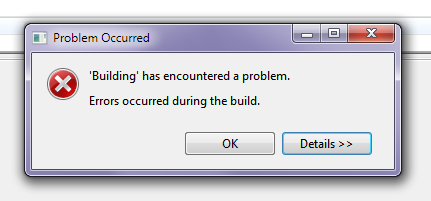
If you do create a .font and don’t define a font file then if you try to build you’ll likely get a build error.
1 Like
Loving these tips! Keep them coming! Thanks!
3 Likes
This tip goes for a lot of the filetypes you can create in Defold. Materials, tilesources, factories etc Unfortunately the errors are rarely informative. I believe that the upcoming editor will be much better at this.
2 Likes
You can detect if your user (on iOS/Android) is listening to music and disable your game’s audio.
if sound.is_music_playing() then
    for i, group_hash in ipairs(sound.get_groups()) do
        sound.set_group_gain(group_hash, 0)
    end
end
It’s good to give your users options. If you have an option screen with many options allow them to choose to mute the game’s audio if they are playing audio from another app, but having it mute by default is a good idea.
More info: Sound in Defold
8 Likes
Alternative Git hosting. This post explains everything you need to know to setup your own git service with Defold.
3 Likes
Texture compression can take a long time. Be aware that if you have compression_level=BEST making bundles can take a long time. It may look like it has hanged, but if you have this setting on with a large project it’s most likely still busy so give it some more time.
2 Likes
On loading screens, which improve user experience, and load your main collection. As your project grows, and especially as your main collection grows, you will find it takes longer to boot up your game into its ready state. This can be a problem for mobile devices, and for best experience you’ll need to give an indication that your game is still happily getting the game ready for them.
It’s not easy to know how long it will take to load your main collection. You want a visual indicator, you want a progress bar that is constantly moving. It’s not a bad idea to “fake” your progress bars so that they are constantly moving, but have diminishing speed the closer they get to 100%, and then have them instantly jump to 100% before screen transitions. But you’ll still want to make what’s right for your game. Some games “fake” the first 50% and then the rest is real progress based on chunk milestones, but again with loading your main collection there is no indicator just a good guess you can make based on how long it usually takes, and remember if you change the assets in your collection it will change how long it takes to load. Also worth keeping in mind just because your test device loads it quickly doesn’t mean other low end phones will.
If your game loads pretty fast you can skip the progress bar loading screen completely, and just use your splash as the loading screen. With or without the “Loading…” text. You could omit this text, and just have it so that if they tap the screen it then show this “Loading…” text to reassure your users.
It’s worth noting some technical details about Android and iOS. If you make a large main collection and don’t have a loading screen - when your user opens your game they will be faced with just a black screen while they wait for the main collection to load. This is avoided by using a light weight collection that uses the Collection Proxy feature to then load and switch to the main collection.
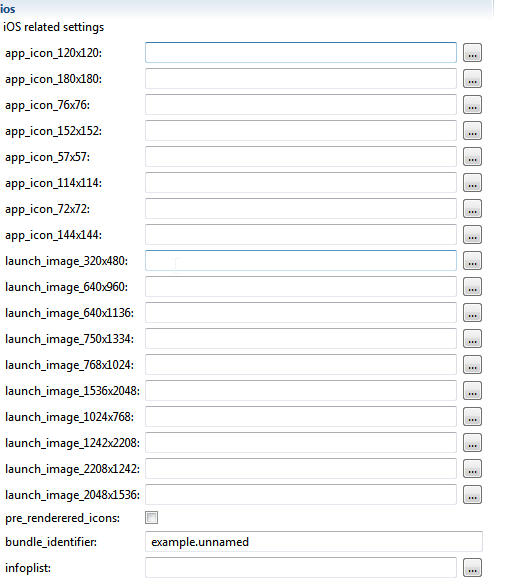
When iOS apps load they first show a hardware splash image. This image is suggested to be the same image you first display to the user when you render your first screen too. They use this hardware splash to fake out users into believing that apps open faster than they really do. As soon as the app is ready your app takes over, and the best experience is to display the same image and then transition from it. These images are what you can define in the iOS section of game.project file. All of the different sizes are hardware splash images for the various models of Apple products.
You can also put loading screen inbetween loading large collections. I’ve not tested async loading yet, but assuming it works how I think it does if you know you are transitioning screens soon you could pre-load the next screen’s collection and have it ready to go to nearly instantly.
More information on Collection Proxies
I’m preparing a loading screen template and will include it in a future post.
8 Likes
Self hosting a pre-made push notification service. I’ve not used this, just sharing it as it may be useful to some Defold users out there.
Pushkin is a free open source tool for sending push notifications. It was developed with a focus on speed and enabling fast experimentation. Pushkin was mainly built for supporting online mobile games, but can easily be extended to any type of application. It supports both Android and iOS platforms.
Pushkin is designed to be a responsive tool. You can design your systems around Pushkin so it reacts to your game server, database server, client or really any service that can send a HTTP POST request. It is also easily scalable, because you can run as many Pushkin instances as you want. One instance is capable of pushing 500 messages per second.
2 Likes
Pro Tip: Don’t compose long messages in the text box here, do it elsewhere. Things can happen and your message eaten. ![]()
9 Likes
Use shortcuts to find and open files for editing quickly.
In Preferences → General → Keys there is an option Open Resource.
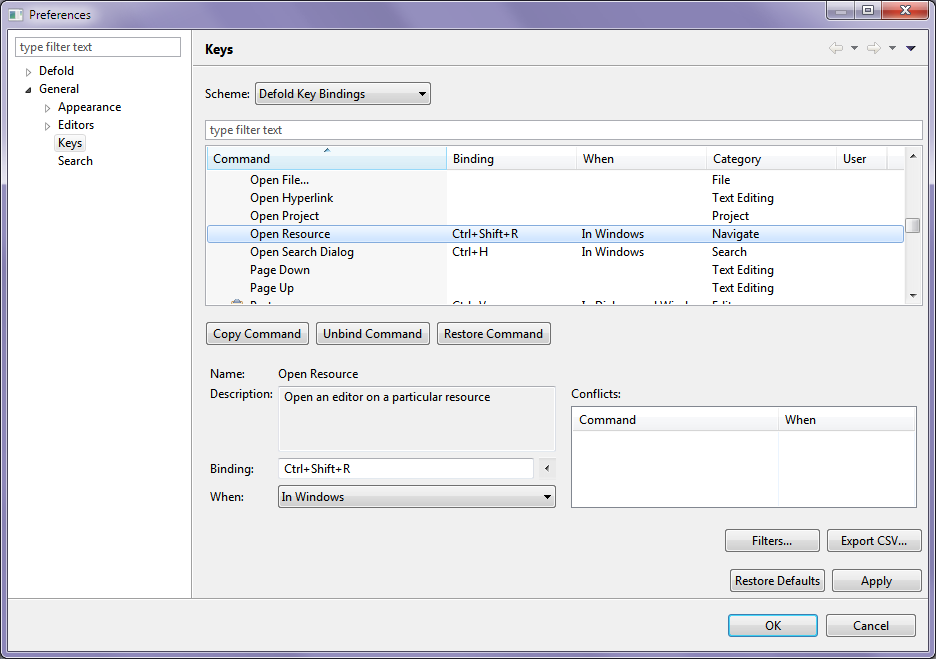
This can be used to open a dialog which will allow you to search for a file to open. It can be any file, and it will be opened with default option. This can be useful if you are working with a big project, and don’t want to hunt for the file in the file tree.
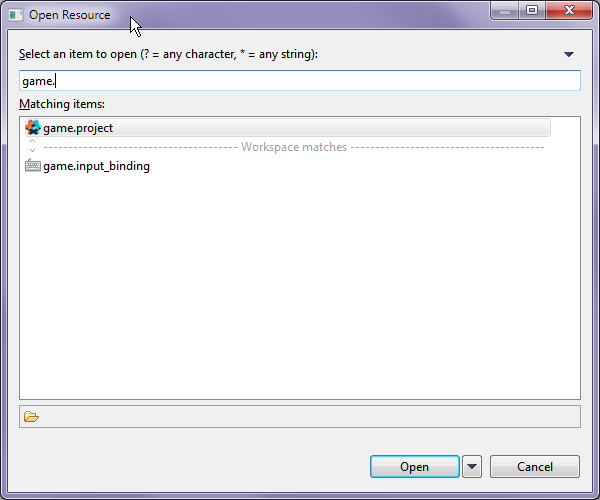
You can change the shortcut for the Open Resource dialog too. I’m testing setting it as simply F1. Depending on OS and setup you may prefer some other shortcut.
Read through the other keys in the editor and experiment with them. Generally once you memorize shortcuts they can speed up your workflow.
2 Likes
Using layers, and ordering within layers based on y position. In some games, you want to have discrete rendering layers for objects. You also want to have objects on layers to be sorted based on y position so that higher objects on the plane are drawn behind objects which are in front of their y position.
Script by @Andreas_Jirenius
Download:
render_order.script (218 Bytes)
render_order.script source
local layer_z = { -0.9, 0.0, 1.0 } -- layer 1, layer 2, layer 3 with default z values

go.property("layer",1) -- exposes this value to be able to be changed in editor, defaults to 1

function update(self, dt)
	local pos = go.get_position()
	pos.z = layer_z[self.layer]-pos.y*0.0001 -- start with layer z default, modify it based on y position
	go.set_position(pos)
end
Add this script as a component to any game object you wish to sort based on layer and y position. You could extend it further for example by adding an additional optional offset property to make certain objects stay on discrete whole number layers but still be above or below everything else on that layer without needing to define more layers.

Remember that your camera z position matters for what is able to be seen by your camera. If you position at z positions behind your camera anything there won’t be visible and so won’t be drawn.
Adding scripts to objects has a runtime cost, and having too many scripts can cause you to hit the default script limit. If you want to sort or manage hundreds of bullets for example it would be better to do that from a single script and not have every bullet object have its own copy of the script.
19 Likes